You can create your own fresh, homemade whipped cream in just minutes! Start by chilling your mixing bowl and beaters – this will help the cream whip up nice and fluffy. Then, pour in the cold heavy cream and whip it up, gradually increasing the speed. Once you see soft peaks forming, add in a bit of powdered sugar to sweeten it to your liking. Serve this delightful homemade whipped cream immediately, or store it in the fridge for up to 3 days. The possibilities for enhancing your favorite desserts are endless, so get ready to impress with your new whipped cream skills!
Key Takeaways
- Whipped cream can be made at home in minutes using just a few simple ingredients: heavy cream, powdered sugar, and vanilla extract.
- Chilling the mixing bowl and beaters beforehand is crucial to achieve the perfect light and airy texture.
- Gradually increase the mixing speed while monitoring the cream to prevent over-whipping and formation of butter.
- Adjust sweetness by adding powdered sugar to taste, gently incorporating it without over-mixing.
- Homemade whipped cream can be stored in the refrigerator for up to 3 days or frozen for longer preservation.
Top picks for "homemade whipp cream"
Open Amazon search results for this keyword.
As an affiliate, we earn on qualifying purchases.
History
Although whipped cream has been around for centuries, its origins can be traced back to ancient civilizations. The ancient Egyptians and Greeks were known to have whipped cream-like substances using various tools and techniques.
In the 17th century, whipped cream became a popular dessert topping in Europe, with chefs experimenting with different flavors and methods. The invention of the hand-cranked whisk in the 1600s revolutionized whipped cream production, allowing for a lighter, fluffier texture.
By the 19th century, whipped cream had become a staple in many households, with recipes and techniques being shared across the continent. Today, whipped cream remains a beloved ingredient in a wide range of desserts, from pies and cakes to sundaes and parfaits.
Whether you prefer it sweetened or unsweetened, homemade whipped cream is a delightful treat that has stood the test of time.
Recipe
Homemade whipped cream is a simple and delicious topping that can elevate a variety of desserts. Whether you're topping a pie, cake, or serving it with fresh fruit, this silky smooth whipped cream is sure to impress.
Whipped cream is made by whipping heavy cream until it transforms into a light and airy texture. The process incorporates air into the cream, resulting in a fluffy and spreadable consistency. Homemade whipped cream is far superior to store-bought varieties, as it contains no stabilizers or preservatives.
- 1 cup heavy whipping cream (cold)
- 1 tablespoon powdered sugar
- 1 teaspoon vanilla extract
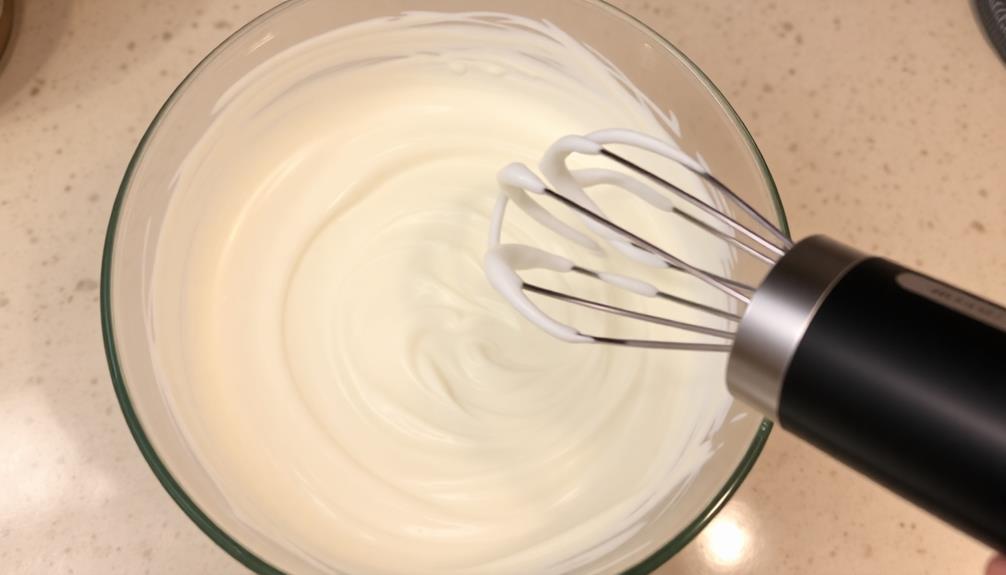
In a large, chilled bowl, combine the heavy whipping cream, powdered sugar, and vanilla extract. Using a hand mixer or a stand mixer fitted with the whisk attachment, whip the ingredients on high speed until stiff peaks form, about 2-3 minutes.
Be careful not to overbeat, as the cream can quickly turn to butter. It's important to use very cold cream and equipment for the best results. Chilling the bowl and beaters beforehand can help the cream whip up faster and more voluminously.
Serve the whipped cream immediately or refrigerate until ready to use. This homemade treat will keep in the fridge for up to 4 days.
Cooking Steps
First, chill your mixing bowl and beaters in the fridge for about 30 minutes.
Then, pour in the heavy cream and whip it until soft peaks form.
Step 1. Chill the Mixing Bowl and Beaters

Before whipping the cream, you'll want to chill the mixing bowl and beaters thoroughly. This helps the cream whip up to a nice, fluffy texture. Start by placing the bowl and beaters in the freezer for about 15 minutes. You can even place your mixing spoon in there too.
The cold temperature prevents the cream from over-whipping, which can make it turn to butter.
Once the bowl and beaters are nice and chilled, take them out and get ready to whip. Make sure to use them immediately – you don't want them to warm up too much.
Whipping the cream with cold equipment helps incorporate more air, resulting in a light and airy final product. This step may seem small, but it makes a big difference in the quality of your homemade whipped cream.
With just a little prep work, you're on your way to a creamy, dreamy topping!
Step 2. Add Heavy Cream

With your mixing bowl and beaters chilled, you can now pour in the heavy cream. Make sure to use heavy cream, not regular milk or half-and-half – the higher fat content is crucial for creating that delicious, creamy whipped topping.
Did you know that just like selecting the right cold medications for effective relief, using the right ingredients can make a big difference in your whipped cream texture? Slowly pour the cream into the bowl, taking care not to splash it everywhere. Once the cream is in, you can start mixing.
Begin mixing on low speed, gradually increasing to medium-high as the cream starts to thicken. Keep an eye on the mixture, stopping to scrape down the sides of the bowl as needed. You'll know the cream is ready when it forms stiff, billowy peaks. This usually takes 2-3 minutes of steady whipping.
Be patient and don't overbeat, or you'll end up with butter instead of fluffy whipped cream!
With the cream nicely whipped, you're ready for the next step. Grab your spatula and get ready to fold in any flavorings or sweeteners you'd like to add. The possibilities are endless – vanilla, cocoa, cinnamon, or even a touch of powdered sugar.
Get creative and make this whipped cream your own!
Step 3. Whip Until Soft Peaks Form
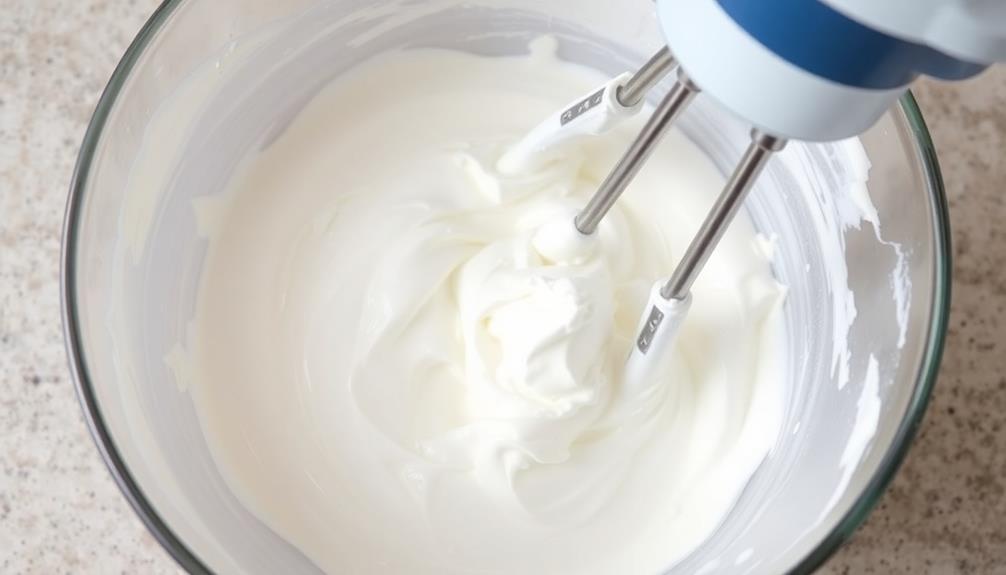
Begin by whipping the cream on low speed, gradually increasing to medium-high as it starts to thicken. This gentle motion incorporates air into the cream, transforming it from a liquid into a light, fluffy whipped cream.
As the cream whips, it will go through several stages. First, it will become frothy and increase in volume. Keep whipping, and you'll soon see soft, billowy peaks starting to form. These soft peaks indicate that the whipped cream is almost ready.
Continue whipping until the peaks hold their shape when the beater is lifted. Be careful not to over-whip, or the cream will become grainy and separated. Once you reach the desired soft, pillowy texture, stop whipping.
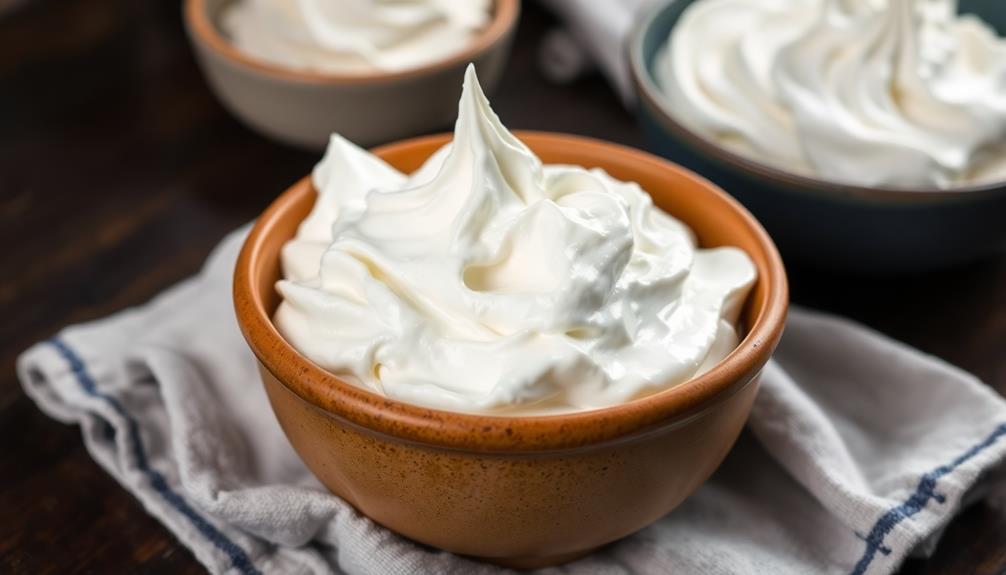
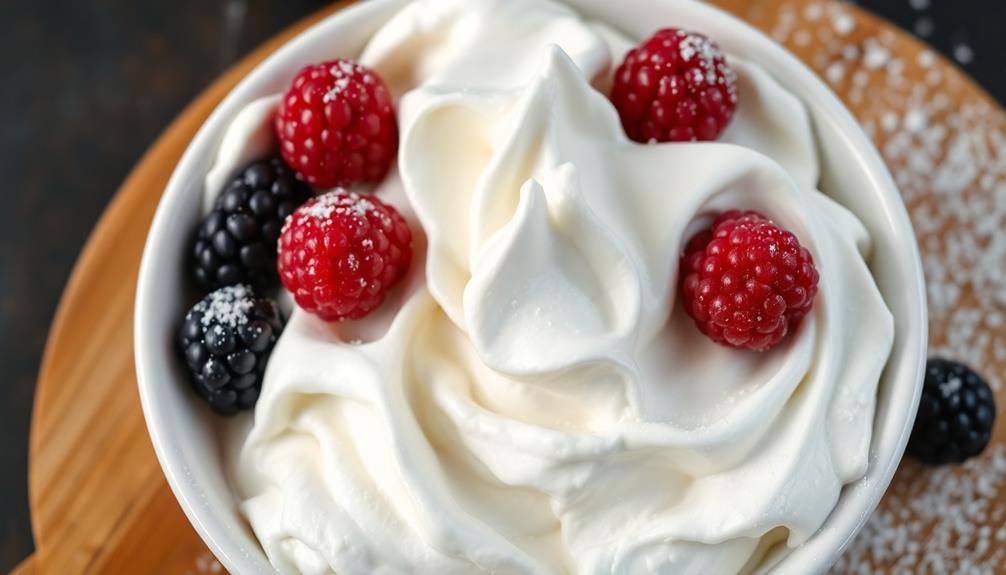
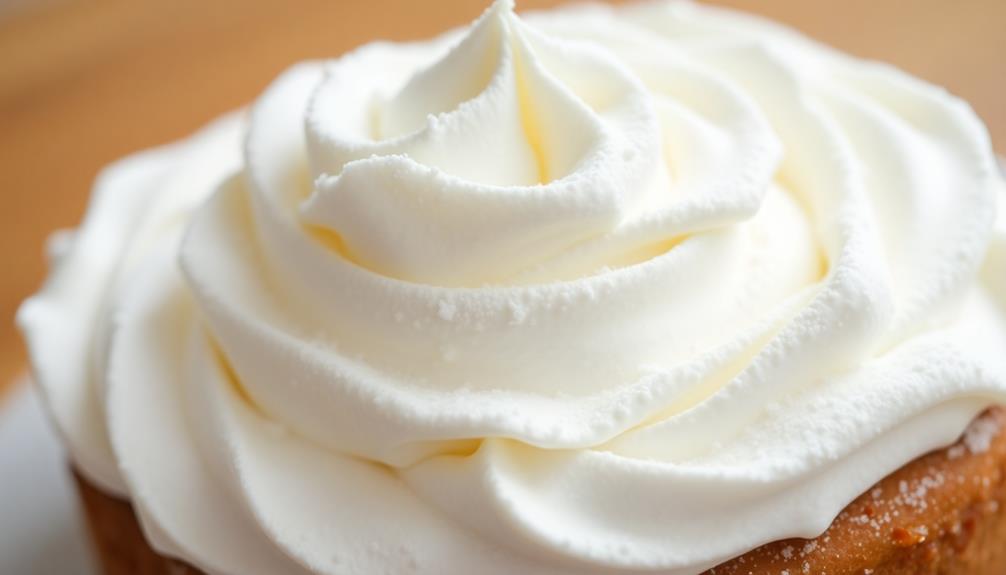
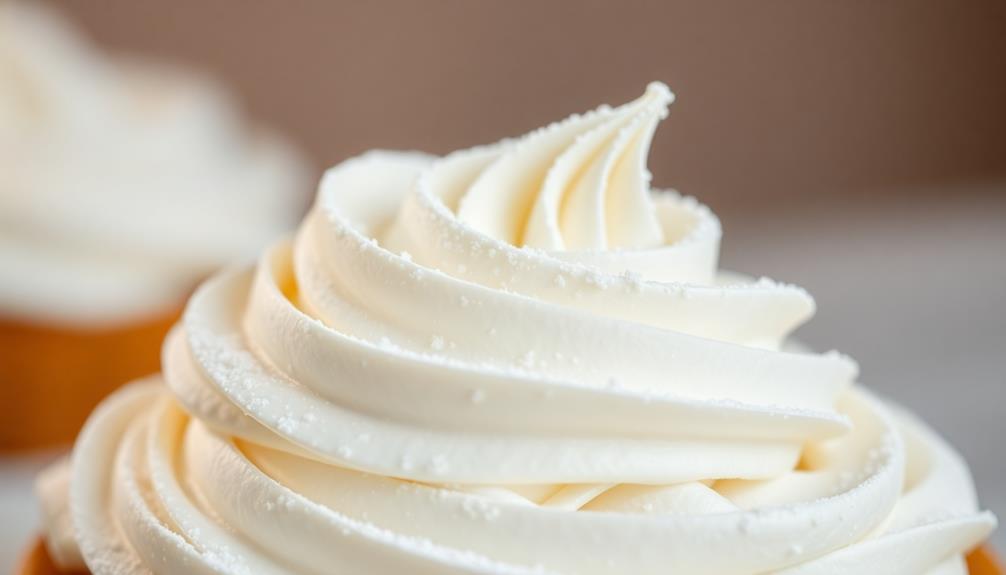
Your homemade whipped cream is now ready to top pies, cakes, or even enjoy on its own. With just a few minutes of effort, you've created a luxurious topping that's far superior to anything store-bought.
Step 4. Add Powdered Sugar to Taste
To sweeten the whipped cream, add powdered sugar a tablespoon at a time, tasting after each addition. The amount of sugar you'll need will depend on your personal preference and the intended use of the whipped cream.
Start with a small amount, like one tablespoon, and gradually increase until it reaches your desired level of sweetness.
Stir the powdered sugar into the whipped cream gently, using a rubber spatula or whisk. Taste the mixture and decide if you'd like it sweeter. If so, add another tablespoon of sugar and stir again.
Keep tasting and adjusting the sugar until the whipped cream is perfectly sweetened for your needs.
Be careful not to over-whip the cream, as that can cause it to become grainy or even turn to butter.
Once the whipped cream is at your preferred sweetness, it's ready to use. Whether you're topping a dessert, filling a pastry, or enjoying it straight, homemade sweetened whipped cream is a delightful treat.
Step 5. Serve Immediately or Refrigerate

Freshly whipped cream is best enjoyed immediately, as its airy texture and delicate flavor are at their peak when first whipped. However, you may not always need to consume it right away. If you have leftovers or wish to prepare it in advance, you can refrigerate the whipped cream for later use.
To store the whipped cream, simply spoon it into an airtight container and place it in the fridge. It will keep for up to 3 days, though its texture may gradually become more dense and less fluffy over time. When ready to use, give it a gentle stir to restore its creamy consistency.
Whipped cream can be a versatile topping or ingredient in many desserts. Whether you plan to serve it immediately or refrigerate it, be sure to enjoy its fresh, homemade goodness.
With a little preparation, you can have this delightful treat on hand whenever the craving strikes.
Final Thoughts
Whipping up homemade whipped cream is a delightful culinary endeavor that can elevate any dessert or topping. Now that you've mastered the technique, you can confidently bring this versatile treat to your next gathering or enjoy it as a simple indulgence.
Remember, the key to success is paying attention to the consistency and not overbeating the cream.
Homemade whipped cream can be stored in the refrigerator for up to 3 days, though it's best enjoyed as fresh as possible. Consider making it right before serving for optimal texture and flavor.
Experiment with different flavors by gently folding in a touch of vanilla extract, cinnamon, or even a splash of liqueur. The possibilities are endless!
Whipped cream also freezes well, so you can make a larger batch and have it on hand whenever the craving strikes.
Embrace the art of homemade whipped cream and let your culinary creativity shine. Enjoy the process, savor the results, and impress your friends and family with this delightful homemade treat.
Frequently Asked Questions
How Long Does Homemade Whipped Cream Last in the Refrigerator?
Homemade whipped cream can last up to 3-4 days in the refrigerator when stored properly. Be sure to keep it chilled and covered to maintain its light, airy texture and prevent it from separating or becoming watery.
Can I Use Low-Fat or Non-Fat Cream for Making Whipped Cream?
You can use low-fat or non-fat cream to make whipped cream, but the result won't be as rich or creamy. The lower the fat content, the less stable and voluminous the whipped cream will be. For best results, stick with full-fat heavy cream.
Is It Possible to Make Whipped Cream Without a Mixer?
Absolutely! You can make whipped cream without a mixer. All you need is a bowl, some heavy cream, and a whisk. Simply whisk the cream vigorously until it forms stiff peaks. It may take a bit more effort, but the result is just as delicious.
Can I Add Any Flavors to the Whipped Cream?
Absolutely! You can add a variety of flavors to your whipped cream to customize it to your taste. Try adding a splash of vanilla extract, a bit of cocoa powder, or even some fresh fruit puree.
What Are the Potential Substitutes for Heavy Cream in Whipped Cream?
You can use various substitutes for heavy cream in whipped cream, such as coconut cream, almond milk, soy milk, or even yogurt. These alternatives can provide a similar texture and flavor, depending on your dietary preferences or taste.