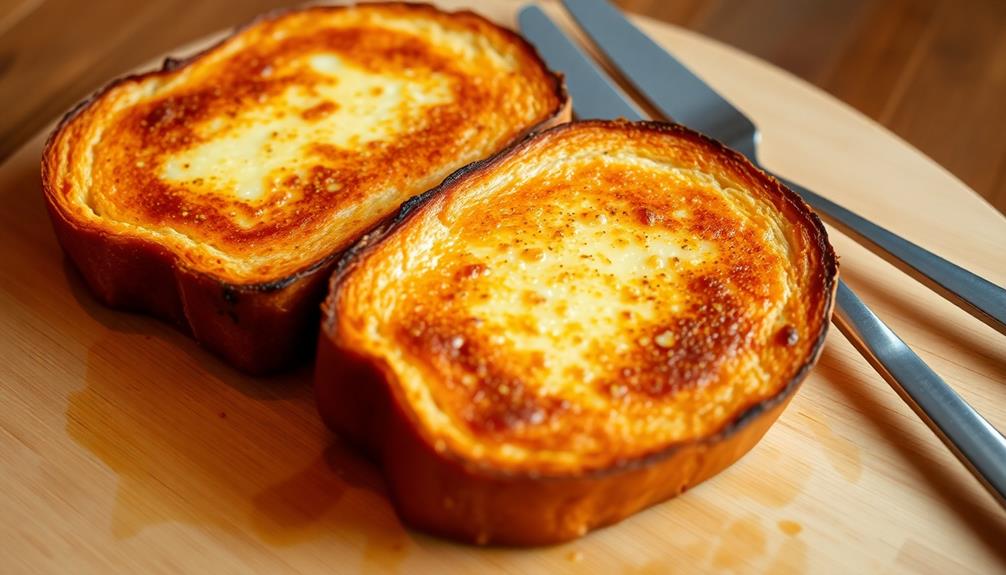
To make a classic grilled cheese sandwich, start by buttering the bread on both sides. Place your favorite cheese – cheddar, Swiss, or Gruyère – between the slices. Heat a skillet over medium heat and add a little butter or oil. Cook the sandwich until the bottom is golden brown, about 2-3 minutes. Flip it carefully and cook the other side until the cheese is melted and oozing. Press down gently on the sandwich as it cooks for an even, crispy finish. Grilled cheese is a versatile comfort food that can be customized with additional ingredients – you'll find plenty of ways to take it to the next level.
Key Takeaways
- Butter both sides of bread slices to achieve a crispy, golden-brown texture.
- Place generous amounts of favorite cheese (e.g., cheddar, Swiss, Gruyère) between the bread slices for a gooey, melted center.
- Heat a large skillet or griddle over medium heat, adding a small amount of butter or oil to coat the surface.
- Cook the sandwich until the bottom slice is golden brown, then flip and cook the other side for even browning.
- Monitor the cooking process closely, flipping the sandwich occasionally to prevent burning and ensure even melting of the cheese.
History
The grilled cheese sandwich, a culinary classic, has a rich history that spans centuries. Its origins can be traced back to ancient Greece, where the combination of bread, cheese, and heat was enjoyed as a simple yet satisfying meal.
Over time, the grilled cheese sandwich evolved, with different cultures and cuisines putting their own unique spin on the recipe.
In the United States, the grilled cheese sandwich gained popularity during the Great Depression, when it became a cost-effective and filling option for families.
As the decades passed, the humble grilled cheese sandwich became a beloved comfort food, beloved by both children and adults alike.
Today, the grilled cheese sandwich remains a versatile and beloved dish, with endless variations and creative flavor combinations to explore.
Whether you prefer it classic or with a twist, the grilled cheese sandwich continues to delight and satisfy taste buds around the world.
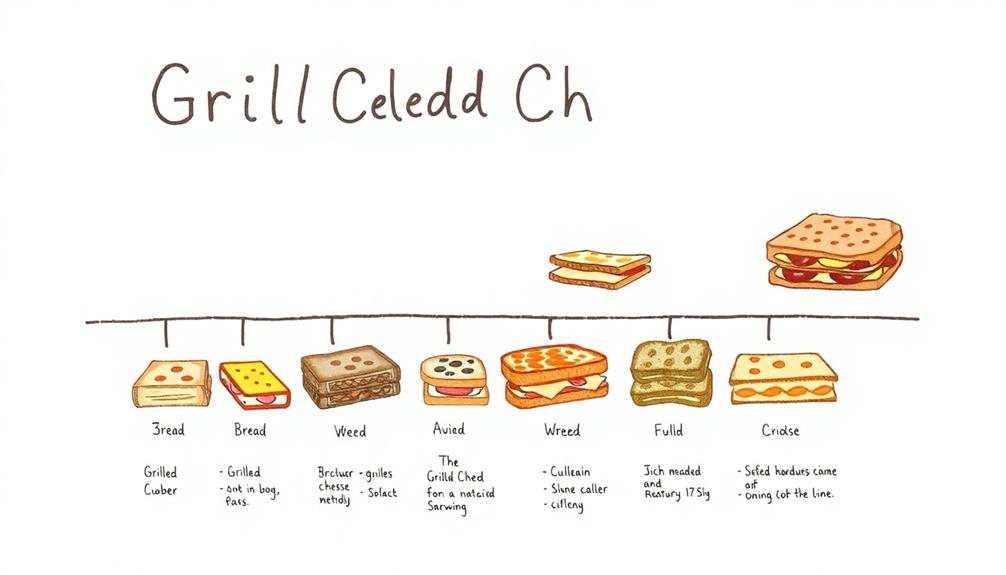
Recipe
Grilled cheese sandwiches are a classic comfort food that can be enjoyed at any time of the day. The combination of melted cheese and crispy, golden-brown bread is simply irresistible.
Whether you prefer a simple classic or a more elaborate version, this recipe will guide you through the steps to create a delicious grilled cheese sandwich.
The key to a successful grilled cheese lies in the quality of the ingredients. Use fresh, high-quality bread and your favorite type of cheese for the best results. The bread should be sliced thick enough to hold the cheese without becoming too thin and fragile.
Ingredients:
- 2 slices of bread (white, sourdough, or your preferred type)
- 2-3 slices of your favorite cheese (cheddar, Swiss, Gruyère, etc.)
- 1-2 tablespoons of butter or margarine
Instructions:
Preheat a skillet or griddle over medium heat. Butter one side of each slice of bread. Place one slice of bread, butter-side down, in the hot skillet. Top with the cheese slices, then place the other slice of bread, butter-side up, on top.
Cook the sandwich for 2-3 minutes per side, or until the bread is golden-brown and the cheese is melted.
When cooking the grilled cheese, be patient and let the bread get crispy before flipping. You can also experiment with different types of cheese or add additional ingredients, such as tomato, bacon, or caramelized onions, to create your own unique twist on the classic grilled cheese.
Cooking Steps

Butter the bread slices evenly on both sides.
Place your favorite cheese between the bread slices.
Heat a pan over medium heat and cook the sandwich until it's golden brown, flipping it occasionally to ensure even cooking.
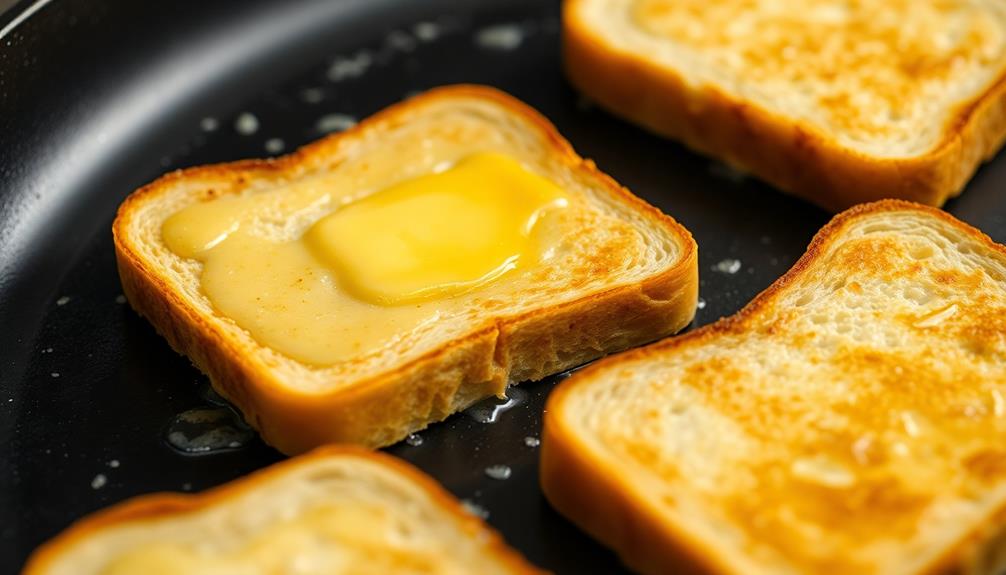
Step 1. Butter Bread Evenly on Both Sides
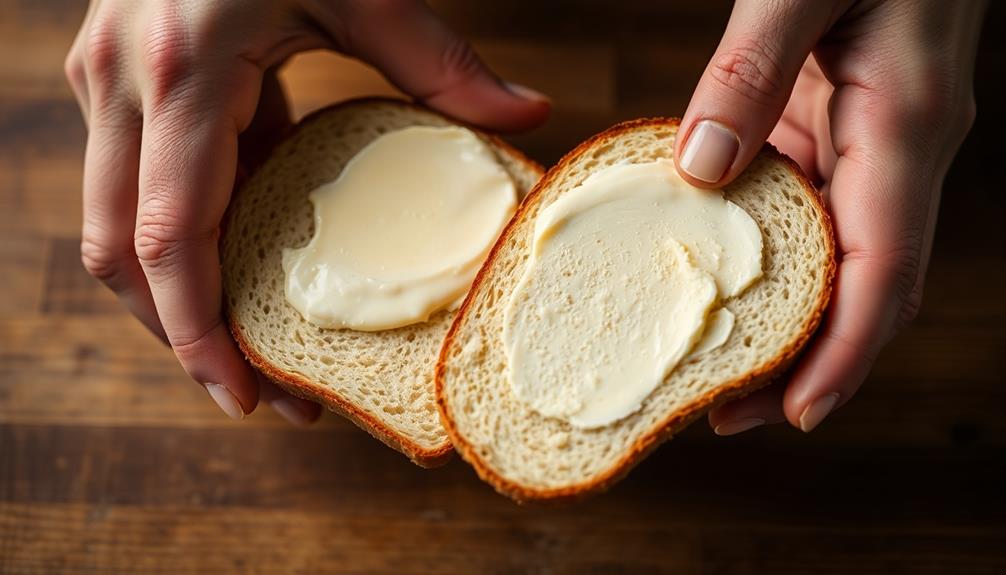
Next, butter the bread slices evenly on both sides. Use a butter knife or the back of a spoon to spread a thin, even layer of butter across the entire surface of each slice.
Make sure to get all the way to the edges so there are no dry spots. You want the bread to be fully coated, but not dripping with excess butter.
Applying the butter evenly will help the sandwich cook up crispy and golden brown. If you miss a spot, that area mightn't toast properly.
Take your time and do a thorough job. Once both slices are buttered, you're ready to assemble the sandwich and get it cooking!
The even butter coating is a crucial step that will ensure your grilled cheese turns out perfectly gooey and delicious.
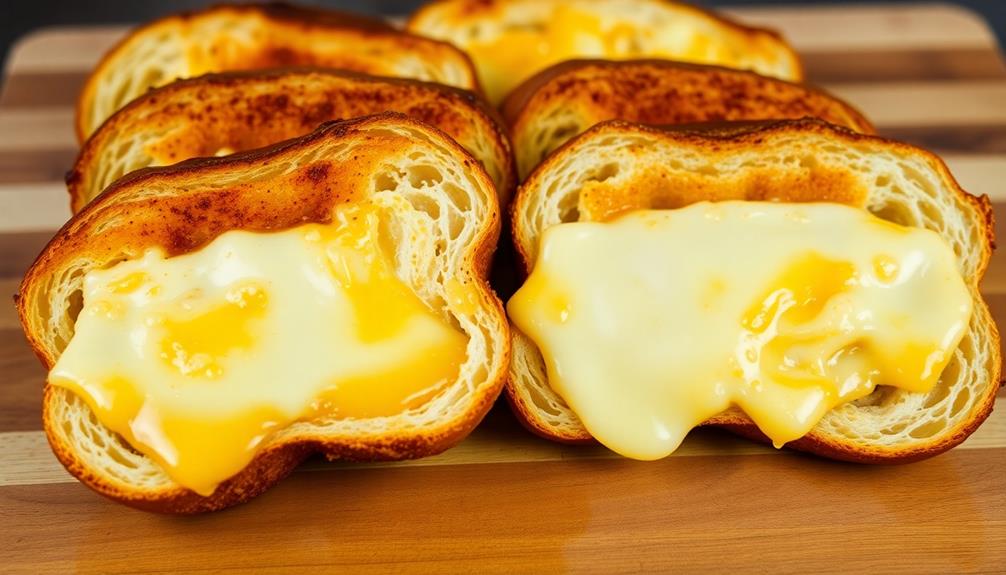
Step 2. Place Cheese Between Bread Slices
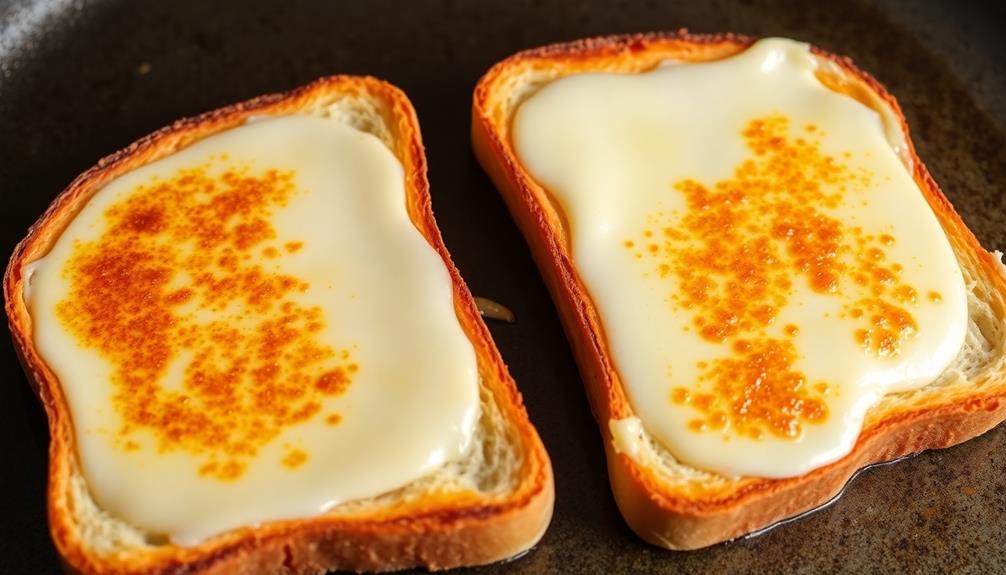
With the bread slices evenly coated, it's time to start assembling your grilled cheese.
Grab your slices of bread and place them on a clean work surface.
Now, it's time to add the cheese. Pick your favorite type of cheese, whether it's cheddar, Swiss, or something more adventurous.
Slice or grate the cheese and place it between the two bread slices, making sure to cover the entire surface.
Don't be shy – you want a generous amount of cheese to create that ooey-gooey goodness.
Once the cheese is in place, gently press the two slices together to secure the filling.
Be careful not to squish the bread too much, as you want to maintain a nice, even thickness throughout.
With the cheese neatly tucked between the slices, your grilled cheese sandwich is now ready for the next step: cooking it to perfection.
Step 3. Heat Pan Over Medium

To begin, place a large skillet or griddle over medium heat. You'll want to let it heat up for a minute or two, so the surface is nice and toasty.
While it's warming up, go ahead and get your bread and cheese ready to go.
Once the pan is heated, add a small knob of butter or a drizzle of oil. Make sure to spread it around so the entire surface is lightly coated. This will help create that golden-brown crunch we all love in a grilled cheese.
Now, carefully place your sandwich into the pan. Let it sizzle for 2-3 minutes, until the bottom slice is nicely toasted. Keep an eye on it, as the cheese may start to melt quickly.
When the first side is done, use a spatula to flip the sandwich over. Cook for another 2-3 minutes on the second side, until both slices of bread are crispy and the cheese is melted through.
Remove the sandwich from the heat and enjoy your delicious grilled cheese creation!
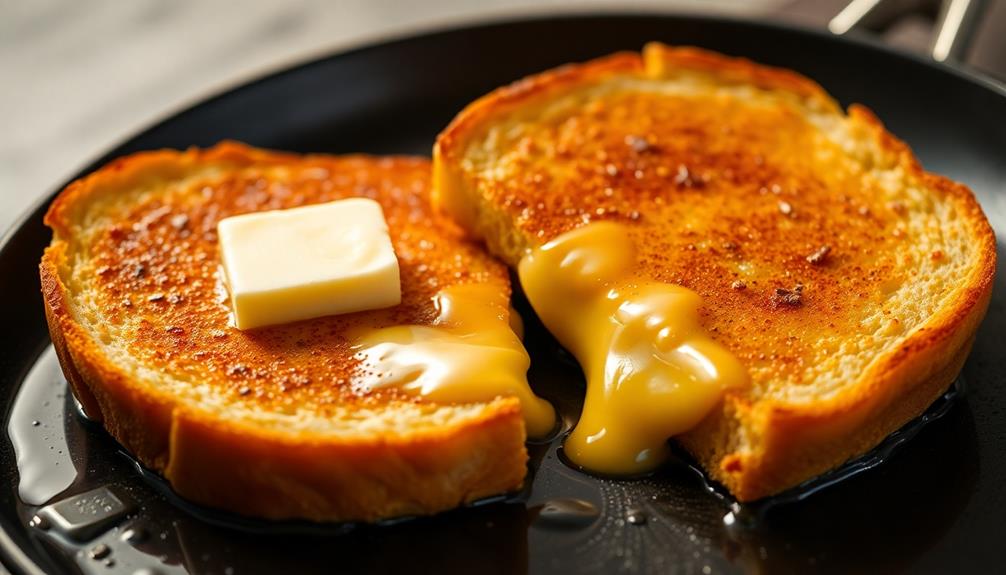
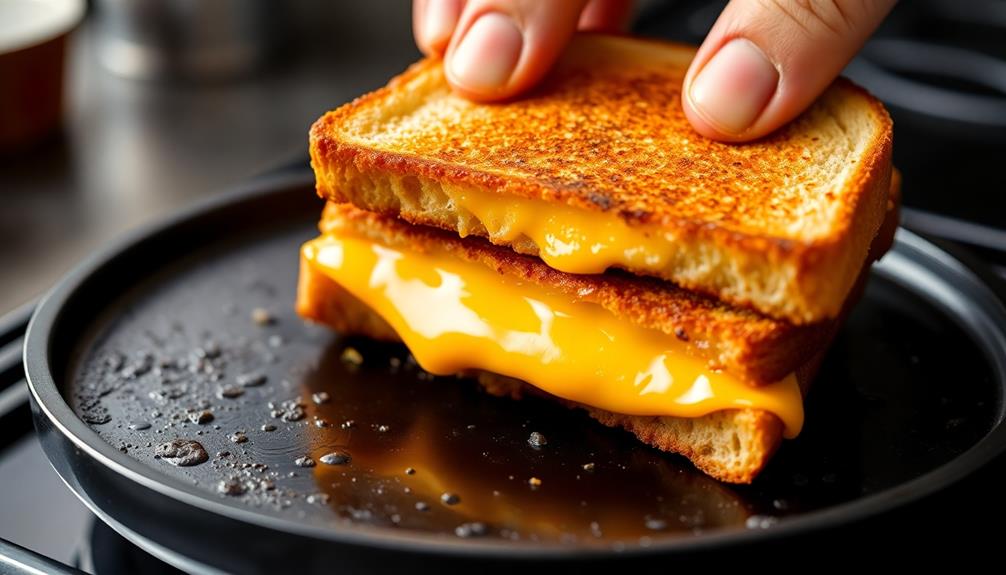
Step 4. Cook Until Golden Brown
Once the pan is heated and the butter is melted, carefully place your assembled sandwich into the pan. Resist the urge to move it around too much – let it cook undisturbed.
You'll know it's time to flip when the bottom slice has turned a lovely golden brown, about 2-3 minutes.
Gently slide a spatula under the sandwich and flip it over. Cook the other side until it's equally golden and crispy, another 2-3 minutes. Keep an eye on it and adjust the heat as needed to prevent burning.
The key is to cook the sandwich slowly and evenly, allowing the cheese to melt perfectly while the bread gets that irresistible crunch.
When both sides are toasted to perfection, remove the grilled cheese from the pan and let it sit for a minute before taking that first bite. The cheese will be warm, gooey, and utterly delicious.
Serve immediately and enjoy your masterpiece!
Step 5. Flip Sandwich Occasionally for Even Cooking
Flip the sandwich occasionally to ensure even cooking. As the bread and cheese heat up, the bottom side will start to brown first. To prevent one side from getting too dark while the other remains pale, use a spatula to gently flip the sandwich over every minute or so. This allows the heat to evenly distribute and both sides to develop that perfectly golden-brown crust.
Be careful when flipping – you don't want the sandwich to fall apart. Slide the spatula under the sandwich, supporting it from the bottom, then flip it over in one smooth motion. Listen for that satisfying sizzle as the other side hits the hot pan.
Continue flipping the sandwich every minute or so, keeping a close eye on it, until both sides are toasted to your liking.
Flipping the sandwich regularly is a simple but crucial step for achieving that classic grilled cheese texture – crispy on the outside and gooey on the inside. With a little practice, you'll be flipping like a pro in no time.
Final Thoughts
Although grilled cheese sandwiches are a simple dish, there's an art to perfecting them. Now that you've mastered the basics of assembling and cooking your sandwich, consider a few final thoughts.
Experiment with different cheeses, breads, and mix-in ingredients to find your signature combination. For example, try pairing sharp cheddar with sourdough or adding a sprinkle of herbs. Additionally, think beyond the traditional sandwich and explore creative variations like grilled cheese bites or a grilled cheese panini.
When you're ready to serve, don't forget the perfect accompaniment – a steaming bowl of tomato soup. The classic pairing is both comforting and delicious.
As you continue honing your grilled cheese skills, have fun with it! This simple sandwich offers endless opportunities for customization and creativity. With a little practice, you'll be whipping up grilled cheese perfection in no time.
Frequently Asked Questions
Can I Use Different Types of Cheese?
Absolutely! You can use a variety of cheese types to create your grilled cheese sandwich. Mix and match different cheeses like cheddar, mozzarella, Swiss, or even try adding a little crumbled feta for a unique twist.
How Do I Achieve the Perfect Golden Brown Crust?
To achieve a perfect golden brown crust, make sure you use enough butter or oil, and heat your pan over medium heat. Flip the sandwich occasionally to ensure even browning on both sides.
Is It Possible to Make a Grilled Cheese Sandwich in the Oven?
Yes, you can make a grilled cheese sandwich in the oven. Simply place the assembled sandwich on a baking sheet and bake at 400°F (200°C) until the bread is golden brown and the cheese is melted, about 10-15 minutes.
Can I Add Additional Ingredients Like Tomatoes or Bacon?
Absolutely! You can easily add extra ingredients like tomatoes or bacon to your grilled cheese sandwich. These additions can enhance the flavor and make your sandwich even more delicious. Feel free to get creative with your toppings.
How Do I Prevent the Bread From Getting Soggy?
To prevent soggy bread, toast the bread slices before assembling the sandwich. Use a dry skillet or griddle to lightly brown the bread, then construct your grilled cheese with the crispy toasted slices. This'll keep the bread from getting soggy.