

This checklist is for teachers, parents, and students gathering supplies for hands-on science activities. It covers a few specific product picks alongside advice for categories where choosing by activity and classroom needs matters more than starting with a particular item.

Prime made for students and young adults
- Fast, free delivery for dorm and study essentials
- Prime Video and Amazon Music included
- Member-only deals
The sections move from lab protection and measurement to chemistry equipment, then to observation and model-building resources. Each one highlights what to check before choosing, including fit, compatibility, and whether an item suits the intended activity.
Use the checklist to match each supply to your lesson or project. Confirm the product’s stated purpose and specifications, and consider who will use it and under what supervision. For advice-only categories, use the prompts to compare options that fit your curriculum and learners.
Microscope slide sets
Slide sets support close observation, but the right selection depends on what learners will examine and how the microscope will be used. Before choosing, identify the specimen types and magnification work planned. A set for prepared samples may not meet a need for blank slides or student-made wet mounts. Check what is included and whether the slides are intended for repeated classroom handling or a particular activity. Match the contents to the lesson rather than assuming every set serves the same purpose. Common buying mistakes include overlooking slide dimensions, coverslip needs, or the number of slides available for a group. Confirm compatibility with the microscope stage and any storage case, and consider whether younger students can handle the pieces safely with appropriate supervision. If learners will prepare their own samples, check whether the set includes the pieces and supplies required for that process; do not assume a slide set includes them. For shared classroom use, plan how slides will be labeled, stored, and distributed. Choose for the actual workflow, including cleanup and storage, so the set supports the activity from preparation through observation.What to look for:
- Prepared specimens or blank slides suited to planned activities
- Slide dimensions compatible with the microscope stage
- Whether coverslips are included or needed separately
- Quantity appropriate for individual or shared use
- Storage case and labeling approach
Student laboratory goggles
Eye protection is a core consideration for student lab activities, and the listed pick is the 3M Chemical Splash/Impact Resistant Safety Goggle, 1 Pack. Before choosing it for a class, review the product’s stated protection and fit details against the activity and the applicable classroom safety requirements. A product name alone does not establish that it is appropriate for every experiment, wearer, or setting. Confirm suitability for the planned use before distributing goggles to students. A common mistake is choosing eye protection based on a broad label without checking how it fits the individual wearer or works with other required protective equipment. Review sizing and adjustment information, and consider whether students can maintain a secure, comfortable fit throughout the activity. Check compatibility with prescription eyewear if relevant, and follow the manufacturer’s guidance for use, cleaning, and storage. For group settings, also plan how goggles will be identified and kept in usable condition between activities. Fit and clear instructions matter alongside the product’s stated protection. If the task has specific hazards, consult the relevant safety guidance rather than assuming one goggle is right for every lab.What to look for:
- Product protection details suited to the planned activity
- Fit and adjustment guidance for student wearers
- Compatibility with prescription eyewear, if needed
- Manufacturer guidance for cleaning and storage
- Classroom safety requirements for the experiment
3M Chemical Splash/Impact Resistant Safety Goggle, 1 Pack
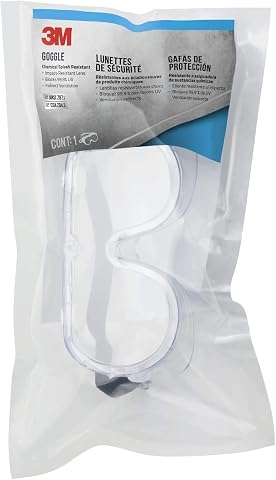
These safety goggles from 3M provide impact and splash protection with a polycarbonate lens and comfortable elastic headband. Designed to fit over most prescription eyewear, they feature vents to reduce fogging and meet ANSI Z87.1-2003 standards, making them suitable for various workplace tasks.
Pros:
- Provides impact and splash protection with durable polycarbonate lenses
- Comfortable elastic headband ensures a secure fit
- Vents help reduce fogging for clear vision during use
- Fits over most prescription glasses
Cons:
- No adjustable temple; may not fit all head sizes comfortably
- Limited color options available
Best for: Activities where the product’s stated protection fits the classroom requirements
Not ideal for: Tasks whose hazards or wearer needs do not match the product guidance
Bottom line: Review fit, product guidance, and activity requirements before using this goggle with students.
Digital classroom thermometers
A classroom thermometer can help learners collect temperature readings, but the intended measurement method should come first. The listed pick is the Digital Thermometer for Adults and Kids – No Touch Forehead Thermomete. Its name describes a no-touch forehead thermometer, so check whether that method suits the lesson before selecting it for science measurements. A device designed for forehead readings may not meet the needs of an activity involving liquids, surfaces, or other materials. Match the measurement to the instrument rather than relying on the word “digital.” Before buying, review the stated measurement range, units, response guidance, and intended use in the product details. Check how readings are taken and whether the procedure can be repeated consistently across student groups. Common mistakes include assuming a thermometer works with any material or overlooking the difference between a body-temperature reading and a classroom experiment measurement. Consider who will operate it, how readings will be recorded, and what cleaning or handling guidance applies. For a lesson requiring measurements beyond forehead readings, select an instrument specified for that purpose. Use the manufacturer’s directions and align the tool with the learning objective.What to look for:
- Intended use that matches the measurement activity
- Stated measurement range and units
- Clear instructions for obtaining repeatable readings
- Suitable operation for the age and group using it
- Handling and cleaning guidance
Digital Thermometer for Adults and Kids – No Touch Forehead Thermometer
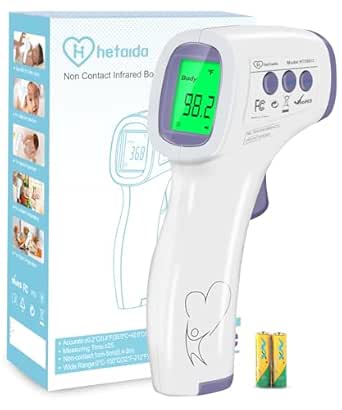
This non‑contact infrared thermometer measures body temperature without touching the skin, reducing cross‑infection risk. It provides instant readings in about one second with an accuracy of ±0.2 °C and features a color‑changing LCD display plus audible warnings for abnormal temperatures.
Pros:
- Non‑contact measurement reduces infection risk
- Fast 1‑second reading with high accuracy (±0.2 °C)
- Multi‑function: can measure forehead, room, object, and liquid temperatures
- Color‑changing LCD and warning sound for abnormal readings
Cons:
- Requires disposable AAA batteries
- Limited measurement distance (max ~3 inches)
Best for: Activities that call for no-touch forehead readings
Not ideal for: Experiments measuring liquids, surfaces, or other materials
Bottom line: Choose this pick only when forehead readings match the classroom objective.
Beginner chemistry glassware
The listed option is the Advanced Organic Chemistry Glassware Kit, 38 Pieces, 24/40 Joints. Its name indicates a 38-piece kit with 24/40 joints, but those details alone do not establish that it is suitable for beginners or a particular classroom activity. Before selecting it, compare the included components and joint specifications with the procedures, equipment, and supervision available. Compatibility comes first: glassware must match the other apparatus learners will use and the work they are expected to perform. A common mistake is treating a large kit as a complete classroom solution without checking each piece, its intended use, or what else is required. Read the contents list and confirm joint dimensions against any existing equipment. Consider whether the planned activities call for this type of glassware at all, and check handling, cleaning, and storage guidance. For student use, account for age, experience, and appropriate adult supervision; a kit title does not tell you the level of skill required. If your lessons are introductory, ask whether simpler equipment better fits the objectives and learners. Plan the full setup before purchase, including compatible supports and any additional items specified by the activity instructions. Follow relevant safety guidance when working with glassware.What to look for:
- Full contents list and intended use of each piece
- 24/40 joint compatibility with existing apparatus
- Activity requirements and learner experience level
- Handling, cleaning, and storage guidance
- Any additional equipment specified by procedures
Advanced Organic Chemistry Glassware Kit, 38 Pieces, 24/40 Joints

This 38-piece glassware set is designed for various organic chemistry applications including distillation, reflux, filtration, and extraction. It includes a variety of flasks, funnels, adapters, clamps, and safety components made from high-quality borosilicate glass.
Pros:
- Comprehensive set suitable for multiple organic chemistry procedures
- High-quality borosilicate glass for durability and heat resistance
- Includes a variety of adapters, clamps, and safety components
Cons:
- Complex setup may require some experience to use effectively
- Heavy and fragile, requiring careful handling
- No specific price information available
Best for: Users whose planned setup matches the kit’s pieces and joint size
Not ideal for: Beginners needing a kit confirmed for introductory classroom activities
Bottom line: Check every component and joint against the lesson setup before choosing this kit.
Pocket science field guides
A pocket field guide can help learners identify and observe things outdoors, but usefulness depends on the location, subject, and age group. Start by naming the kinds of observations the activity involves, such as plants, animals, rocks, or weather. Then look for a guide focused on that subject and relevant to the places students will explore. Local relevance matters; broad coverage may be less useful than a guide suited to the actual setting. Check the format before choosing: text size, illustrations, organization, and durability can all affect how easily students use a guide outside. Common mistakes include selecting a guide that covers too many topics superficially or choosing one whose terminology and detail do not fit the learners. Consider whether students will carry it, share it, or use it alongside a worksheet or observation log. Confirm that the guide supports identification without encouraging unsupported conclusions, and plan to pair it with teacher guidance where needed. Choose for the outing by matching subject coverage, readability, and field conditions to the activity.What to look for:
- Subject coverage that matches the field activity
- Relevance to the local area or environment
- Readable text and useful illustrations
- Portable format suited to student use
- Organization that supports quick identification
Solar system model kits
A solar system model kit gives learners a way to represent relationships among celestial bodies, but models simplify what they show. Begin with the learning goal: identifying planets, comparing order, exploring relative sizes, or building a display. Let the objective guide the kit, since a model suited to one concept may not communicate another clearly. Check what parts are included and whether students assemble or simply use the model. A common mistake is treating a physical model as a precise representation of scale or motion without checking what it conveys. Review the instructions and any stated dimensions, and decide whether the activity needs additional explanation or a separate visual aid. Consider age appropriateness, assembly complexity, storage, and whether enough components are available for the intended group arrangement. If students will work collaboratively, think through how parts will be shared and kept together. Explain the model’s limits as part of the activity so students understand which relationships it illustrates and which it simplifies.What to look for:
- Model features that support the lesson objective
- Parts and assembly requirements clearly described
- Age-appropriate instructions and complexity
- Dimensions or scale information for teaching context
- Storage and component management for classroom use
When assembling supplies, prioritize the items required for safe participation and the planned activities, then add measurement tools and specialty equipment that directly support the lessons. For each pick, check fit and compatibility before committing to a classroom setup, and use advice-only categories to compare options against the actual curriculum.
Build the checklist around what students will observe, measure, and make. A few well-matched tools can support focused activities, and careful preparation helps learners use them with confidence. Start with the lesson goals, then choose supplies that fit the group and the work ahead.
Columbus Day / Indigenous Peoples' Day Picks
long weekend sales
As an affiliate, we earn on qualifying purchases.