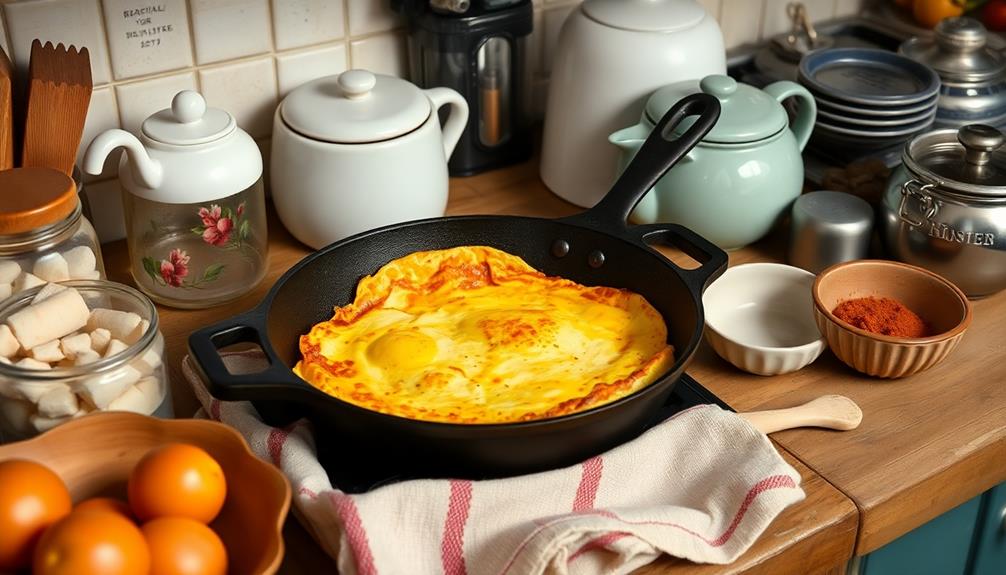
Whip up a fluffy, golden-brown omelette in no time with this foolproof recipe. Start by cracking fresh eggs into a bowl and whisking them vigorously to incorporate air – this is the secret to light and airy perfection. Melt butter in a skillet, then pour in the frothy eggs. Gently fold the omelette as it cooks, creating a soft, delicate texture. Feel free to customize your omelette with your favorite fillings, like cheese, veggies, or meats. Master this classic breakfast dish, and you'll unlock endless culinary possibilities.
Key Takeaways
- Master the art of whisking eggs vigorously to incorporate air for a light, fluffy omelette texture.
- Melt butter in a non-stick skillet over medium heat to ensure even cooking and prevent sticking.
- Fold the omelette gently with a spatula to maintain a delicate, half-moon shape.
- Use high-quality, fresh ingredients to enhance the flavors and create a delicious breakfast dish.
- Experiment with various fillings and seasonings to discover your preferred omelette flavor combinations.

Gifts for Men, Beard Kit for Men's Daily Grooming & Care, Moisturize & Soften Facial Hair, Men's Self Care Set w/Beard Oil, Dad Day Gifts Fathers Day, Birthday Gifts for Husband Boyfriend Dad Son
Beard Oil & Balm for Maximum Hydration: Our non-greasy beard oil absorbs instantly to moisturize skin and eliminate...
As an affiliate, we earn on qualifying purchases.
History
The origins of the omelette can be traced back to ancient Greece, where it was a popular dish consumed by soldiers and commoners alike.
This simple yet delicious egg-based meal was often cooked over an open fire, using a variety of fillings and seasonings.
As the recipe spread throughout the Mediterranean region, it evolved to reflect the local ingredients and culinary traditions.

Gifts for Men, Fathers Day Gifts for Dad Body And Wash Gift Set Beard Kit and Body Care, Sandalwood Spa Baskets, Bath and Beard Grooming Kit, for Husband, Beard Balm Growth Oil
At-Home Spa Session - Indulge in a relaxing and refreshing spa-like experience after a stressful day. This bath...
As an affiliate, we earn on qualifying purchases.
Recipe

An omelette is a versatile and delicious breakfast dish that can be customized to suit individual tastes.
Whether you prefer it simple and classic or loaded with a variety of fillings, the omelette is a quick and easy way to start your day off right.
Preparing an omelette requires just a few basic ingredients and a bit of technique.
With a little practice, you'll be whipping up restaurant-quality omelettes in the comfort of your own kitchen.
Ingredients:
- 3 eggs
- 1 tablespoon butter
- 2 tablespoons milk (optional)
- Salt and pepper to taste
- Desired fillings (e.g. cheese, ham, vegetables)
Instructions:
Crack the eggs into a bowl and whisk them together until well blended.
If using milk, add it to the eggs and whisk again.
Heat a non-stick skillet over medium heat and melt the butter in the pan.
Pour the egg mixture into the pan and let it cook for a minute or two, using a spatula to gently push the cooked egg towards the center of the pan.
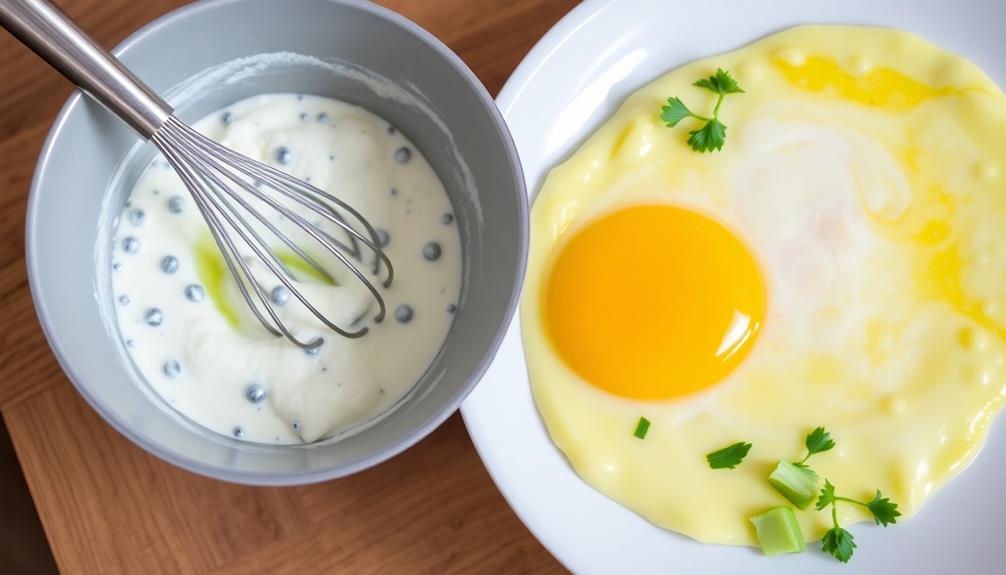
Once the bottom is set but the top is still slightly runny, add your desired fillings.
Fold the omelette in half and slide it onto a plate.
For best results, use fresh, high-quality ingredients and don't overstuff the omelette.
Experiment with different flavor combinations to find your perfect omelette.
Enjoy your homemade creation!

Every Man Jack Beard Essentials Gift Set for Men – Complete Routine with 5 Full-Size Essentials – Sandalwood Scent - Beard & Face Wash, Lotion, Oil, Butter & Comb
A COMPLETE REGIMEN: Everything you need for a complete beard care routine; step 1: cleanse with Beard Wash;...
As an affiliate, we earn on qualifying purchases.
Cooking Steps
Crack the eggs into a bowl and whisk them vigorously until they're nice and frothy.
Next, add a pat of butter to a pan and let it melt.
Once the pan's hot, carefully pour in the whisked eggs and gently fold them as they start to set.
Step 1. Crack Eggs Into a Bowl
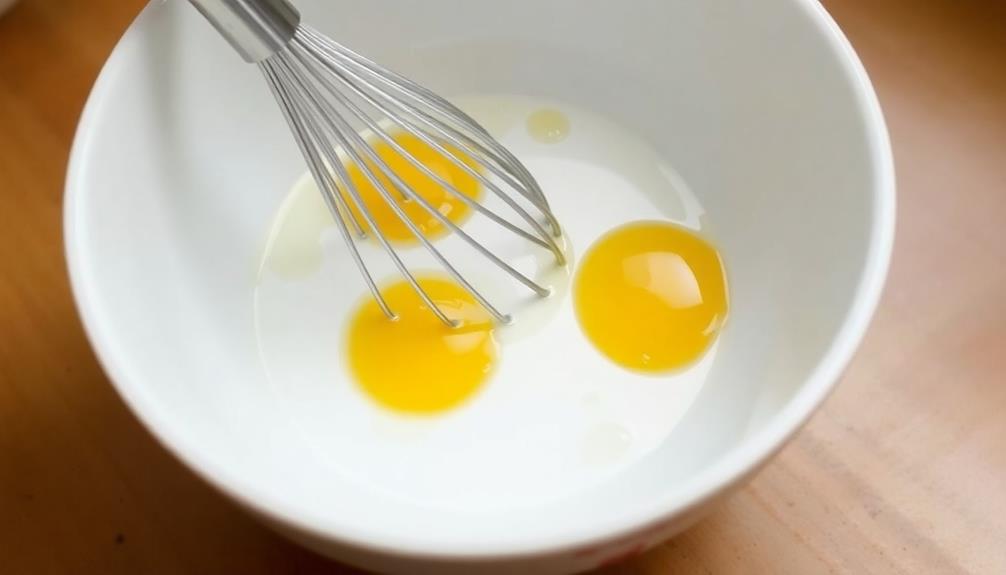
To begin, crack the eggs into a bowl. Gently tap the middle of the egg on a flat surface, like the side of the bowl, until it cracks. Carefully peel the shell apart and let the contents slide into the bowl.
Make sure no eggshells fall in – you don't want those in your omelette! Crack each egg one by one, depositing them all in the same bowl.
Once you've added all the eggs, use a fork or whisk to beat them until they're thoroughly mixed. You want the yolks and whites to be completely combined, creating a uniform yellow liquid.
Don't overbeat, though – a few vigorous whisks should do the trick. With the eggs prepared, you're ready for the next step in making your delicious omelette.
Step 2. Whisk Eggs Vigorously Until Frothy

With the eggs prepared, you'll want to whisk them vigorously until they're nice and frothy. Grab a fork or a whisk and start beating the eggs with purpose. Swirl the fork or whisk around the bowl, making sure to incorporate air into the mixture. The eggs should become light and airy, with a slightly pale color.
This step is crucial, as it will result in a tender, fluffy omelette. Keep whisking for about 30 seconds to a minute, until the eggs have significantly increased in volume and have a light, foamy texture. You'll know they're ready when the mixture is uniform and has a smooth, homogeneous appearance.
Don't be afraid to put some elbow grease into it – the more air you can incorporate, the better your omelette will turn out. Once the eggs are perfectly whisked, you're ready to start cooking your delicious breakfast creation.
Step 3. Add Butter to Pan
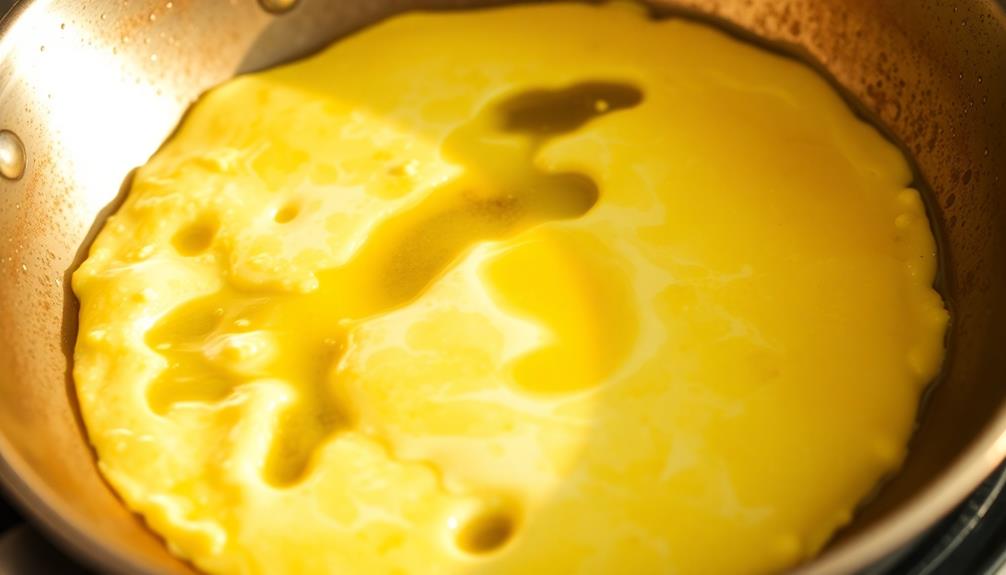
Next, you'll want to add a bit of butter to your pan. You can use either unsalted or salted butter – the choice is yours! Melt the butter over medium heat, swirling the pan to coat the bottom and sides.
Be careful not to let the butter burn – you're aiming for a gentle sizzle. Once the butter is melted and the pan is nicely coated, you're ready for the next step.
The butter will help your omelette cook evenly and prevent it from sticking to the pan. It also adds a rich, delicious flavor that complements the eggs perfectly.
As the butter melts, you'll start to smell that heavenly aroma – get ready, because your omelette is about to come together beautifully! Keep a close eye on the pan, adjusting the heat as needed, to ensure the butter doesn't burn.
With the butter ready, you can now start pouring in your whisked eggs.
Step 4. Pour Eggs Into Pan
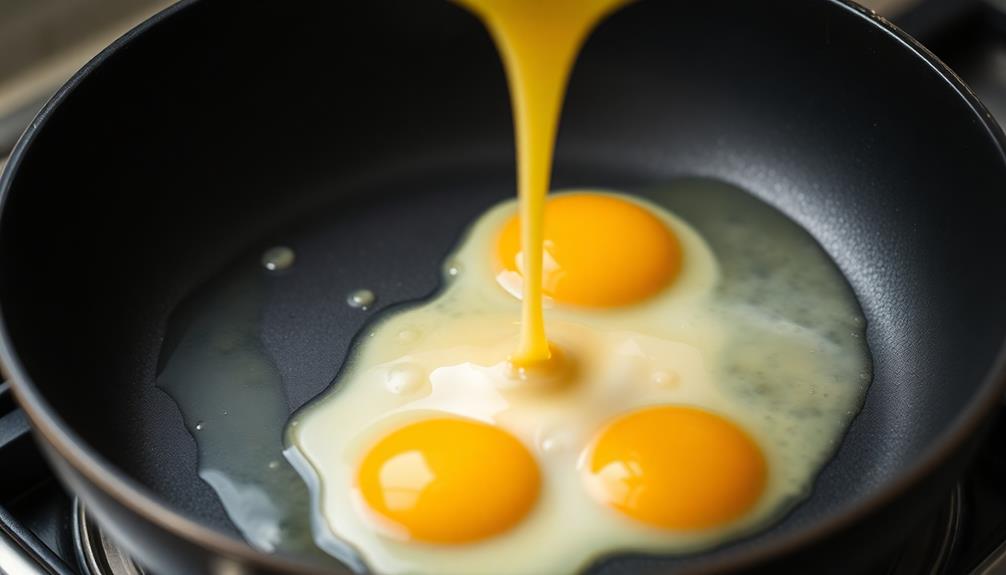
Once the butter is melted and the pan is ready, pour the whisked eggs into the center of the pan.
Gently tilt the pan to allow the uncooked egg to flow towards the edges, creating an even layer. As the edges begin to set, use a spatula to lift the edges, letting the uncooked egg flow underneath. This ensures the omelette cooks evenly.
Continue this process, occasionally shaking the pan to prevent the omelette from sticking. When the bottom is lightly browned and the top is still slightly runny, it's time to fold the omelette.
Use the spatula to gently fold one side of the omelette over the center, then fold the other side over, creating a half-moon shape.
Slide the folded omelette onto a plate and enjoy your perfectly cooked breakfast creation.
Step 5. Gently Fold Eggs Until Set

As the edges of the omelette start to set, use a spatula to gently fold one side of the omelette over the center.
Be careful not to overload the pan or the omelette will fall apart. Gently lift and fold the opposite side over the first, creating a neat, crescent-shaped omelette.
You can fold it in half or into thirds, depending on your preference. Avoid overly aggressive folding, which can cause the delicate eggs to break.
Once the omelette is folded, let it cook for another 30 seconds to a minute, just until it's set but still slightly soft in the center.
Remember, the omelette will continue to cook even after you've removed it from the heat, so don't overcook it.
Slide the perfectly folded omelette onto a plate and enjoy your masterpiece!
The key is to handle the omelette delicately and fold it with care for a light, fluffy result.

Isner Mile Dad Gifts Fathers Day Husband: from Wife Daughter, Beard Grooming Kit for Men with Beard Oil Balm Wash Brush Comb & Straight Razor, Stocking Stuffers Birthday Gifts for Men Him Boyfriend
COMMAND ATTENTION WHEREVER YOU GO - A groomed beard will make you stand out from the crowd! The...
As an affiliate, we earn on qualifying purchases.
Final Thoughts

Your omelette is now complete, and it's time to enjoy the fruits of your labor.
Take a moment to admire your handiwork – that fluffy, golden-brown creation is the result of your careful attention and skill. As you take that first delicious bite, savor the flavors and textures you've crafted.
The balanced interplay of the creamy eggs, melted cheese, and any other fillings you've added is a testament to your culinary prowess. This omelette isn't just breakfast; it's a personal achievement.
Feel proud of yourself for mastering this classic dish. Whether you're a seasoned cook or just starting out, you've demonstrated the ability to prepare a fantastic omelette.
Now, dig in and enjoy every last bite. Your hard work has paid off, and you deserve to relish this moment of breakfast bliss.
Frequently Asked Questions
Can I Use Store-Bought Eggs for the Omelette?
Yes, you can absolutely use store-bought eggs for your omelette. They'll work just as well as farm-fresh eggs and provide the same great flavor and texture. Go ahead and crack those store-bought eggs – they're perfect for making a delicious omelette.
How Do I Prevent the Omelette From Sticking to the Pan?
To prevent the omelette from sticking to the pan, make sure you use a nonstick pan and coat it with a small amount of butter or oil before adding the egg mixture. This will help the omelette slide right out.
Can I Make the Omelette in Advance and Reheat It?
Yes, you can make the omelette in advance and reheat it. Simply prepare the omelette, let it cool, and store it in the refrigerator. When ready to serve, reheat it in a pan or the microwave until warm throughout.
Is It Possible to Make a Vegan or Gluten-Free Omelette?
Yes, you can make a vegan or gluten-free omelette! You'll need to use ingredients like tofu, chickpea flour, or plant-based milk instead of eggs and traditional flour. The key is finding the right substitutes to achieve a similar texture and flavor.
What Type of Cheese Works Best for the Omelette?
When it comes to a vegan or gluten-free omelette, you'll want to choose a cheese that melts well and complements the other ingredients. Vegan cheddar or mozzarella-style cheeses work great, adding flavor and texture to your egg-free breakfast.