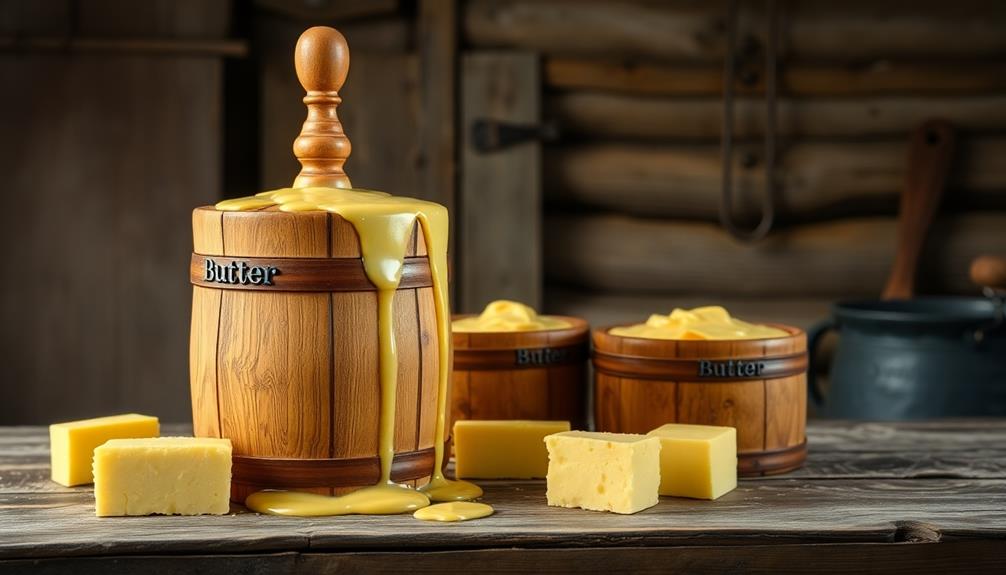
Making homemade butter is easier than you might think! Start by gathering some heavy cream and a clean mason jar. Simply shake the jar vigorously for about 10 minutes until the butter forms. Alternatively, you can use a food processor or stand mixer to whip the cream until clumps appear, then drain the excess buttermilk. Rinse the butter under cold water, knead it until smooth, and you're all set! Homemade butter boasts a richer, more customizable flavor than store-bought varieties. It's perfect for spreading on fresh bread, cooking vegetables, and baking. Want to learn even more about this delicious culinary craft? Let's dive deeper.
Key Takeaways
- Gather heavy cream and an airtight mason jar to make homemade butter by shaking the jar vigorously for about 10 minutes until butter forms.
- Whip cream in a food processor or stand mixer until clumps form, then drain excess buttermilk and rinse the butter to remove residue.
- Homemade butter surpasses store-bought in flavor and quality due to fresh ingredients, allowing for customization and cost-effectiveness.
- Homemade butter can be used for spreading on freshly baked bread, melting over vegetables, baking, and a variety of culinary purposes.
- The process of making butter connects with rich culinary traditions, providing a sense of accomplishment and inspiring further culinary endeavors.

Gevi Commercial Espresso and Coffee Makers, Professional 20 Bar Espresso Maker with Milk Frother, Stainless Steel Expresso Coffee Machines for Home, Compact Cappuccino Machine, Great Gift
𝐎𝐩𝐭𝐢𝐦𝐚𝐥 𝐅𝐥𝐚𝐯𝐨𝐫 𝐄𝐱𝐭𝐫𝐚𝐜𝐭𝐢𝐨𝐧 - Equipped with a 20-bar pump, NTC temperature control, pre-infusion feature, and a pressure gauge,...
As an affiliate, we earn on qualifying purchases.
History
The origins of homemade butter can be traced back to ancient civilizations, where the process of churning cream into a solid, yellow fat was a common household task.
Ancient Greeks, Romans, and Chinese all had their own methods for making butter, often using primitive tools like animal skin bags or wooden barrels.
Butter is a dairy product that has been enjoyed for centuries, and over time, the techniques evolved, leading to its integral role in many traditional cuisines around the world.
In the Middle Ages, butter production increased as dairy farming became more widespread.
Monks and peasants alike would churn butter by hand, using their muscle power to separate the fat from the liquid.
This labor-intensive process required patience and skill, as the churning had to be done just right to achieve the perfect texture and flavor.
As technology advanced, so did the methods of butter-making.
The industrial revolution brought mechanized churns and other innovations that made the process faster and more efficient.
Today, homemade butter remains a beloved treat, allowing people to connect with the rich history and timeless traditions of this versatile dairy product.

Breville BDC650BSS Grind Control Coffee Maker With Grinder, Brushed Stainless Steel, Thermal Carafe
The Breville Grind Control coffee maker creates third wave specialty coffee by capturing freshness and essential oils from...
As an affiliate, we earn on qualifying purchases.
Recipe
Making homemade butter is a rewarding and delicious process that allows you to control the ingredients and create a superior product. The fresh, creamy texture and rich flavor of homemade butter is unmatched by store-bought varieties.
Homemade butter is surprisingly simple to make, requiring just a few basic ingredients and a bit of elbow grease. With a little patience and attention, you can transform heavy cream into a spreadable delight that will elevate any dish.
- Heavy cream
- Salt (optional)
To make homemade butter, pour the heavy cream into a food processor or stand mixer fitted with the whisk attachment. Whip the cream on high speed until it begins to thicken and form small clumps.
Continue whipping until the butter has fully separated from the buttermilk. This process can take 5-10 minutes. Once the butter has formed, drain the buttermilk and rinse the butter under cold water to remove any remaining buttermilk.
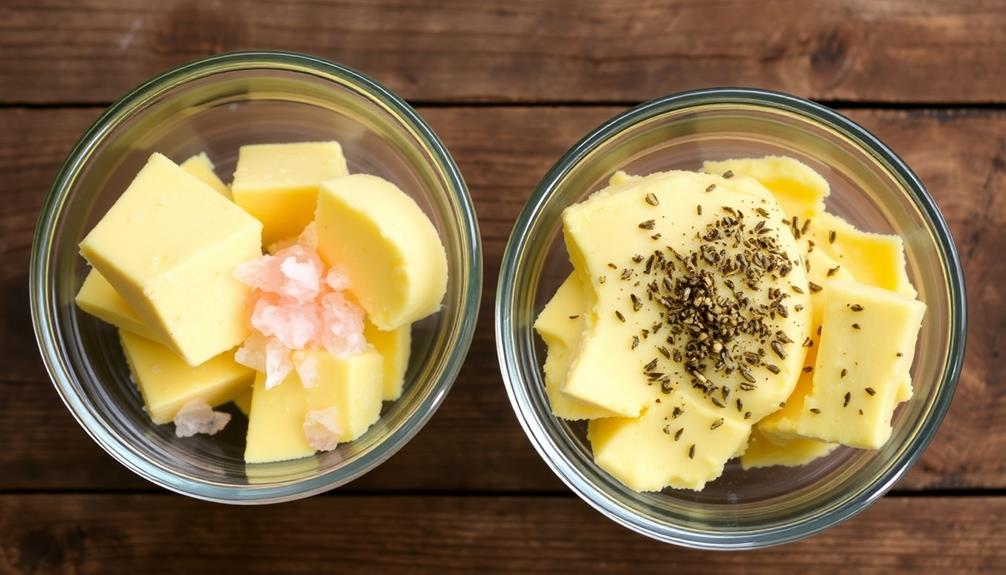
Finally, knead in salt if desired.
Homemade butter can be stored in an airtight container in the refrigerator for up to one week. The butter can also be frozen for longer-term storage.
When making homemade butter, be sure to use the freshest, highest-quality cream available for the best flavor and texture.

CASABREWS CM5418 Espresso Machine 20 Bar, Compact Espresso Maker with Steam Milk Frother, Stainless Steel Coffee Machine with 34oz Removable Water Tank for Cappuccino, Small Latte Machine, Silver
Make Your Favorite Espresso Coffee At Home: The CASABREWS coffee machine with milk frother allows you to prepare...
As an affiliate, we earn on qualifying purchases.
Cooking Steps
Alright, let's get started! First, grab a mason jar and some heavy cream.
Then, shake that jar vigorously for about 10 minutes until the cream transforms into butter.
Next, drain off the excess buttermilk and give the butter a good rinse under cold water.
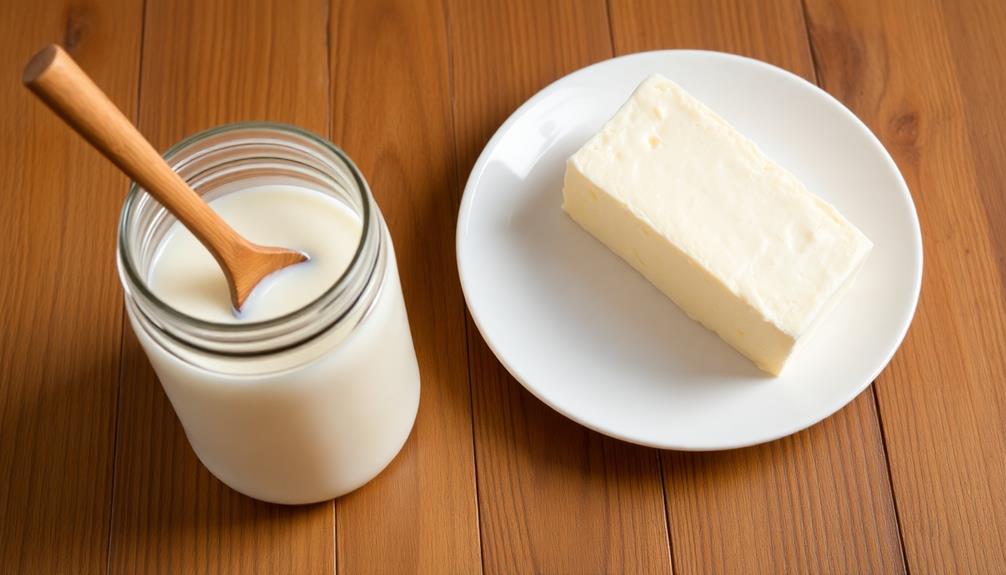
Step 1. Gather Heavy Cream and Mason Jar
Obtaining the necessary ingredients is the first step in your journey to creating homemade butter. You'll need heavy cream and a clean, airtight mason jar. The cream should be fresh and of high quality, as it will directly impact the taste and texture of your final product.
Carefully pour the cream into the mason jar, filling it about halfway. Seal the lid tightly, ensuring no air can escape. This container will act as your churning vessel, so make sure it's sturdy and leak-proof.
With your tools gathered, you're ready to begin the butter-making process. Shake the jar vigorously, keeping a steady rhythm. As you work, the cream will transform, passing through various stages before finally solidifying into fresh, homemade butter.
Maintain your shaking motion until the butter has fully formed, separating from the buttermilk. Once complete, you'll have successfully crafted your own delicious butter from scratch.
Step 2. Shake Vigorously for 10 Minutes
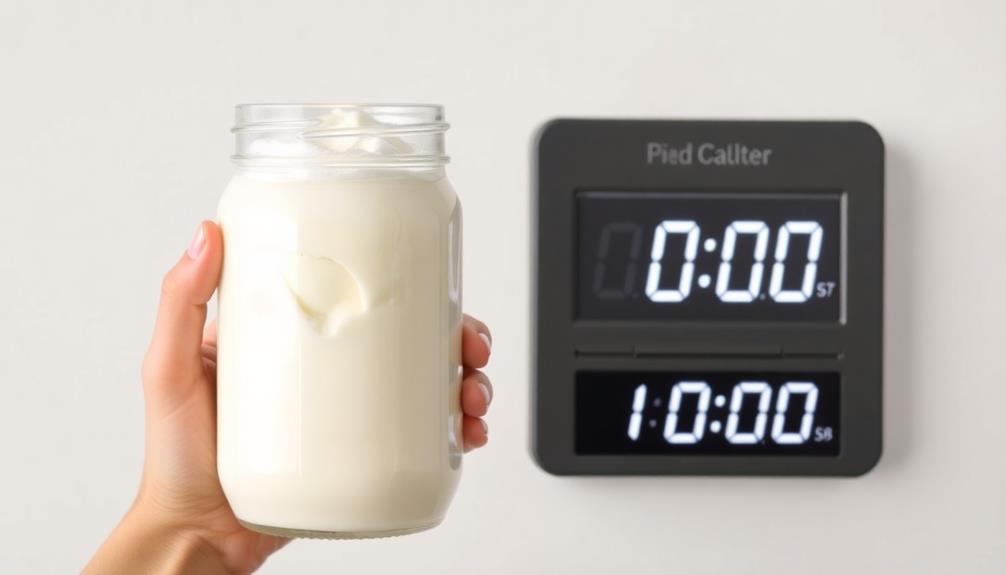
With your heavy cream and mason jar ready, it's time to put in the effort and shake. Grip the sealed jar firmly with both hands, then start shaking vigorously.
Don't be afraid to really get into it – you'll want to shake the jar for a solid 10 minutes to ensure the cream transforms into butter.
As you shake, you'll notice the cream gradually thickening. Keep an eye out for when it starts to form a solid mass and the liquid (buttermilk) separates. This is a sign you're on the right track!
Once you reach the 10-minute mark, take a break to check your progress. The cream should have turned into a nice, spreadable butter by now.
If it needs a bit more time, simply resume shaking until the transformation is complete. Just be patient and keep at it – the effort will be worth it when you get to enjoy your homemade butter!
With a little elbow grease, you'll be well on your way to dairy deliciousness.
Step 3. Drain Excess Buttermilk From Butter
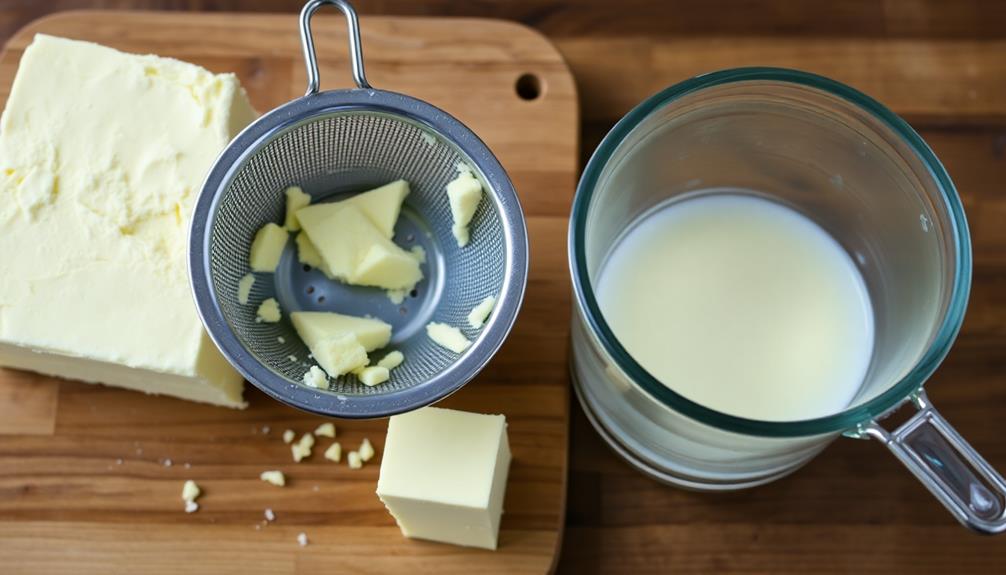
Having successfully transformed the heavy cream into butter, the next step is to drain the excess buttermilk.
Grab a large bowl and place a fine-mesh strainer or colander over it. Carefully pour the butter mixture into the strainer, allowing the buttermilk to drain out. Gently press the butter with a spoon to help release any additional liquid.
Once the majority of the buttermilk has been drained, transfer the butter to a clean work surface. Use your hands to knead the butter, squeezing and pressing to remove even more buttermilk. You'll notice the butter becoming smoother and more cohesive as you work.
Discard the drained buttermilk – it can be saved for another use, like in baking or as a drink.
Continue kneading and pressing the butter until it's free of any remaining buttermilk. The butter is now ready to be shaped, seasoned, and enjoyed on your favorite bread or used in your favorite recipes.
Step 4. Rinse Butter Under Cold Water
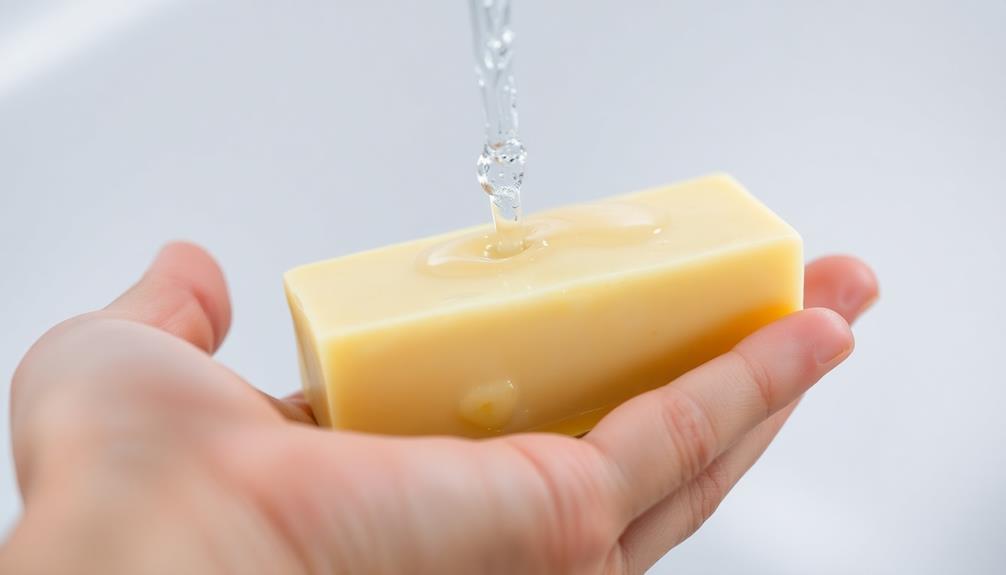
After draining the excess buttermilk, you'll want to rinse the butter under cold water. This step helps to remove any remaining buttermilk, which can cause the butter to spoil more quickly. Proper rinsing is crucial for maintaining the quality of your butter, as butter storage practices can significantly impact its freshness.
Start by placing the butter in a clean bowl and running cool water over it, gently squeezing and kneading the butter with your hands. The water should run clear, indicating you've rinsed away the last traces of buttermilk.
Continually change the water until it no longer has a milky appearance. This process may take a few minutes, but it's an important step to ensure your homemade butter stays fresh for longer.
Once the water runs clear, you can pat the butter dry with a clean paper towel or cloth. At this point, your butter is ready to be shaped, seasoned, or stored for future use. Rinsing the butter under cold water helps extend its shelf life and maintain its delicious flavor and texture.
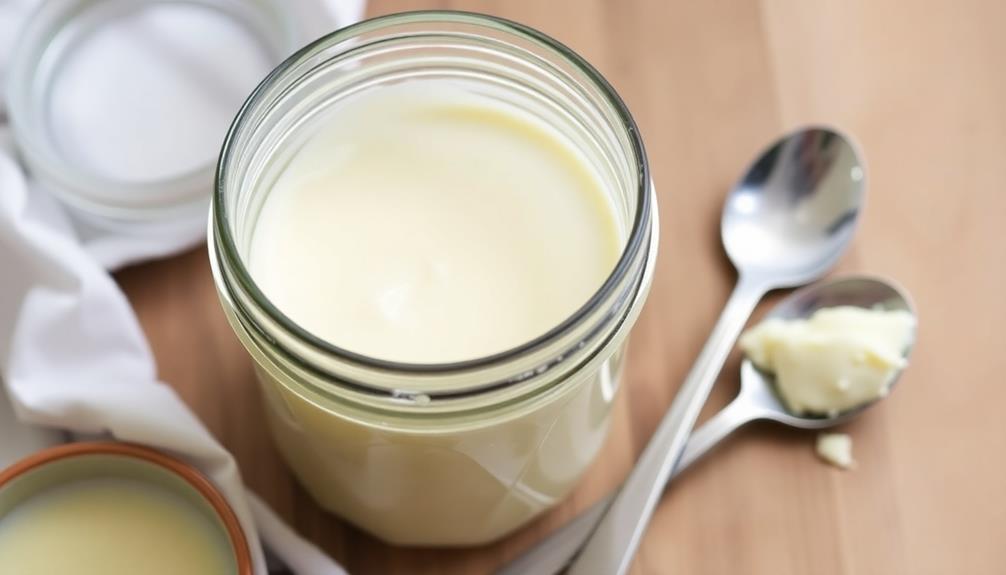
Step 5. Knead the Butter Until Smooth
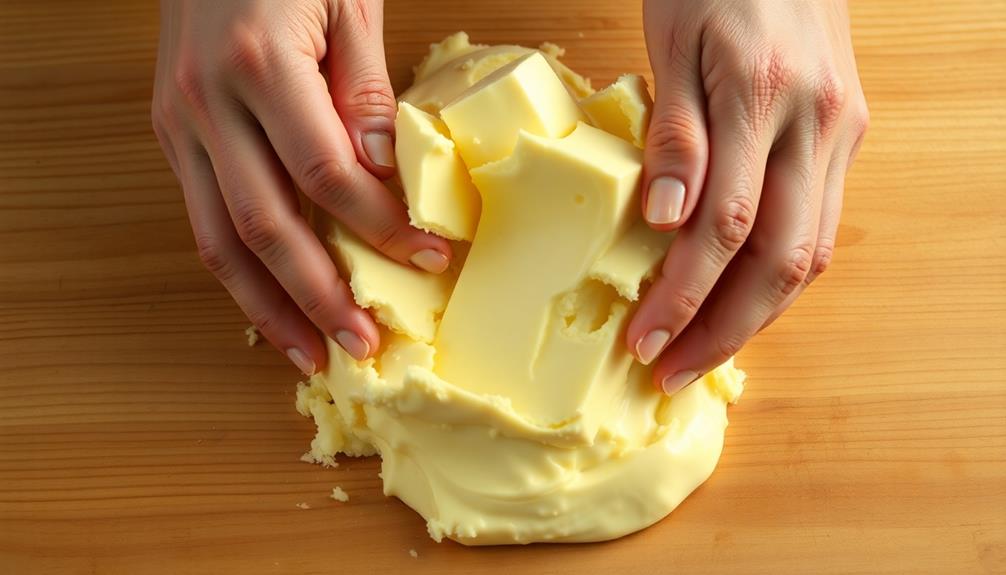
Next, knead the butter until it's smooth and uniform in texture. Using your hands, gently press and fold the butter to work out any remaining buttermilk or water. Knead the butter for about 2-3 minutes, or until it feels silky and cohesive.
Be careful not to overwork the butter, as this can cause it to become greasy. As you knead, you may notice the butter starting to become more pliable and easier to manipulate. This is a good sign that you're on the right track.
Periodically, you can use a wooden spoon or spatula to scrape down the sides of the bowl and incorporate any stray bits. Once the butter is smooth and free of any liquid, it's ready for the next step.
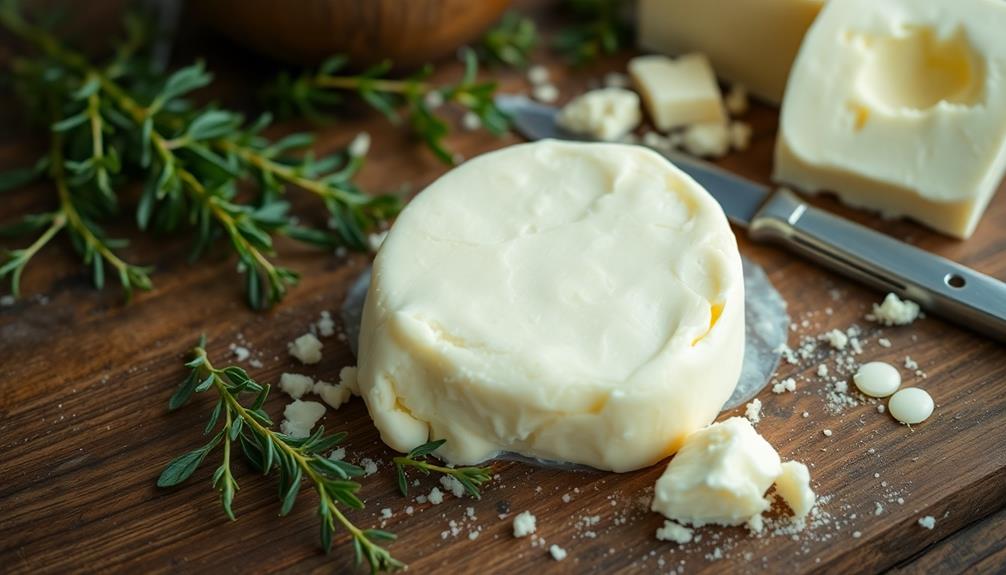
Gather the kneaded butter into a cohesive ball or log shape. At this point, the butter can be used immediately or stored for later use.

atatix Espresso Machine with Milk Frother, 20 Bar Pressure Espresso Maker, with 44OZ Removable Tank, Compact Stainless Steel Coffee Machine for Home, Office, Latte, Cappuccino, Macchiato, Silver
【Make Favorite Espresso Coffee by Yourself】The espresso machine with milk frother allows you to prepare all your favorite...
As an affiliate, we earn on qualifying purchases.
Final Thoughts
Making your own homemade butter is a rewarding and satisfying process. You've come so far, from selecting the freshest cream to meticulously following each step.
Now, as you reach the final stage, take a moment to appreciate all your hard work. The smooth, creamy texture of the butter you've created is a testament to your dedication and culinary skills.
As you enjoy your homemade butter, consider the countless ways you can use it. Spread it on freshly baked bread, melt it over steaming vegetables, or even incorporate it into your favorite recipes.
The possibilities are endless! Remember, the butter you've made is far superior to store-bought options, both in flavor and quality. Take pride in your accomplishment and savor every bite.
With this final step complete, you can now confidently call yourself a homemade butter expert. Enjoy the fruits of your labor, and don't hesitate to share your newfound skills with family and friends.
Frequently Asked Questions
How Long Can Homemade Butter Be Stored?
Homemade butter can be stored for up to 2 weeks in the refrigerator. It's best to store it in an airtight container to prevent it from absorbing other flavors. With proper storage, you can enjoy your freshly churned butter for several days.
Can I Use a Food Processor Instead of a Stand Mixer?
Yes, you can use a food processor instead of a stand mixer to make homemade butter. The process will be similar, but you'll need to monitor the mixture carefully to avoid over-churning.
Is It Possible to Make Butter From Pasteurized Cream?
Yes, you can make butter from pasteurized cream. The pasteurization process doesn't affect the butter-making ability of the cream. Just be sure to use high-quality, fresh cream for the best results.
What Are the Best Types of Cream for Making Butter?
To make the best butter, you'll want to use heavy cream or whipping cream. These high-fat creams will give you a richer, creamier butter. Pasteurized cream will work, but may not have as much fat content as you'd like.
Can I Add Any Flavors or Seasonings to Homemade Butter?
You can definitely add flavors and seasonings to your homemade butter! Try mixing in fresh herbs, spices, garlic, honey, or even citrus zest to create unique and flavorful butter spreads. The possibilities are endless when it comes to customizing your homemade butter.