
To make sourdough bread, start by maintaining a lively starter with wild yeast and bacteria, feeding it daily until bubbly and doubled in size. Mix your starter with flour and water, then let it ferment at room temperature, watching for signs like bubbling and rising. Shape the dough once it’s doubled, then proof it until airy and springy. Bake when it’s perfectly proofed for a crusty, flavorful loaf—keep going to discover all the tips for success.
Key Takeaways
- Maintain a healthy sourdough starter by daily feeding until bubbly and doubled in size.
- Mix active starter with flour and water, then let the dough ferment until it doubles and bubbles.
- Perform stretch and folds during bulk fermentation to develop gluten and improve dough structure.
- Shape the dough after fermentation, then proof until it is airy, springy, and doubled in size.
- Bake the proofed dough at the right temperature for a crisp crust and flavorful loaf.
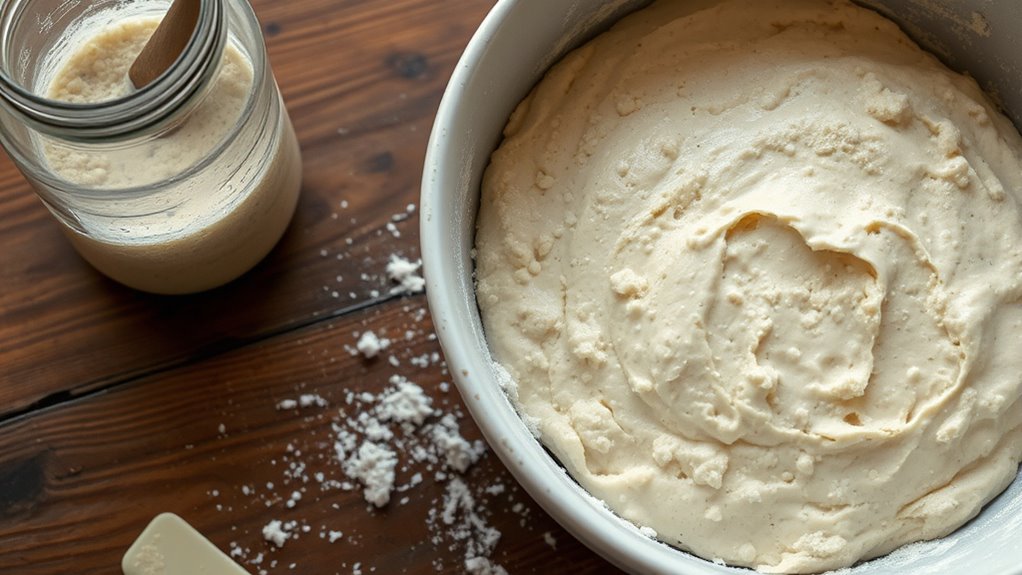
Making sourdough bread from scratch might seem challenging at first, but with the right steps, it becomes a rewarding process. The foundation of good sourdough is your starter, a lively mixture of flour and water teeming with wild yeast and bacteria. Proper starter maintenance is vital because it keeps your culture healthy and active. Each day, you’ll want to feed your starter with equal parts flour and water, stirring it until smooth. This regular feeding encourages fermentation, which produces the acids and gases that give sourdough its distinctive flavor and airy texture. As your starter matures, you’ll notice it becoming bubbly and doubling in size within a few hours of feeding—signs that it’s active and ready for baking. Monitoring fermentation timing is essential here; you want to feed and use your starter when it’s at its peak activity, usually when it’s risen and full of bubbles. This guarantees your dough develops the right flavor profile and structure.
Once your starter is lively, you’ll mix it with more flour and water to form your dough. During this process, pay attention to fermentation timing. After mixing, your dough needs to rest and ferment, allowing the yeast to produce carbon dioxide and develop flavor. Typically, this first bulk fermentation lasts several hours at room temperature, but it can vary depending on your environment. You’ll want to observe how the dough behaves—look for it to double in size, become slightly springy, and show bubbles on the surface. During this period, you might do a stretch and fold every 30 minutes to strengthen the gluten and improve the dough’s structure. Proper fermentation timing guarantees the dough develops the desired elasticity and flavor, so don’t rush this step. Temperature plays a big role here; warmer environments speed up fermentation, while cooler ones slow it down. Adjust your timing accordingly, knowing that patience yields better flavor and texture.
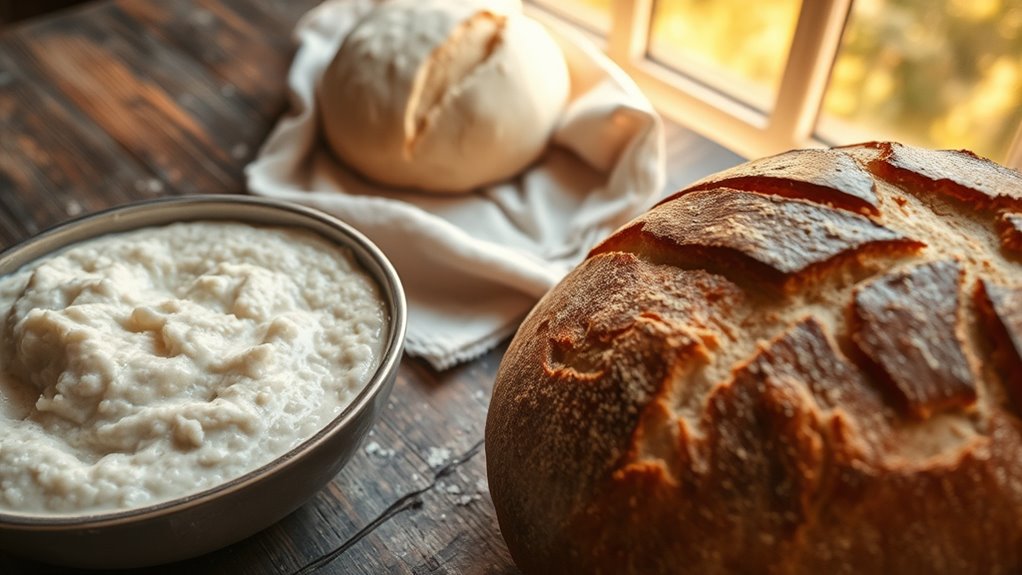
As fermentation completes, you’ll shape your dough and prepare it for proofing or final rise. This stage also depends on fermentation timing—wait until the dough has doubled and shows good fermentation signs before shaping. Once shaped, the dough undergoes a final proof, during which it gains volume and develops a tender crumb. Pay attention to how long it takes; under-proofed dough can be dense, while over-proofed dough might collapse. The key is to find the sweet spot where the dough is airy and springy. Baking at the right time ensures your sourdough develops a crispy crust and complex flavor. Throughout the entire process, maintaining your starter and managing fermentation timing are your best tools for baking a perfect loaf every time.
Frequently Asked Questions
Can I Use Gluten-Free Flour for Sourdough Starters?
Yes, you can use gluten-free alternatives for sourdough starters. However, it’s important to note that starter maintenance differs since gluten-free flours ferment differently. You’ll need to feed your starter more frequently and be patient, as gluten-free starters may develop more slowly. Keep an eye on the texture and smell, and adjust your feeding schedule as needed to keep your gluten-free starter healthy and active.
How Long Does Sourdough Bread Stay Fresh?
Sourdough bread stays fresh for about 2 to 4 days when stored properly. To preserve its freshness, you should store it in a bread box or paper bag at room temperature, avoiding plastic which can make it soggy. For longer preservation, wrap it tightly and freeze it. Proper bread storage helps maintain its flavor and texture, ensuring you enjoy delicious, crusty sourdough for days.
What Are Common Signs of a Healthy Sourdough Starter?
A healthy sourdough starter practically hums with life, showing vigorous activity and a symphony of fermentation bubbles that seem to dance nonstop. You’ll notice a tangy, pleasant smell—no off-putting odors—and a bubbly, airy surface that indicates active fermentation. The starter should double in size within hours, and its texture remains smooth and elastic. If these signs appear, you’ve got a lively, thriving starter ready to craft delicious bread.
Can I Bake Sourdough Without a Dutch Oven?
Yes, you can bake sourdough without a Dutch oven by using alternative methods. A baking vessel like a stainless steel or ceramic pot with a tight-fitting lid works well, or you can create steam in your oven by placing a pan of water on the bottom rack. Covering your loaf with a large oven-safe bowl or using a pizza stone with steam also helps develop a crispy crust.
How Can I Tell if My Sourdough Is Over-Proofed?
Over-proofed sourdough can be tricky; about 25% of bakers notice it by touch and appearance. To tell if your dough is over-proofed, check fermentation timing—if it’s been rising too long, or the dough feels very slack and lacks elasticity, it’s a sign. When over-proofed, your bread might spread out or have a flat, dense texture. Keep an eye on these signs to perfect your baking!
Conclusion
Now that you’ve mastered the art of making sourdough bread, you hold the key to bakery-worthy loaves right in your kitchen. Remember, patience is your greatest ingredient—like a good story, great bread unfolds over time. Trust the process, and soon you’ll be savoring that warm, tangy crust, a delicious reward for your effort. So go ahead, bake with confidence, and let your bread be the proof that perseverance truly rises to the occasion.