You can easily make stretchy slime at home without using traditional activators. Start by mixing ½ cup of white glue with 2 tablespoons of cornstarch. Gradually stir in 1.5 tablespoons of dish soap. If your slime's too sticky, add a bit more cornstarch; if it's too dry, add some dish soap. Let the mixture sit for about 2 minutes to improve its texture. Store your slime in an airtight container to keep it fresh and ready for fun. Want to explore different variations and tips for success? There's plenty more to discover!
Key Takeaways
- Combine ½ cup white glue, 2 tablespoons cornstarch, and 1.5 tablespoons dish soap for a simple slime base without activators.
- Adjust slime consistency by adding more cornstarch for stickiness or more dish soap for dryness.
- Allow the mixture to rest for 2 minutes to enhance texture before playing.
- Store finished slime in an airtight container to maintain freshness and prevent drying out.
- Experiment with colors, scents, and textures to create customized slime variations.
Ingredients for Non-Activator Slime

To make non-activator slime, you'll need just a couple of simple ingredients: cornstarch and dish soap. This easy recipe requires 2 tablespoons of cornstarch and 1.5 tablespoons of dish soap. By using these two ingredients, you can create a fun and safe slime without the need for traditional activators, making it perfect for kids.
Cornstarch acts as the thickening agent, giving your slime its desired texture, while dish soap adds flexibility and stretch. If you find your mixture too dry, simply add a bit more dish soap to achieve the right consistency. Conversely, if it feels too wet, incorporate a little additional cornstarch. This simple adjustment allows you to customize the slime to your liking.
The result is a non-stick slime that's fantastic for tactile play and educational activities. It engages various age groups without the mess that usually comes with traditional slime recipes.
Plus, you can whip it up quickly, making it an ideal crafting activity for both home and classroom settings. With just cornstarch and dish soap, you're on your way to creating a delightful slime experience!
Simple Preparation Steps
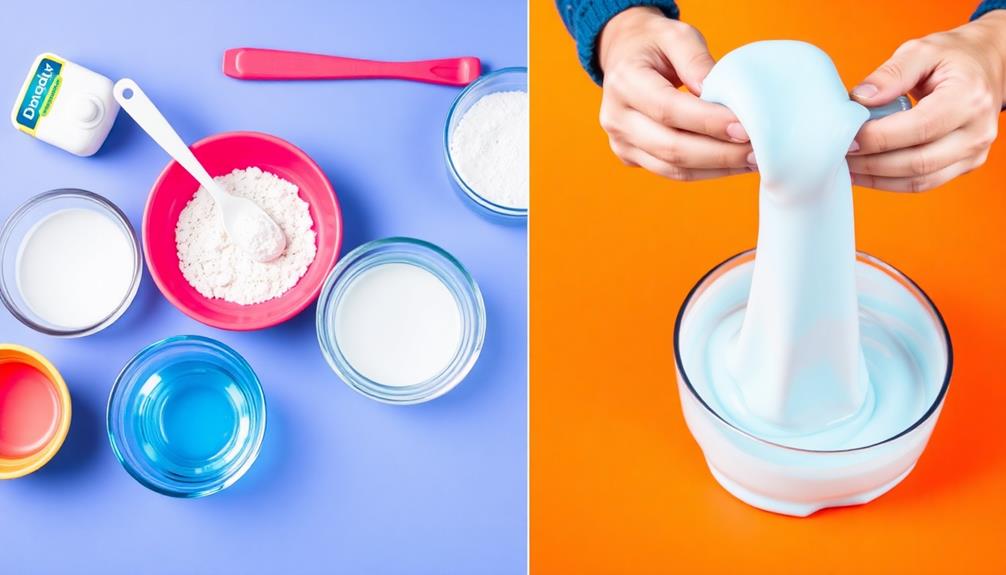
Getting started with your slime is straightforward.
You'll mix the white glue and cornstarch first, then add dish soap to achieve the right consistency.
If you find it's not quite right, adjusting with more soap or cornstarch is easy and will help you create the perfect slime.
Easy Mixing Techniques
Creating slime without a traditional activator is simple and fun, especially when you follow these easy mixing techniques.
Start by grabbing a bowl and mixing ½ cup of white glue with 2 tablespoons of cornstarch. This forms a stretchy base for your slime. Once that's combined, gradually add 1.5 tablespoons of dish soap, stirring continuously. Make sure everything is well mixed before moving on.
If you find your mixture is too sticky, don't worry! Just incorporate a bit more cornstarch to adjust the texture. On the flip side, if it feels too dry, simply add a touch more dish soap.
After mixing, let the combined mixture sit for about 2 minutes. This resting time helps enhance the slime's texture, making it even more enjoyable to play with.
To keep your slime fresh for future use, store it in an airtight container. If you want to experiment further, you can even add a pinch of baking soda to create a different consistency or mix in some contact lens solution to see how it affects the slime's elasticity.
Enjoy your slime-making adventure!
Consistency Adjustment Tips
Achieving the perfect slime consistency can make all the difference in your slime-making experience. To start, if your slime becomes too sticky, gradually incorporate cornstarch into the mixture. Begin with 1 tablespoon and adjust as needed until you reach a non-sticky consistency.
On the other hand, if you find your slime too dry, try adding small amounts of dish soap—about 1/2 teaspoon at a time—to achieve your desired texture.
For a smoother consistency, let the mixture rest for 2 minutes after combining all ingredients. This resting period allows the components to meld together effectively. If your slime is too runny, slowly mix in additional cornstarch in 1/2 tablespoon increments until it reaches your preferred thickness.
Don't hesitate to experiment with ingredient ratios! Increasing cornstarch to 3 tablespoons or reducing dish soap to 1 tablespoon can greatly impact how your slime becomes.
Tips for Perfect Slime

Perfecting your slime takes a bit of practice, but with a few key tips, you'll be a pro in no time. Follow these simple suggestions to achieve that perfect, gooey masterpiece:
- Adjust Slowly: Gradually add contact lens solution while stirring continuously. This guarantees an even consistency and helps you reach your desired stickiness.
- Knead It: Spend at least 5 minutes kneading your slime with your hands. This not only develops a fantastic texture but also reduces stickiness effectively.
- Tweak with Baking Soda: If your slime turns out too sticky, mix in a small amount of baking soda. It'll help firm it up and create a better feel.
- Experiment with Ratios: Don't be afraid to play around with different ratios of glue, baking soda, and contact lens solution. You can create a variety of textures, from thicker to stretchier slime!
Lastly, always store your slime in an airtight container. This keeps it fresh and prevents it from drying out.
With these tips, you'll be well on your way to slime perfection!
Benefits of Homemade Slime

Why should you consider making homemade slime? First off, it's a fun and engaging activity that sparks creativity, much like how the power of imagination can reveal transformative possibilities. You can experiment with different colors, textures, and scents, making it perfect for both kids and adults.
Plus, as you mix and knead the ingredients, you're enhancing fine motor skills, which is great for hand-eye coordination and dexterity.
Homemade slime is also cost-effective. The simple ingredients—like glue and baking soda—are often found in your kitchen, allowing you to create without breaking the bank. Many slime recipes call for items you already have, so you can dive right into the fun.
Moreover, making slime fosters scientific exploration. As you observe the chemical reactions between the ingredients, you'll see the transformation from liquid to stretchy, moldable substance. It's a hands-on way to learn about science!
Lastly, you can customize your homemade slime to fit your preferences. Whether you want to add glitter or your favorite scent, the possibilities are endless. This personalization enhances the sensory experience and keeps the activity fresh and exciting every time.
Troubleshooting Common Issues
If you're facing issues with your homemade slime, you're not alone.
Sticky, stringy, or dried-out slime can be easily fixed with a few simple adjustments.
Let's explore some quick solutions to help you get your slime back on track!
Sticky Slime Solutions
When your slime turns out too sticky, it can be frustrating, but there are simple solutions to rescue your creation.
Don't despair! You can salvage your slime with just a few easy tweaks. Here's what you can do:
- Add Baking Soda: Knead in 1/2 teaspoon of baking soda along with 1 teaspoon of contact lens solution. This combo helps firm up your slime and reduces that pesky tackiness.
- Knead Thoroughly: Sometimes, all your slime needs is a good kneading session. Work it until it reaches the desired consistency.
- Store Properly: To prevent future stickiness, always store your slime in an airtight container. This helps maintain moisture levels and keeps it from drying out.
- Use Liquid Starch: If your slime is stringy, incorporate 1 tablespoon of liquid starch. Knead until the strings disappear for a smoother finish.
Fixing Dried-Out Slime
We've all been there: you pull out your favorite slime only to find it's dried out and less fun to play with. Don't worry! With a few simple tweaks, you can bring it back to life.
First, if your slime is slightly dried out, mix in some warm water a little at a time. Knead it thoroughly to avoid over-saturation. For slime that's become rubbery, a squirt of moisturizing lotion can help restore its stretchiness.
If your slime is sticky, try this effective solution: combine 1/2 tsp of baking soda with 1 tsp of contact lens solution, and knead into the slime. This should reduce the tackiness considerably.
Here's a quick reference table to help you:
| Issue | Solution | Additional Tip |
|---|---|---|
| Slightly dried out | Add warm water and knead | Start with a small amount |
| Rubber texture | Add moisturizing lotion | Knead until smooth |
| Sticky slime | Mix 1/2 tsp baking soda + 1 tsp contact lens | Knead well after mixing |
Proper storage is key to prevent future drying, so always keep your slime in a sealed container!
Stringy Slime Remedies
Stringy slime can be a frustrating experience, but fortunately, there are effective remedies to restore its smooth texture. If you're dealing with stringy slime, try these solutions to improve its consistency:
- Add Liquid Starch: Incorporate 1 tablespoon of liquid starch, stir until the strings disappear, and knead for a firmer texture.
- Baking Soda & Contact Lens Solution: If it's overly sticky, mix in 1/2 teaspoon of baking soda with 1 teaspoon of contact lens solution. This combo can reduce stickiness and enhance overall consistency.
- Warm Water: For slightly dried-out or stringy slime, add warm water and mix thoroughly. This helps rejuvenate it, making it more pliable.
- Kneading: Knead the slime for at least five minutes. This process integrates air and moisture, which can greatly improve the texture and reduce stringiness.
To prevent stringiness from happening again, store your slime in an airtight container to maintain its moisture.
With these remedies, you can enjoy a smooth, satisfying slime experience!
Creative Variations to Try

Exploring creative variations in your DIY slime can elevate your crafting experience and lead to exciting discoveries. Start by experimenting with different types of glue, such as clear glue or glitter glue, to create unique textures and visual effects.
You can also add household items like baking soda, lotion, or cornstarch to adjust the consistency and stretchiness of your slime without needing traditional activators.
For a personal touch, incorporate food coloring, essential oils, or glitter to customize the scent and appearance of your slime. This way, each batch becomes a one-of-a-kind creation.
Don't forget to mix in fun items like foam beads or small plastic toys to enhance the sensory experience and add an element of surprise.
Moreover, try using different ratios of ingredients. Increasing the amount of dish soap or cornstarch can lead to new slime textures and properties.
Safe Storage and Maintenance

To keep your DIY slime fresh and ready for play, proper storage and maintenance are essential. By following a few simple steps, you can guarantee your slime remains fun and engaging for months.
- Use an Airtight Container: Store your slime in a zip-top plastic bag or a small sealable container. This helps lock in moisture and extends its lifespan.
- Squeeze Out Air: Before sealing, squeeze out as much air as possible. This prevents your slime from drying out and losing its squishy texture.
- Regular Checks: Check your stored slime regularly for moisture. If it starts to dry out or loses its stretchiness, add a small amount of activator to revive it.
- Seal Tightly: Always seal containers tightly after each use. This maintains freshness and prevents contamination from dust or other external elements.
Community Experiences and Feedback
Community members frequently share their positive experiences with making slime without traditional activators, often highlighting the simplicity and fun of using everyday ingredients like cornstarch and dish soap. This approach encourages creativity and experimentation, leading to varied textures that cater to different preferences.
Here's a glimpse into what community members are saying:
| Experience | Ingredient Used | Texture Preference |
|---|---|---|
| Kids love the mess-free fun! | Cornstarch & Dish Soap | Thicker consistency |
| Perfect for educational activities! | Cornstarch & Baking Soda | Fluid slime |
| Easy to adjust for desired texture! | Dish Soap & Baking Soda | Customizable options |
| Great for family bonding! | Cornstarch & Water | Enjoyable tactile feel |
Users frequently report that the non-Newtonian properties of slime made without activators provide engaging tactile experiences for both children and adults. Many emphasize that adjusting the ratios of cornstarch and dish soap can lead to the perfect slime using whatever ingredients you have on hand. This method not only keeps things mess-free but also makes slime-making accessible and enjoyable for everyone.
Expert Insights and Resources
Experts agree that making slime without traditional activators not only simplifies the process but also enhances the fun and creativity involved. By using simple household ingredients like cornstarch and dish soap, you can create a non-sticky slime that's perfect for kids and adults alike.
Here are some insights and tips to elevate your slime-making adventure:
- Safe Ingredients: These recipes use common items, eliminating harmful chemicals and promoting a safer crafting experience.
- Easy Ratios: Stick to a ratio of 2 tablespoons of cornstarch to 1.5 tablespoons of dish soap for the best consistency.
- Textural Magic: Letting the mixture sit for a couple of minutes before playtime makes it more pliable and enjoyable.
- Quick Fun: This method is perfect for spontaneous activities at home or in educational settings, allowing for creativity without the mess.
With these expert insights, you'll not only enjoy crafting slime but also inspire others to join in on the fun.
Immerse yourself in these recipes and witness the joy of creating something unique and enjoyable!
Frequently Asked Questions
How Do I Make Slime Without Activator?
To make slime, combine glue and baking soda for thickness. Gradually add water until it's dough-like, then knead for five minutes. Incorporate lotion for stretchiness, and store in an airtight container to keep fresh.
How to Make 2 Ingredient Slime?
To make 2-ingredient slime, mix 2 tablespoons of cornstarch with 1.5 tablespoons of dish soap. Stir thoroughly, let it sit for 2 minutes, and adjust consistency as needed. Enjoy your fun, safe slime!
What Makes Slime Stretchy Without Activator?
To make slime stretchy without activators, focus on combining glue with a thickening agent like cornstarch or lotion. Kneading the mixture well and experimenting with ratios will enhance its elasticity and overall stretchiness.
How to Make Homemade Activator for Slime?
You might think making a homemade activator is complicated, but it's simple! Mix 1 teaspoon of borax in warm water or combine baking soda with contact lens solution for an easy, stretchy slime that kids'll love!
Conclusion
Making slime without an activator is like crafting a little piece of magic right in your kitchen. With just a few simple ingredients and a dash of creativity, you can whip up a fun, squishy masterpiece that's sure to entertain. Remember to experiment and tweak your recipe for the perfect texture. So gather your supplies, release your imagination, and plunge into the delightful world of homemade slime—your hands are about to become the gateway to endless fun!


