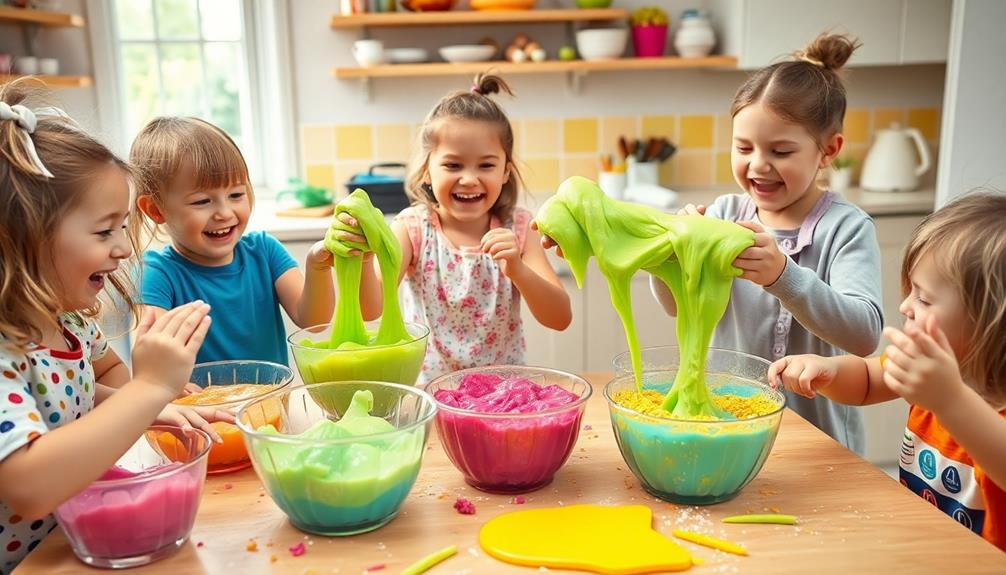
The easiest way to make slime is by using just three ingredients: white glue, baking soda, and contact saline solution. Start by mixing 1 cup of glue with 1 tablespoon of baking soda in a bowl. Stir well until combined, then add 1 to 2 tablespoons of contact saline solution. Mix until it thickens and becomes less sticky. You can personalize it with food coloring, glitter, or scents to make it unique! Once you've mastered this simple recipe, you might want to explore creative variations and fun activities that enhance your slime-making experience.
Key Takeaways
- Combine 1 cup of white glue with 1 tablespoon of baking soda in a mixing bowl for the base of the slime.
- Add 1 to 2 tablespoons of contact saline solution and stir until the mixture thickens.
- Incorporate food coloring and mix until no white streaks remain for vibrant color.
- Knead the slime by hand, adjusting with more contact solution if it feels sticky.
- Store the finished slime in an airtight container to maintain freshness and quality.
Ingredients for Slime
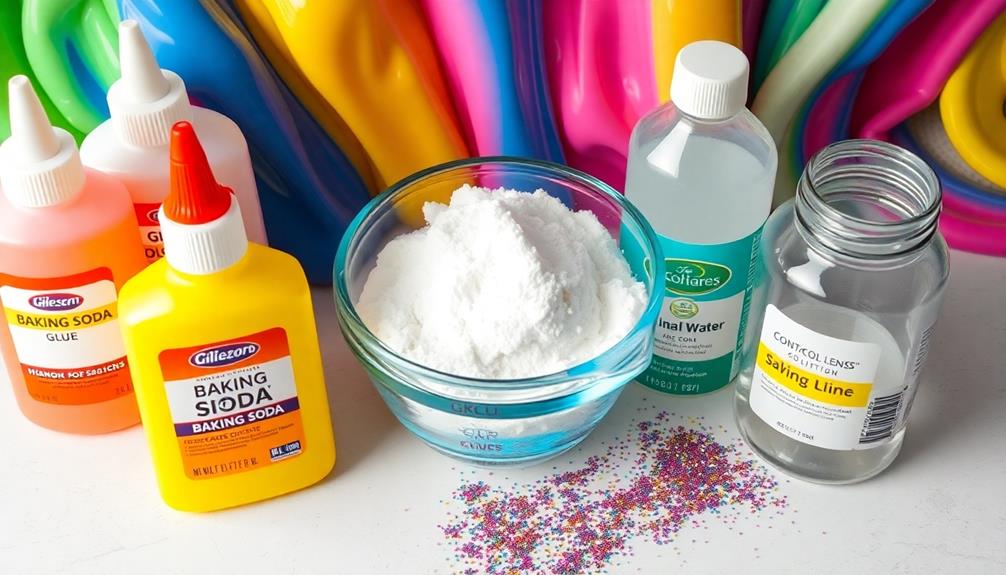
When you're ready to make slime, you'll need a few essential ingredients. The classic slime recipe starts with 1 cup of white glue, which provides the base for your gooey creation.
Next, you'll add 1 tablespoon of baking soda. This ingredient plays a vital role in giving your slime the right texture.
To activate the slime, you'll need 1 to 2 tablespoons of contact saline solution or another slime activator. This step is key, as it transforms your mixture from a sticky mess into a stretchy, fun substance.
If you want to customize your slime, consider adding a few optional ingredients. Food coloring can give your slime a vibrant hue, while glitter adds a touch of sparkle.
You might also want to include scented oils for a delightful aroma or mini styrofoam balls for added texture.
For a simpler alternative, you can make cornstarch slime using just 2 tablespoons of cornstarch and 1.5 tablespoons of dish soap.
If you're looking for a clear option, substitute white glue with clear glue, adjusting the amount to about three-quarters of the bottle.
Step-by-Step Slime Recipe
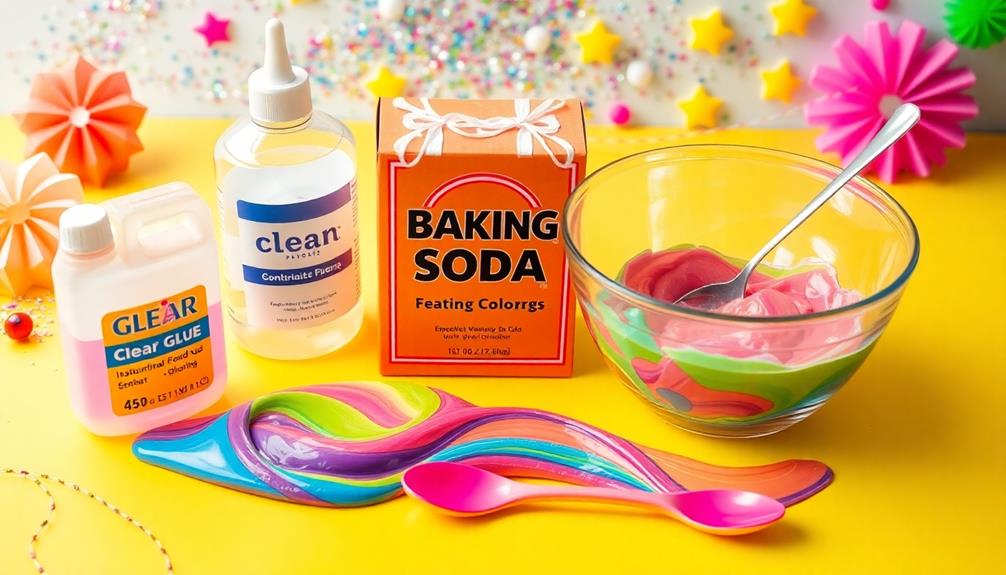
To create your own slime, start by gathering your ingredients and tools. You'll need 1 cup of white glue, 1 tablespoon of baking soda, and 1 tablespoon of contact lens cleaner.
Begin by combining the white glue and baking soda in a mixing bowl. Mix thoroughly until well blended.
Next, add the contact solution to the mixture. Stir until the slime begins to thicken. If you want a thicker or thinner consistency, adjust the amount of contact solution you use.
For a personalized touch, squeeze in eight drops of food coloring and mix until no white streaks remain.
Once you're satisfied with the color, it's time to knead the slime. Use your hands to knead it until it reaches a consistent texture. If the slime feels too sticky, add more contact solution in small amounts.
Customization Ideas

Now that you've mastered the basic slime recipe, it's time to get creative!
You can play around with color variations and textures by adding food coloring, glitter, or even essential oils to make your slime truly unique.
Consider the themes of the season or special occasions to inspire your custom creations!
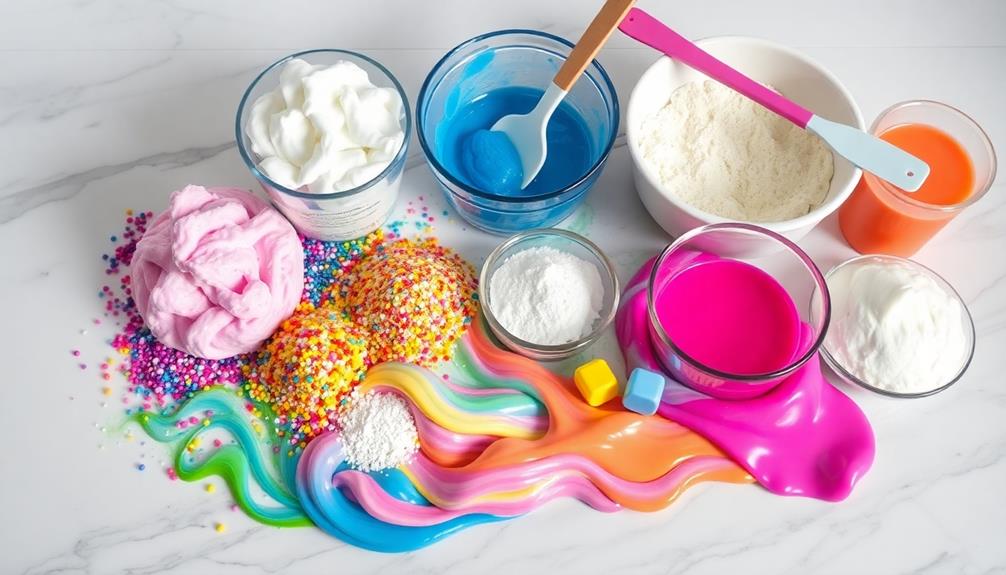
Color Variations and Techniques
Slime offers endless opportunities for creativity, especially when it comes to color variations and customization techniques. You can easily transform your DIY slime by experimenting with different food coloring combinations. Try mixing blue and yellow to create a vibrant green, or blend red and white for a soft pink. If you're feeling adventurous, layer multiple colors for a stunning effect!
Using clear glue instead of white glue can elevate your slime game. This choice allows for a transparent look, making your chosen colors pop even more. You can also create seasonal themes by selecting color palettes specific to holidays, like orange and black for Halloween or red and green for Christmas.
To make your slime even more appealing, consider incorporating glitter, beads, or confetti into your glue mixture. These additions not only enhance the visual interest but also create a fun sensory experience.
Plus, adding scented oils can elevate playtime by providing delightful fragrances, making your slime irresistible. With these techniques, you'll have a personalized slime that's not just fun to play with but also a true reflection of your creative flair!
Textures and Add-ins
Adding unique textures and fun add-ins can take your slime experience to the next level. You can customize your slime by mixing in glitter for a sparkly effect or tiny beads for an exciting texture. These add-ins not only make your slime visually appealing but also provide a delightful sensory experience.
To enhance the aroma, try incorporating scented oils. This simple addition turns your slime into an engaging sensory delight. If you want vibrant colors, experiment with food coloring, blending different shades to create unique variations that match your style.
For a fluffy texture, don't forget to add shaving cream to your slime mixture. This not only increases its volume but also makes it incredibly fun to squish!
You might also want to contemplate adding mini styrofoam balls or confetti. These add-ins create a bumpy, visually interesting slime that adds an extra layer of fun.
With these customization ideas, you can create slimes that aren't just gooey but also exciting to touch, see, and smell. So, gather your favorite textures and add-ins, and let your slime-making creativity shine!
Tips for Successful Slime Making

When you're ready to make slime, knowing the essential ingredients is key to success.
You can save money by sourcing supplies from dollar stores and using travel-sized contact solution for multiple batches.
Don't forget to set up a clean workspace and practice good hygiene before and after your fun slime-making session!
Essential Ingredients Required
Making slime is a fun and creative activity that requires just a few essential ingredients. To get started, you'll need 1 cup of white glue. This is the primary base for your slime, providing that stretchy consistency we all love.
Next, add 1 tablespoon of baking soda; this ingredient helps to thicken the mixture. The vital component for transforming your glue into slime is the slime activator, which in this case is 1 to 2 tablespoons of contact saline solution. This solution reacts with the glue and baking soda to create that perfect slime texture.
For a personalized touch, consider using optional ingredients like food coloring, glitter, or scented oils. These can enhance your slime and make the experience even more enjoyable. Just remember to mix all your ingredients thoroughly for the best results.
You might want to adjust the amount of glue based on how thick or stretchy you want your slime to be.
Lastly, don't forget to wash your hands before and after playing with your slime. This keeps everything clean and prevents any residue from transferring. Enjoy your slime-making adventure!
Cost-Effective Supply Sources
Creating slime doesn't have to break the bank. You can find cost-effective supplies right in your local stores or even your home. For instance, travel-sized contact solution is a fantastic option for slime recipes, allowing you to whip up multiple batches without overspending.
Additionally, managing the mess can be easier when you have designated crafting zones, similar to how pet-free areas help control pet hair spread control pet hair like a pro.
Dollar stores are treasure troves for affordable crafting materials. You can usually score glue, glitter, and food coloring there, making it easy to stick to your budget while having fun.
Plus, don't underestimate the power of household items. Ingredients like baking soda and cornstarch can be great additions to your slime recipes, and you probably already have them on hand.
When you're ready to get messy, protect your surfaces with oilcloth or an outdoor tablecloth. This simple step can keep your workspace tidy and make cleanup a breeze.
Just remember to wash your hands before and after slime play to maintain cleanliness. Soaking your mixing tools in warm soapy water will also help prevent glue from hardening, making your next slime-making session even easier.
Enjoy crafting your slime without overspending!
Cleanup and Safety Tips
To guarantee a fun and safe slime-making experience, it's important to prioritize cleanup and hygiene. Here are some tips to keep in mind for successful slime play:
- Protect surfaces: Use an oilcloth or outdoor tablecloth to simplify cleanup and prevent damage from spills.
- Wash your hands: Hand washing is vital both before and after slime play to maintain hygiene and prevent contamination.
- Soak mixing tools: Immediately soak mixing tools in warm, soapy water to prevent glue from hardening, making cleanup easier.
- Supervise children: Encourage supervision during slime play to guarantee safety and monitor for any potential allergies to ingredients used.
- Store slime properly: Keep slime in an airtight container to prolong its lifespan and keep play areas tidy.
Safety Considerations

When diving into the fun of slime-making, it's crucial to keep safety in mind. One of the key safety considerations is avoiding borax, which can lead to skin irritation and respiratory issues with prolonged exposure.
Instead, opt for safer alternatives like baking soda and saline solution. These options not only reduce health risks but also create a more pliable slime texture.
Always supervise children during slime-making activities. This guarantees they don't ingest any materials or accidentally get them in their eyes.
It's also wise to conduct a patch test on your skin before using new ingredients, especially food coloring or scented oils, to check for allergic reactions.
Keep all slime-making supplies, particularly those that may contain chemicals, out of reach of young children.
Storage and Longevity

To keep your slime fresh, store it in a sealed plastic jar or an airtight container.
Remember, homemade slime usually lasts 2-3 weeks at room temperature, but refrigeration can help it last longer.
If you notice moisture on top, you can easily restore its consistency with a paper towel.
Ideal Storage Containers
Storing slime properly is essential for maintaining its consistency and longevity. To achieve this, you'll want to use the right storage containers. Airtight plastic jars and zip-top bags are your best options, as they help keep moisture in and prevent your slime from drying out.
Here are some tips for selecting the ideal storage containers:
- Choose airtight plastic jars for easy access and visible storage.
- Use zip-top bags for space-saving and portability.
- Always label your containers with the date made to track freshness.
- Consider refrigeration for extended shelf life, especially if your slime is particularly gooey.
- If moisture separation occurs, simply blot the clear liquid on top with a paper towel before re-storing.
Shelf Life Tips
Maintaining your slime's quality and longevity is essential for guaranteeing endless fun. To maximize its shelf life, you'll want to store your slime in a sealed plastic jar or an airtight container. This keeps the moisture locked in and prevents it from drying out. Homemade slime typically lasts about 2-3 weeks at room temperature when stored properly, but you can extend its life by refrigerating it.
Here's a quick reference table for you:
| Storage Method | Shelf Life | Tips |
|---|---|---|
| Room Temperature | 2-3 weeks | Keep away from direct sunlight |
| Refrigerated | Up to 4 weeks | Prevents bacterial growth |
| Moisture Separation Fix | N/A | Blot clear liquid with a towel |
If you notice moisture separation, don't worry! Just blot the clear liquid off the top with a paper towel to restore your slime's consistency. Remember to avoid extreme temperatures to guarantee your slime stays in peak condition. Happy sliming!
Moisture Management Techniques
Proper moisture management is key for keeping your slime fun and functional. To guarantee your slime stays fresh and lasts longer, follow these essential tips for storage and longevity:
- Store your slime in an airtight container or zip-top bag to prevent moisture loss.
- Keep it away from direct sunlight and heat sources to maintain its quality.
- Slime typically lasts for 2-3 weeks at room temperature when stored properly.
- If you notice moisture separation, indicated by a clear liquid on top, gently blot it with a paper towel to restore consistency.
- Knead the slime before each use, as it can become stiff if left unused for a while.
Mess-Free Slime Making

Creating slime can be a fun activity, but it's crucial to keep the mess to a minimum. To achieve mess-free slime making, start by laying down a plastic tablecloth or trash bag to protect your surfaces. Use a bowl with high sides to mix your ingredients, as this helps minimize splashing. Incorporate ingredients slowly and stir gently to avoid overflow.
Here's a quick reference table to help you with your mess-free process:
| Step | Tip | Purpose |
|---|---|---|
| Protect Your Surface | Use a plastic tablecloth or trash bag | Prevent spills and splatters |
| Choose Your Bowl | Opt for one with high sides | Minimize splashing |
| Prepare for Accidents | Keep damp cloths or paper towels nearby | Quick clean-up of drips and spills |
After you've made your slime, it's vital to store finished slime in an airtight container. This prevents it from drying out and keeps your workspace clean when it's not in use. Following these steps will guarantee a fun and mess-free slime-making experience!
Engaging Slime Activities
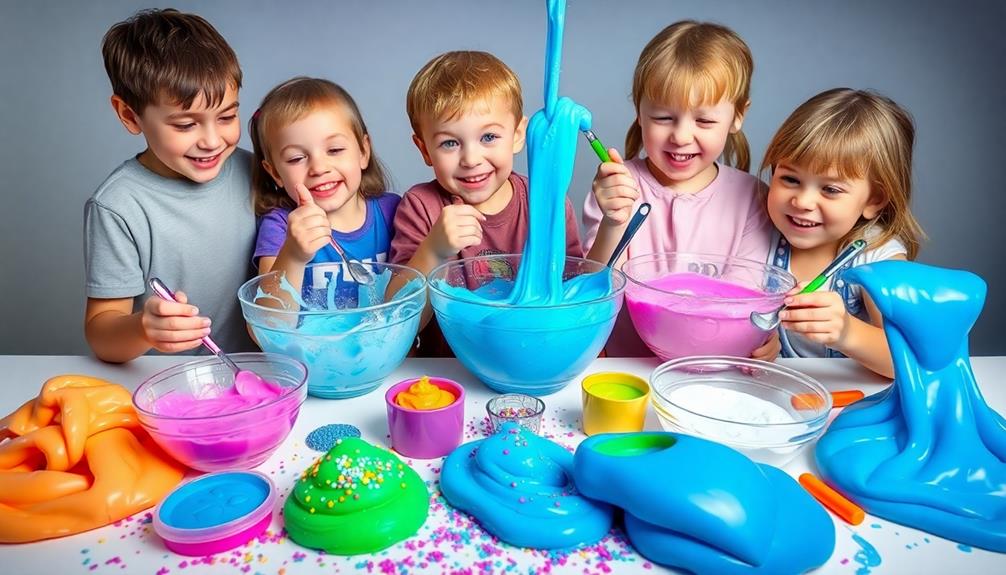
Once you've successfully made your slime and kept the mess under control, it's time to take the fun to the next level with engaging slime activities.
These activities not only keep the excitement flowing but also promote creativity and learning.
Here are five engaging slime activities you can try:
- Treasure Hunt: Hide small toys or figures within the slime for a fun treasure hunt. It encourages exploration and imaginative play.
- Polka-Dot Slime: Mix in soft pom-poms or glitter to create polka-dot slime. This enhances visual appeal and tactile experiences.
- Stretch and Measure: Use rulers and scissors to stretch and measure your slime. This integrates counting and cutting activities that promote math skills.
- Texture Experimentation: Incorporate various household items like beads, gems, or foam balls to experiment with different textures and customize your slime creatively.
- Storage for Future Fun: Store your slime in an airtight container to guarantee it remains playable for future sessions, extending the enjoyment and learning opportunities.
These engaging activities will keep you entertained while providing valuable skills along the way!
Alternative Slime Recipes
If you're looking to mix things up in your slime-making adventures, alternative slime recipes offer exciting variations that can enhance your experience.
One unique option is Glooze slime. To make slime, combine 7 tablespoons of skim milk with 1 tablespoon of vinegar. Let the solids settle, then mix in ¼ teaspoon of baking soda for a slimy texture.
Another fun recipe is Oobleck slime, which is made from 2 cups of cornstarch and 1 cup of water. This non-Newtonian fluid acts like a solid when you apply pressure, but flows like a liquid when you move it slowly.
For a straightforward approach, try the simple slime recipe. Mix 1 oz. of clear glue with ¼ cup of water, add food coloring if you'd like, and stir in ¼ cup of borax solution until the slime forms.
If you want something stretchy, combine ½ cup of polyvinyl alcohol with food coloring, then slowly add 2 teaspoons of borax solution.
Finally, for a bouncy slime, mix ½ cup of polyvinyl alcohol with eight drops of food coloring and 2 teaspoons of borax.
Enjoy experimenting!
Benefits of Making Slime

Making slime offers a fun and interactive way for kids to explore creativity while developing essential skills. This hands-on activity not only entertains but also engages children in learning through play.
As they manipulate the slime, they can experience aspects of key domains of development by enhancing their cognitive and motor skills. Here are some key benefits of making slime:
- Promotes creativity: Kids can create customized creations with various colors and textures.
- Enhances fine motor skills: Mixing and kneading slime improves dexterity and coordination.
- Introduces scientific principles: Children learn about chemical reactions and non-Newtonian fluids in an enjoyable way.
- Builds problem-solving skills: Adjusting ingredients teaches kids how to experiment and achieve the desired consistency.
- Cost-effective fun: Making slime is economical and requires just a few household ingredients.
Frequently Asked Questions
How Do You Make Easy Slime Fast?
To make easy slime fast, mix white glue and baking soda, then add food coloring. Stir in lens cleaner until thickened, knead for consistency, and store in an airtight container to keep it fresh.
How Do You Make 3 Ingredient Slime?
Did you know 95% of kids love playing with slime? To make 3-ingredient slime, mix 1 cup white school glue with 1 tablespoon baking soda, then gradually add 1/2 cup saline solution until it thickens. Enjoy!
What Are Two Easy Ingredients to Make Slime?
To make slime easily, grab white school glue and baking soda. Mix 1 cup of glue with 1 tablespoon of baking soda for a smooth base. You can customize it with food coloring or glitter!
How Do You Make Slime in 5 Minutes?
To make slime in just five minutes, combine white glue and baking soda, then add lens cleaner. Stir, personalize with food coloring, knead until smooth, and store in an airtight container for later fun.
Conclusion
In the kingdom of creativity, making slime is your magic potion. With just a few simple ingredients, you conjure a delightful goo that brings joy and laughter. Each batch you create is like planting a seed in a garden of imagination, where customization blooms into vibrant colors and textures. So grab your tools, embrace the mess, and let your inner alchemist shine. Remember, every squishy creation is a step toward mastering the art of fun!