To make bath bombs, you mix dry ingredients like baking soda, citric acid, and Epsom salts, then combine them with a wet blend of carrier oil and essential oils. Press the mixture firmly into silicone molds and let them sit for at least 24 hours to dry and harden. For personalized gifts, you can customize scents and package them attractively. Keep going to discover more tips and tricks for perfect bath bombs.
Key Takeaways
- Mix dry ingredients like baking soda, citric acid, and Epsom salts thoroughly in a large bowl.
- Combine carrier oil and essential oils separately, then gradually add to dry mixture while stirring.
- Test the mixture’s consistency by squeezing; it should hold shape without crumbling or being too moist.
- Pack firmly into silicone molds, pressing down well to ensure shape stability.
- Allow bath bombs to dry in molds for at least 24 hours before unmolding and packaging.

Ever wondered how to create your own luxurious bath bombs at home? Making bath bombs from scratch is not only fun but also a fantastic way to craft personalized gifts for friends and family. Whether you’re preparing for a special occasion or just want to add a little pampering to your routine, DIY gift ideas like custom bath bombs can be both meaningful and practical. One of the best parts of making your own is choosing the right essential oil blends. These oils transform a simple fizzy ball into a fragrant, soothing experience tailored to your preferences. Popular choices include lavender for relaxation, eucalyptus for invigoration, and citrus blends for an uplifting vibe. Combining these oils allows you to create unique scents that elevate your bath time or make your gifts stand out.
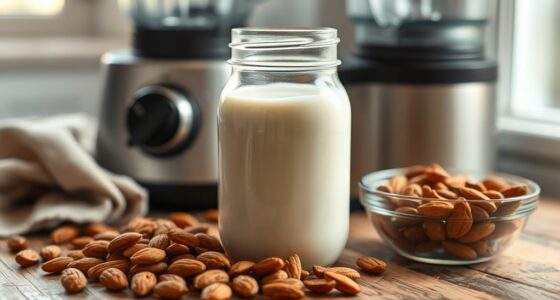
To get started, gather your ingredients: baking soda, citric acid, Epsom salts, cornstarch, carrier oil (like coconut or almond oil), and your essential oils. You’ll also need a mold—silicone molds work great because they’re easy to fill and release. First, mix the dry ingredients—baking soda, citric acid, salts, and cornstarch—in a large bowl. Stir thoroughly to ensure even distribution. In a separate small bowl, combine your carrier oil with a few drops of essential oils, adjusting the amount depending on how strong you want the scent to be. Add the wet mixture gradually to the dry ingredients, stirring constantly. It’s important to do this slowly to prevent the mixture from fizzing prematurely.
Next, test the consistency by pressing a small amount in your hand. It should hold together when squeezed but not be too moist or crumbly. If it’s too dry, add a few more drops of oil; if it’s too wet, sprinkle in a little more baking soda or cornstarch. Once the mixture is just right, pack it firmly into your molds. Press down well to ensure the bath bombs will hold their shape when unmolded. Let them sit for at least 24 hours to dry and harden completely. Incorporating proper ingredient ratios ensures the bath bombs will be both effective and safe for skin contact.
When you’re ready to give your bath bombs as gifts, you can customize them further with DIY gift ideas like wrapping them in clear cellophane, tying with a ribbon, or adding a small tag with instructions or a heartfelt note. Experimenting with different essential oil blends allows you to craft bath bombs suited for relaxation, energizing mornings, or calming evenings. Making your own bath bombs is satisfying, cost-effective, and enables you to tailor scents and ingredients perfectly. Plus, the effort you put into choosing the right essential oil blends and designing the packaging makes these homemade gifts truly special.
Frequently Asked Questions
Can I Add Essential Oils for Personalized Scents?
Yes, you can add essential oils for personalized scents in your bath bombs. Simply mix your chosen essential oil blends into the dry ingredients before combining with wet ingredients. This allows you to customize your fragrance, enhancing your relaxation experience. Be sure not to use too much—about 10-15 drops per batch—to avoid skin irritation. Fragrance customization is easy and fun, giving your bath bombs a unique, soothing scent every time.
How Long Do Homemade Bath Bombs Last?
Imagine a peaceful, bubbly bath inviting you after a long day—your homemade bath bombs can last up to six months if stored properly. Keep them in an airtight container, away from moisture and direct sunlight, to preserve their fizz and scent. Proper shelf life and storage tips guarantee your bath bombs stay fresh, vibrant, and ready to transform your bath into a relaxing escape whenever you need it.
Are There Safe Colorants for Sensitive Skin?
Yes, you can use natural dyes and skin-safe pigments for sensitive skin. Look for ingredients like mica, beetroot powder, or spirulina, which are gentle and non-irritating. Always check labels to verify they’re free from synthetic dyes or harsh chemicals. Testing a small amount first helps prevent reactions. Using these safe colorants ensures your bath bombs look beautiful without causing irritation, making your bath experience relaxing and safe.
Can I Make Bath Bombs Without Baking Soda?
Yes, you can make bath bombs without baking soda by using alternative binding agents like citric acid or cornstarch. These help create the fizz and structure you want. To keep your bath bombs fresh, consider natural preservative options such as vitamin E oil or essential oils. Just mix your ingredients carefully, add your chosen binders, and mold them into your desired shapes for a relaxing, skin-friendly bath experience.
How Do I Store Bath Bombs to Prevent Them From Cracking?
Think of storing bath bombs like keeping delicate jewelry safe; you want to protect them from the environment. To prevent cracking, store your bath bombs in airtight storage containers and control humidity levels. Keep them in a cool, dry place away from moisture and direct sunlight. This way, you preserve their shape and fizz, ensuring they stay perfect until you’re ready to enjoy your relaxing bath.
Conclusion
Now that you know the secret to creating mesmerizing, colorful bath bombs, go grab your ingredients and get crafting! With a little patience and plenty of passion, you’ll produce perfect, plush bath bombs that bring blissful bubbles to your bath. Remember, practice paves the path to perfection, so don’t be discouraged if your first few aren’t flawless. Keep experimenting, enjoy every exciting experience, and soon you’ll be a bath bomb builder with brilliance!