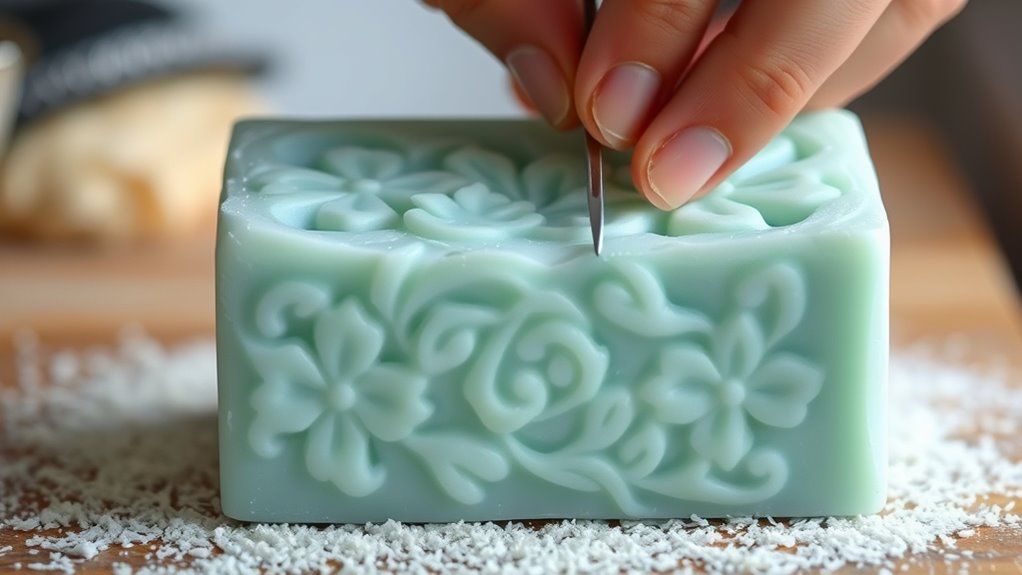
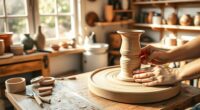
To carve soap, start by choosing a soft, firm soap that’s easy to shape and stable when carved. Use a sharp knife or sculpting tools, working slowly with gentle movements to create detailed designs. Stabilize the soap on a damp cloth or non-slip surface and sketch your pattern lightly first. Carving safely and carefully helps prevent slips, so take your time. If you keep practicing, you’ll discover更多 tips to refine your soap sculpting skills.
Key Takeaways
- Select soft, firm soap that is easy to carve and stable during shaping.
- Use a sharp knife and sketch designs lightly with a toothpick before carving.
- Work slowly with controlled movements, carving away from your body for safety.
- Stabilize the soap on a non-slip surface and carve in a well-lit area.
- Smooth or fix mistakes by reheating or gently sanding the soap surface.
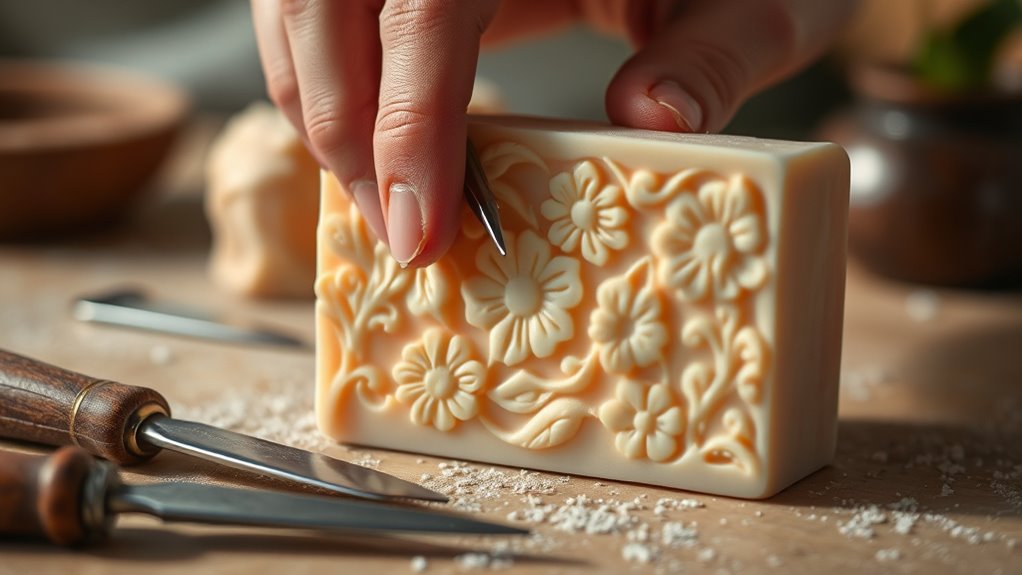
Carving soap is a fun and accessible craft that allows you to create intricate designs with minimal tools. Whether you’re a beginner or someone looking to refine their skills, understanding soap sculpting techniques can make the process enjoyable and successful. Start by choosing a soft, firm soap that’s easy to carve but holds its shape well. Before you begin, gather essential tools like a small, sharp knife, a toothpick, and possibly a craft knife or sculpting tools if you have them. Proper tools help you achieve finer details and prevent frustration.
Carving soap is a simple, fun craft perfect for beginners to create detailed designs with minimal tools.
When you start carving, keep your soap steady by placing it on a non-slip surface or a damp cloth to prevent slipping. Use gentle, controlled movements rather than pressing hard, which can cause the soap to crack or break. With soap sculpting techniques, it’s best to work in layers—start with the basic shape and gradually add details. If you’re creating a detailed figure, sketch lightly on the soap with a toothpick before making deeper cuts. This helps guide your carving and guarantees accuracy. Remember to carve away from your body and keep your fingers clear of the blade to avoid accidents.
Safety tips for soap carving are vital, especially since blades are involved. Always carve in a well-lit area and work slowly to maintain control. When you’re finished, clean your tools thoroughly to keep them sharp and ready for next time. If you’re using multiple tools, designate specific ones for different tasks, like fine details versus bulk removal, to keep your carving precise. Be cautious with the soap’s edges—sharp corners can cause cuts if you’re not careful. If you’re working on a large piece, break it into manageable sections to prevent fatigue and mistakes.
As you become more confident, experiment with different soap colors and scents. You can layer different colored soaps or carve out patterns to add depth to your designs. Remember, patience is key—soap carving is a skill that improves with practice. If you make a mistake, don’t get discouraged; you can often smooth out errors by reheating the soap slightly or sanding rough areas gently. With the right tools, techniques, and safety precautions, you’ll find soap carving to be a rewarding hobby that allows your creativity to shine through. Enjoy every step, and soon you’ll be creating detailed sculptures that impress everyone.
Frequently Asked Questions
What Safety Precautions Should I Take When Carving Soap?
When carving soap, you should wear safety gear like gloves and eye protection to prevent cuts and soap chips from getting in your eyes. Set up a clean, stable workspace with a non-slip surface, and keep your tools within easy reach. Always carve slowly and carefully, paying attention to your hand placement. This way, you minimize risks and guarantee a safe, enjoyable soap carving experience.
Which Tools Are Best for Detailed Soap Carving?
You should use fine, precise soap carving tools like small knives, razors, and gouges for detailed work. These enable better control and intricate carving techniques. Choose sharp, thin blades for delicate lines and wider tools for broader cuts. Always hold tools carefully and carve away from your body. Practicing steady, controlled movements helps achieve clean, detailed designs, making your soap carving more precise and professional-looking.
How Do I Prevent Soap From Cracking During Carving?
To prevent soap from cracking during carving, you should pay attention to its texture and use gentle carving techniques. Softer soap textures are less likely to crack, so choose a soap with a smooth, slightly pliable consistency. Use sharp tools and carve slowly, applying light pressure. Keep the soap cool and moist if it starts to crack, and take your time to make sure clean, precise cuts without damaging the material.
Can I Reuse Soap Scraps for Carving Projects?
Think of recycling soap scraps as turning Cinderella’s pumpkin into a carriage—you transform what’s leftover into something new. Yes, you can reuse soap scrap varieties for carving projects; just melt and mold them into blocks. Mixing different scraps creates unique textures and colors, making your work more vibrant. By recycling soap, you extend your creative journey and reduce waste, turning humble remnants into beautiful, handcrafted art.
How Long Does Soap Carving Typically Take?
Soap carving typically takes anywhere from 30 minutes to several hours, depending on your project’s complexity and your carving techniques. If you’re using soap molds, you can streamline the process by shaping the soap first, then refining details with carving tools. Take your time, work patiently, and remember that intricate designs require more effort. With practice, you’ll become faster and more precise in your soap carving projects.
Conclusion
Now that you’ve carved your soap, you’ve turned a simple bar into a tiny masterpiece, proof of your patience and creativity. It’s funny how something so plain can become art with just a little effort—like turning a blank canvas into a vibrant painting. So, enjoy your finished piece, knowing that even everyday objects can hold surprises. Carving soap isn’t just about shaping; it’s about discovering the beauty in the ordinary, one sculpture at a time.