How-to Guides for Making Things
Create the Perfect Resume: Here’s How
Achieve your dream job with a standout resume that captivates employers—discover the essential steps to create the perfect one inside!
To create the perfect resume, start by gathering relevant information like job titles and accomplishments. Structure it clearly with sections for contact details, a professional summary, work experience, skills, and education. Choose a format that fits your work history, prioritizing ATS compatibility. Write a compelling summary highlighting your strengths, and use bullet points to present your work experience and key responsibilities clearly. Don't forget to showcase both hard and soft skills. Finally, proofread meticulously to catch errors, and consider using professional templates for a polished look. Discover how to elevate your resume even further.
Key Takeaways
- Gather measurable accomplishments, job titles, employment dates, and educational credentials for a strong foundation.
- Tailor your professional summary and work experience sections using relevant keywords from job descriptions.
- Choose an appropriate resume format that aligns with your work history and industry expectations.
- Emphasize both hard and soft skills relevant to the targeted job, ensuring clarity in your skills section.
- Proofread thoroughly, seeking feedback from peers to catch mistakes that could lead to job rejection.
Resume Preparation and Structure
When crafting your resume, start by gathering all relevant professional information to create a solid foundation. This includes measurable accomplishments, job titles, employment dates, and educational credentials. A well-organized resume structure is essential, so make certain you have clear sections such as contact information, a professional summary, work experience, skills, and education.
Consistency in formatting helps maintain readability. Additionally, focusing on content quality and topical authority won't only improve the effectiveness of your resume but can also enhance your overall personal branding.
In your professional summary, briefly highlight your key strengths and career goals, setting the tone for the rest of your resume. When detailing your work experience, use bullet points to clearly outline your achievements and responsibilities. Incorporate action verbs to create impactful statements that showcase your contributions effectively.
Tailor your resume for each job application by incorporating relevant keywords from the job description. This alignment will demonstrate that your skills and experiences match the position's requirements.
Remember to maintain a concise and organized format, ideally limiting your resume to one page. This keeps it skimmable for hiring managers who often spend only seconds reviewing each document. A well-structured resume can greatly improve your chances of landing an interview.
Choosing the Right Format
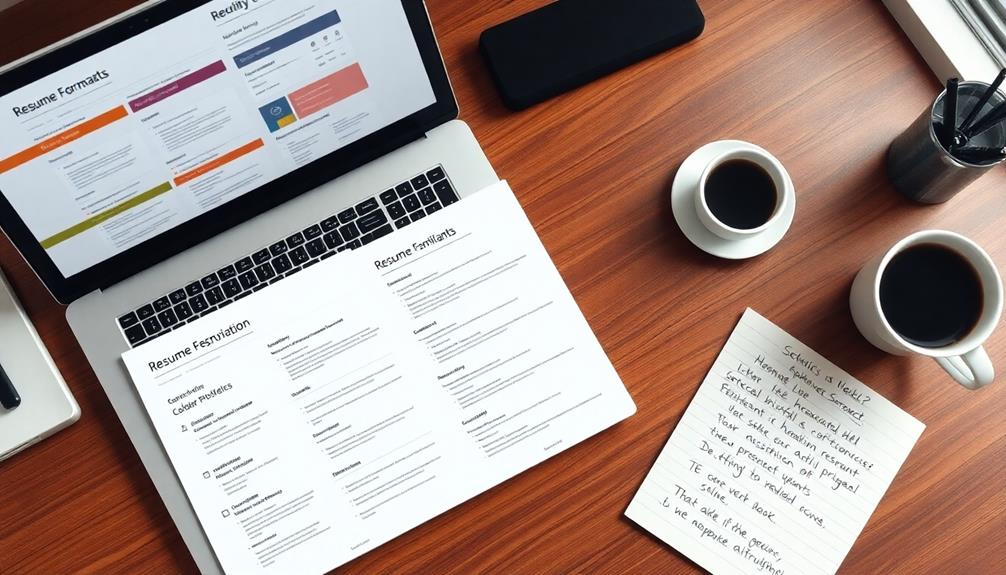
When you're choosing a resume format, think about how it aligns with your work history and the job you're applying for.
A chronological format highlights your career progression, while a functional format focuses on your skills, which can be great if you're changing careers.
Tailoring your format to fit the job and industry standards will make your resume stand out to hiring managers.
Resume Format Types
Choosing the right resume format is essential, as it can greatly impact how effectively you present your qualifications to potential employers. Here are the main resume format types you might consider:
Format Type | Best For | Key Features |
---|---|---|
Chronological Resume | Consistent work history | Lists jobs in reverse order |
Functional Resume | Gaps in employment or career changes | Focuses on skills and qualifications |
Combination Resume | Experienced professionals | Merges skills overview with work history |
Visual Resume | Creative fields | Engaging graphics but must be clear |
The chronological resume format is ideal for candidates with a solid employment record and relevant experience. In contrast, the functional resume is beneficial if you have gaps in your work history or are switching careers. The combination resume allows you to showcase both your skills and detailed work history, making it suitable for diverse professionals. Keep in mind that ATS compatibility is critical, so choose a straightforward design to guarantee your resume is parsed correctly. Select the format that best highlights your strengths and fits your career situation.
Tailoring for Job Applications
Selecting the right resume format can greatly influence your chances of landing an interview. When you tailor your resume format to match the job you're applying for, you increase your chances of catching the hiring manager's eye.
A chronological format is ideal if you have a steady work history, as it highlights your career progression. However, if you're changing careers or have gaps in employment, consider a functional format that emphasizes your skills.
Combination resumes are excellent for seasoned professionals, allowing you to showcase both your relevant skills and detailed work history. Remember, tailoring your resume to the specific industry is crucial; creative fields might appreciate visually appealing designs, while traditional sectors often prefer straightforward layouts.
Don't forget about ATS (Applicant Tracking System) compatibility. Incorporate relevant keywords from the job description within your resume summary and throughout your document to help it pass initial screenings.
A well-chosen format prioritizes clarity and readability, ensuring key sections like work experience, skills, and education stand out for quick reference. By selecting the right format and tailoring your content, you'll make a strong impression on potential employers.
Writing a Compelling Summary
Crafting a compelling summary can set the tone for your entire resume, making it vital to tailor it specifically to the job you're applying for. Your summary should highlight key qualifications and skills that directly align with the employer's needs, ideally in 1-3 concise sentences.
Consider incorporating elements of effective storytelling to engage the reader, similar to techniques used in public speaking, which emphasizes audience engagement strategies.
Use active language and avoid vague statements. Instead of saying, "experienced in sales," specify your achievements, like "achieved 150% of sales targets over two consecutive quarters." This clarity will make your summary stand out.
Focus on your unique selling points that differentiate you from other candidates, such as specialized training or significant accomplishments in your field. This is your chance to grab attention immediately.
Incorporate relevant keywords from the job description to enhance compatibility with Applicant Tracking Systems (ATS) that many employers use for initial resume screening. This step is imperative in ensuring your resume gets noticed.
Lastly, remember to regularly update your summary to reflect new skills, experiences, and career goals. Keeping it relevant as your career progresses will help maintain its impact. A well-crafted summary can be your ticket to landing an interview!
Highlighting Work Experience
When you highlight your work experience, it's crucial to present it in a way that captures the attention of hiring managers quickly. Start by listing your work experience in reverse chronological order. Include the company name, location, job title, and employment dates for clarity. This structure helps employers grasp your career progression at a glance.
Understanding the importance of advance directives in planning can similarly guide your career path by making sure you highlight the right experiences.
Use bullet points to summarize your key responsibilities and achievements for each position. Keep these points concise and impactful. Don't forget to quantify accomplishments whenever possible; for example, you might say you "increased sales by 30% within one year" or "managed a team of 10." These metrics demonstrate tangible results and make your contributions more compelling.
Tailor this section to reflect the skills and experiences most relevant to the job you're applying for. Pay close attention to the job description and incorporate relevant keywords to make certain your work experience aligns with what the employer seeks.
Showcasing Relevant Skills
In showcasing relevant skills, you want to emphasize a blend of hard and soft skills that directly relate to the job you're targeting. This approach not only strengthens your resume skills section but also increases your chances of passing through applicant tracking systems.
Here's how to effectively highlight a mix of hard and soft skills:
- Analyze the Job Description: Identify key skills mentioned and match them with your own.
- Prioritize Transferable Skills: Focus on 6-8 skills that showcase your versatility and adaptability.
- Provide Context: Briefly explain how you acquired and applied these skills in previous roles.
- Update Regularly: Keep your skills section current to reflect industry demands and trends.
Education and Certifications
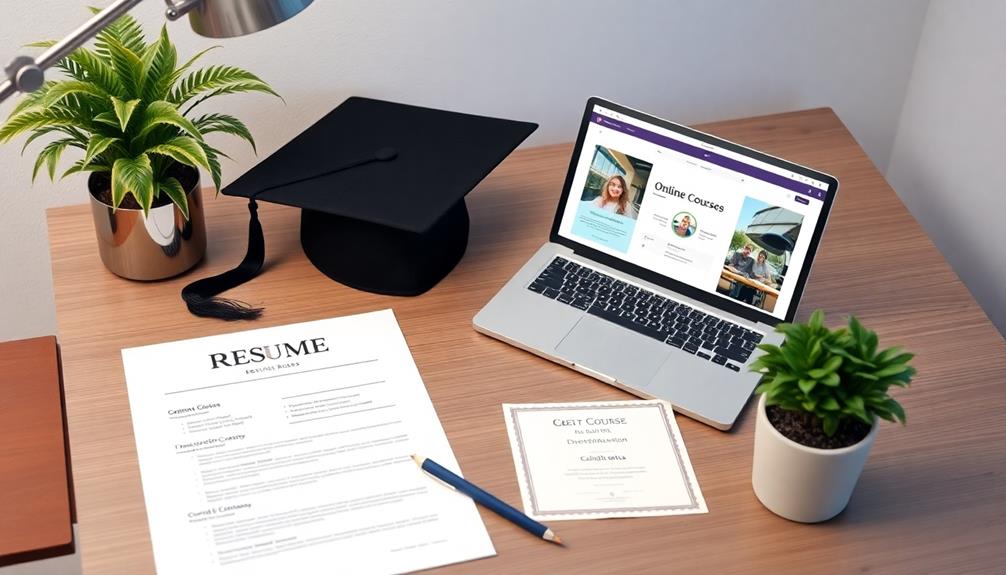
How can you effectively showcase your educational background and certifications to stand out in a competitive job market? Start with your education section, where you clearly list your highest level of education completed, such as degrees, diplomas, or certifications. Make sure to include the institution name, location, and graduation date, as this provides a thorough view of your academic achievements.
Don't forget to highlight relevant coursework, honors, or awards that demonstrate specific knowledge or skills applicable to the job you're pursuing. If you hold any professional certifications or licenses, include these as well, detailing the issuing organization and the dates achieved. This will showcase your specialized qualifications and enhance your candidacy.
If you're currently pursuing a degree or certification, indicate this with "in progress" notation. This reflects your commitment to ongoing professional development, which many employers value.
Keep your education section organized and straightforward. Unless you're a recent graduate, place it towards the bottom of your resume. By following these guidelines, you'll present a polished education section that effectively communicates your qualifications and dedication to potential employers.
Proofreading Your Resume
When you're proofreading your resume, watch out for common mistakes that can cost you the job.
Use tools for error checking, but remember they can miss context-specific errors.
Getting fresh eyes on your resume can also reveal issues you might've overlooked, so don't hesitate to ask for feedback.
Common Mistakes to Avoid
Proofreading your resume is essential for making a strong impression, as even minor mistakes can lead to rejection.
In fact, 80% of hiring managers view typos and grammatical errors as deal-breakers. To help you avoid common pitfalls, here are four mistakes to watch out for:
- Overreliance on Spell Check: While spell-checking tools are helpful, they won't catch every contextual error. Always do a manual proofreading afterward.
- Ignoring Formatting Consistency: Confirm your font styles, sizes, and spacing are uniform throughout. Inconsistent formatting can distract hiring managers and detract from your professionalism.
- Neglecting Fresh Perspectives: Don't hesitate to ask trusted mentors or peers for feedback. They might catch errors you've overlooked and offer insights on clarity and structure.
- Rushing the Process: Take your time when proofreading. Read through your resume multiple times and consider reading it backward to focus on each word individually.
Tools for Error Checking
After addressing common mistakes, it's time to explore effective tools for error checking your resume. Start by utilizing spell-checking tools to catch common spelling errors, but don't rely solely on them. They often miss contextual mistakes that can undermine your professionalism.
One effective strategy is to read your resume backward, helping you focus on individual words and identify overlooked typos or grammatical issues.
Consider printing your resume out for a thorough review on paper. This method allows you to spot formatting inconsistencies and mistakes that mightn't be as visible on a screen.
Additionally, seek feedback from trusted colleagues or mentors; their fresh perspectives can help catch errors you may have missed.
For an added layer of scrutiny, don't hesitate to explore professional proofreading services or specialized software for resume editing. These resources can provide valuable insights and guarantee your document is polished and error-free.
Importance of Fresh Eyes
Having someone else review your resume can make a world of difference. Fresh eyes can spot errors and inconsistencies you might miss, ensuring your professional resume stands out. Consider these points:
- Valuable Insights: Trusted peers or mentors can highlight areas for improvement that you may overlook.
- Typos Matter: Studies show 80% of hiring managers reject resumes due to typos and grammatical errors. Proofreading is essential.
- Backward Reading: Reading your resume backward helps focus on individual words, catching mistakes that affect clarity and professionalism.
- Manual Over Automated: While spell-checkers can help, manual proofreading is vital for identifying nuanced grammar and style issues.
Incorporating feedback and ensuring thorough proofreading can enhance the impact of your resume. A fresh perspective not only clarifies your qualifications but also aligns your document with industry standards.
Utilizing Templates and Tools

Many job seekers find that utilizing professional resume templates and tools can greatly simplify the resume creation process. A well-designed resume template streamlines your layout, making it visually appealing and ensuring you capture hiring managers' attention.
Online resume-building tools often offer step-by-step guidance, helping you incorporate best practices in formatting, content structure, and keyword optimization for ATS compatibility. These tools can save you time, as many resume templates come with pre-written phrases and bullet points tailored to specific industries.
You can easily customize these elements to fit your experience and skills, making your resume more effective. Additionally, using templates enhances consistency in font style and size throughout your document, contributing to overall readability and professionalism.
Importance of a Cover Letter
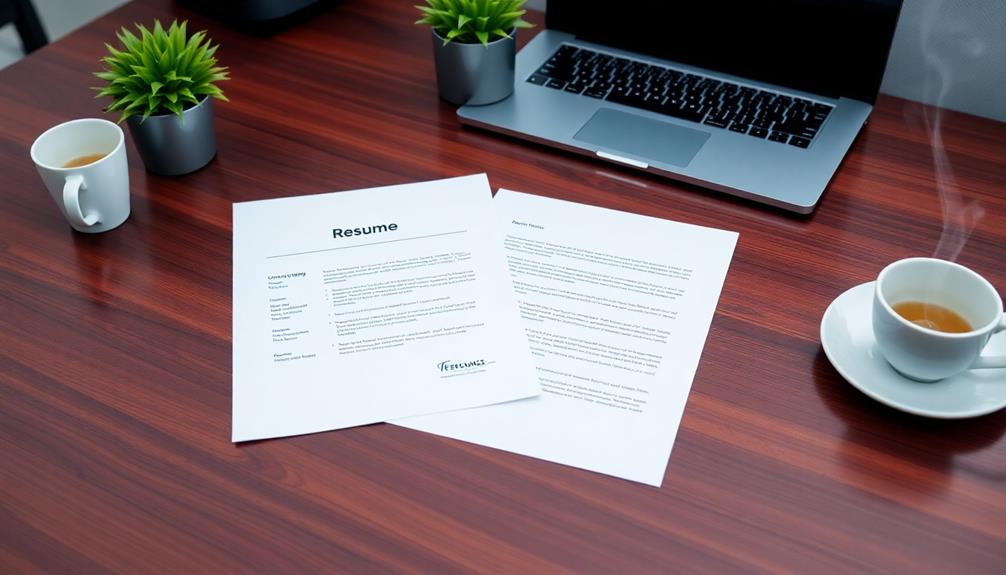
While a polished resume is essential, a well-crafted cover letter can enhance your application and provide a fuller picture of who you're as a candidate.
Here's why you shouldn't overlook this critical component:
- Deeper Insights: A cover letter allows you to elaborate on your experiences and career goals.
- Address Concerns: You can explain employment gaps or career changes in a narrative that a resume can't provide.
- Personalization: Tailoring your cover letter for each application greatly boosts your chances—56% of hiring managers prefer candidates who do this.
- Showcase Achievements: Including specific examples of your achievements and aligning them with the job description helps you stand out.
Frequently Asked Questions
How to Make a Perfect Resume Step by Step?
To make a perfect resume, gather your professional info, choose a suitable format, craft a strong summary, organize your experience with bullet points, and highlight relevant skills using keywords from the job description.
How Do I Make Sure My Resume Is Perfect?
To nail your resume, think of it like assembling a time machine. Tailor it for each job, use clear formatting, highlight measurable achievements, proofread meticulously, and consider professional templates for a polished look. You've got this!
What Are the 7 Basic Steps to Write a Resume?
To write a resume, gather your professional details, choose a format, create a summary, list work experience in reverse order, highlight achievements, include relevant skills, and customize keywords to match the job description.
How to Write a Flawless Resume?
To write a flawless resume, start with a strong summary that highlights your skills. Organize your experience clearly, focus on relevant skills, and proofread carefully. Tailor everything to the job you're applying for.
Conclusion
In crafting your resume, remember it's your personal brand—make it shine like a diamond in a sea of rhinestones. By following these tips, you'll create a compelling document that catches the eye of hiring managers. Don't forget to proofread and tailor your resume for each application; it's a simple yet effective way to stand out. And just like a classic typewriter, a well-structured resume never goes out of style. Now, go ahead and land that dream job!
How-to Guides for Making Things
Make Slime Without Glue: Here’s How
How to create fun and stretchy slime without glue? Discover simple recipes that will surprise you and ignite your creativity!
You can easily make slime without glue using items from your home. Mix equal parts hand soap and hand sanitizer, then refrigerate the mixture for about three hours for the best texture. For clear slime, use a peel-off face mask with PVA and add an activator like Tide. If you want something thicker, microwave crushed glue sticks before mixing with an activator. Feel free to experiment with food coloring and other ingredients like lotion or toothpaste for unique results. Curious about more combinations and tips? There's plenty more to explore that can enhance your slime-making experience!
Key Takeaways
- Combine hand soap and hand sanitizer in equal parts, then refrigerate for about 3 hours for optimal slime texture.
- Use a peel-off face mask containing polyvinyl alcohol (PVA) as the base for clear slime, adding an activator like borax or Tide.
- Microwave crushed glue sticks until melted, then mix with an activator for a thick and fluffy slime consistency.
- Experiment with various household items like toothpaste, lotion, and clay to discover unique slime textures and outcomes.
- Engage with the slime-making community for tips, inspiration, and shared experiences to enhance your slime-making skills.
Understanding No-Glue Slime
No-glue slime offers a fun and creative alternative to traditional slime recipes, allowing you to use everyday household items instead. You might be excited to try making no-glue slime because it eliminates the need for glue, which can sometimes be messy and hard to find. Instead, you can use ingredients like hand soap, hand sanitizer, and even peel-off face masks.
To get started, make sure you have your ingredients ready. A popular method involves mixing hand soap with hand sanitizer, then refrigerating the mixture for several hours to achieve that perfect slime consistency.
For clear slime, a peel-off face mask containing polyvinyl alcohol (PVA) can be combined with an activator like borax or Tide. This method gives you a stretchy result that's visually appealing.
Don't be afraid to experiment! You can try various ingredients like toothpaste, lotion, or shaving cream, but keep in mind that not every combination will yield the desired outcome.
Embrace the trial-and-error nature of no-glue slime making, and you'll discover the joy of crafting your own unique slime creations at home.
Hand Sanitizer Slime Recipe
If you're ready to make some fun and gooey slime, the Hand Sanitizer Slime Recipe is a fantastic choice. This recipe requires just a few simple ingredients: hand soap and hand sanitizer. There's nothing complicated about it, so you can eyeball the measurements as you mix. Start by combining the two until you achieve a liquidy consistency. If you want to add a pop of color, feel free to mix in food coloring before refrigerating.
To get the best results, let's go ahead and refrigerate the mixture for about 3 hours. Once it's set, you'll have a fun, gooey slime that's perfect for playing around with.
Ingredient | Amount Needed | Notes |
---|---|---|
Hand Soap | Eyeball it | Choose your favorite |
Hand Sanitizer | Eyeball it | Check for gel texture |
Food Coloring | Optional | Adds visual appeal |
Refrigeration Time | 3 hours | guarantees proper texture |
This easy alternative to traditional slime making is sure to delight slime enthusiasts looking for no-glue options. You might need to adjust the ratios slightly for your desired texture, but that's part of the fun!
Clear Slime Recipe
Creating clear slime is a simple and satisfying process that requires just a few key ingredients. Start with a peel-off face mask that contains polyvinyl alcohol (PVA), as this will serve as your base ingredient. You'll want to pour the desired amount of the face mask into a mixing bowl.
Next, add an activator to your mixture. You can use borax or Tide—both work well to achieve that perfect slime consistency. Stir the mixture thoroughly until everything is well combined.
If you want to personalize your clear slime, this is the perfect time to add a few drops of food coloring. Combine it well to guarantee even coloring throughout.
Once your mixture is ready, let it set for a few minutes. This resting period helps develop the texture you're looking for. The final product should be stretchy, clear, and visually appealing, reminiscent of the ocean.
You'll love how fun it's to play with your homemade clear slime. Enjoy experimenting with different colors and textures, and remember, the more you mix and stretch, the more satisfying it becomes!
Thick Slime Recipe
Thick slime offers a unique, tactile experience that's both fun and satisfying to make. To start, you'll need to microwave crushed glue sticks until they melt into a fluffy consistency. This step is essential for achieving that thick texture you're after.
Once melted, mix in an activator like Tide. You'll want to stir thoroughly to guarantee even distribution.
If you'd like a splash of color, consider adding food coloring to your melted glue stick mixture. Just a few drops can transform your slime into a vibrant creation. Keep stirring until the color is well combined. The result will be a chunky texture, which mightn't be as smooth as traditional glue-based slimes, but it provides an enjoyable tactile sensation.
Remember to experiment with the proportions of glue sticks and Tide. This trial-and-error approach helps you find the perfect balance for thickness and stretchiness.
Be aware that preparing glue sticks can be challenging, and the effectiveness of your final product may vary compared to other slime recipes. Enjoy the process and the squishy fun of your homemade thick slime!
Experimenting With Ingredients
The beauty of experimenting with ingredients for no-glue slime lies in the endless possibilities it offers. You can use common household items like hand soap, hand sanitizer, toothpaste, lotion, and various creams or clays to create unique slimes.
For instance, when mixing hand soap and hand sanitizer, you don't need precise measurements—just combine them and refrigerate the mixture for the best texture.
If you're interested in making clear slime, check the ingredients of a peel-off face mask for polyvinyl alcohol (PVA) content, as this will guarantee it works effectively as a slime base.
Alternatively, you might try microwaving crushed glue sticks to achieve a fluffy consistency, but be aware that this method can challenge your mixing skills.
Comparing Recipe Outcomes
When you immerse yourself in the world of no-glue slime, comparing the outcomes of different recipes can be eye-opening.
For instance, the hand sanitizer slime offers a liquid consistency that requires refrigeration for about three hours. If mixed with food coloring, it transforms into a vibrant, fun creation.
On the other hand, the clear slime recipe, which uses a peel-off face mask and Tide, results in a stretchy, ocean-like slime, highlighting the importance of polyvinyl alcohol in the face mask.
You might find the thick slime recipe, made from crushed glue sticks, a bit challenging. It often leads to a chunkier product than you might expect.
Your first attempt with toothpaste, lotion, and salt? That one's a "big fat fail" since it won't yield any slime, no matter how much you mix.
Conversely, the second attempt with clay, shaving cream, and warm water shines through, producing one of the fluffiest slimes, even if the preparation is a bit messy.
Tips for Successful Slime
Successful slime-making starts with the right ingredients and techniques. When using hand sanitizer, combine it with hand soap, then refrigerate the mixture for at least three hours to achieve the best consistency.
If you're going for clear slime, make sure your peel-off face mask contains polyvinyl alcohol (PVA) for effective slime formation. Mixing in food coloring during this step adds a fun visual effect.
For a fluffy texture, microwave crushed glue sticks before mixing them with an activator like Tide. Be aware that achieving a smooth mixture can be tricky, so don't get discouraged if it doesn't turn out perfectly the first time.
Don't hesitate to experiment with different combinations, too—adding clay, shaving cream, or warm water can yield unique slime textures.
Share Your Slime Experiences
Sharing your slime adventures can be a fun way to connect with others and learn new techniques. You might've noticed that many slime enthusiasts share their experiences with no-glue slime recipes, showcasing the excitement of experimenting with household ingredients. Some of these recipes include hand sanitizer, face masks, or shaving cream, leading to a mix of successful and unexpected results.
As you engage in this creative process, remember the importance of patience and careful mixing. The right consistency takes time, and sharing your journey can help others understand the nuances involved. It's fascinating to hear how different techniques yield varying outcomes, and your tips could be the spark someone else needs to succeed.
Engaging with the slime-making community not only inspires you to keep experimenting but also helps refine your methods. You'll find that sharing your successes and failures encourages others to do the same, creating a supportive environment for all.
Frequently Asked Questions
How to Make Slime Without Glue That Actually Works?
To make slime without glue, mix hand sanitizer with hand soap, then refrigerate for three hours. Alternatively, try a peel-off face mask with Tide or borax for a stretchy, clear slime variation. Experiment and enjoy!
How to Make Fluffy Slime With 2 Ingredients No Glue?
Want fluffy slime without glue? Start with warm water and clay, mixing until smooth. Then, fold in shaving cream for that airy texture. Add food coloring for flair, and enjoy your fun, creative activity!
How Do You Make Slime With Just Glue and Water Nothing Else?
To make slime with just glue and water, mix equal parts of white school glue and warm water in a bowl. Stir well, let it sit briefly, then knead for a stretchy, pliable texture.
How to Make Slime With Soap and Water Only?
Want to create slime magic? Mix equal parts hand soap and water in a bowl. Stir well, add food coloring if you like, then let it thicken. Refrigerate for extra stretchiness, and enjoy your tactile experience!
Conclusion
Now that you know how to make slime without glue, it's time to release your inner mad scientist! Immerse yourself in these fun recipes, experiment with different ingredients, and watch your creations come to life. Just like whipping up a potion in a wizard's lab, the possibilities are endless. Remember, the best slime is the one you enjoy making, so grab your supplies and start crafting your masterpiece. Share your adventures, and let's make some magical memories together!
How-to Guides for Making Things
Craft a Paper Boat for Fun
Navigate the art of crafting a paper boat for fun and discover creative twists that will take your boating experience to the next level!
Crafting a paper boat is a fun and creative activity you can easily do with just a rectangular piece of paper. Start by folding it in half lengthwise, then bring the top corners down to form a triangle. Fold the bottom flap up, and tuck the triangle down over it for stability. You can decorate your boat with colors or even add a small sail for extra flair! Want to spice things up? Try different sizes, experiment with materials, or even organize a boat race with friends for some friendly competition. There's so much more to explore!
Key Takeaways
- Start with a rectangular paper (8.5 x 11 inches) and fold it in half lengthwise to create a center crease.
- Fold the top corners down to meet the center crease, forming a triangle shape.
- Secure the base by folding the bottom flap up to the triangle's base and then fold the triangle down.
- Enhance your boat's design by adding sails or using thicker paper for better buoyancy.
- Organize a paper boat race to engage in fun and teamwork while exploring physics and buoyancy.
Materials Needed for Crafting
When you're ready to craft your paper boat, what materials do you need? First, grab a rectangular piece of paper; ideally, it should be around 8.5 x 11 inches, but any size works for different scales of boats. Regular printer paper or origami paper is perfect, especially if it's around 20 lb (75 gsm) in weight. This guarantees your paper is easy to fold while still being durable enough to hold its shape.
If you're starting with a larger sheet, you may need scissors to cut it down to the right dimensions. A flat surface is essential for folding, as it helps you create precise creases that enhance your boat's stability and appearance.
Don't forget about optional materials! You can use markers or colored pencils to decorate your boat, adding a personal touch and making it visually appealing. This is a great way to express your creativity while enjoying the process.
Step-by-Step Folding Instructions
To craft your paper boat, start with a rectangular piece of paper, ideally 8.5 x 11 inches.
Begin by folding the paper in half lengthwise, then unfold it to create a center crease. This crease will guide your next folds.
Next, fold the top corners down to meet the center crease, forming a triangle at the top of the paper. Make sure the corners align neatly for a crisp point.
Now, take the bottom flap of the paper and fold it up to the base of the triangle. This will create a secure base for your boat.
Once you've folded the bottom flap, fold the triangle down over it to hold everything in place.
You should now see a shape with a triangle on top and a rectangle below.
Creative Variations and Designs
After mastering the basic folding technique for your paper boat, you can explore a range of creative variations and designs to make your project even more exciting. You can start with the classic origami style, which is simple yet effective. To enhance your creation, consider adding sails made from paper or toothpicks. This not only looks great but also improves functionality.
For those who want their boats to float longer, try incorporating waterproofing techniques using wax or plastic coatings. This way, you can enjoy your paper boats in water without worrying about them falling apart. If you're ready for a challenge, advanced designs like the "Sailing Paper Boat" require more complex folds, mimicking real sailboats.
Here's a quick overview of some creative ideas:
Design Type | Materials Needed | Skill Level |
---|---|---|
Classic Origami | Square paper | Beginner |
Paper Sailboat | Paper, toothpicks | Intermediate |
Waterproof Boat | Wax or plastic coating | Intermediate |
Sailing Paper Boat | Extra sheet, folding skills | Advanced |
Engaging in these variations can improve your fine motor skills and hand-eye coordination, making it fun for everyone!
Fun Activities With Paper Boats
Paper boats aren't just fun to make; they open up a world of enjoyable activities that can spark creativity and learning. As you craft these little vessels, you're not only engaging in a hands-on project but also enhancing fine motor skills. Folding and manipulating the paper helps develop dexterity, which is especially beneficial for children.
Once you've made your boats, why not organize a paper boat race? This friendly competition fosters teamwork and social interaction, bringing friends or family together for a fun-filled event. You can even use recycled materials, promoting an eco-friendly crafting experience while teaching the importance of sustainability.
Floating your boats in water can lead to exciting explorations of buoyancy and physics. You'll discover how different designs affect their ability to float, turning playtime into a lesson in science.
Plus, engaging in these hands-on activities can improve cognitive development and problem-solving skills, making it a well-rounded experience for young learners.
Tips for Successful Boat Making
Creating paper boats can be a delightful experience, but ensuring they float well and look great requires some helpful tips. Start with a rectangular piece of paper, ideally 8.5 x 11 inches, for a balanced boat structure. Make precise folds; sharp creases enhance stability and aesthetics. Thicker paper or cardstock can add buoyancy, allowing your boat to support more weight in water.
Experiment with different sizes and shapes. Smaller boats may capsize easily, while larger ones can hold more cargo. To boost your boat's sailing capabilities, consider adding a small sail made from another piece of paper. Adjust its angle to catch the wind effectively.
Here's a quick reference table to guide you:
Tip | Description |
---|---|
Paper Size | Use 8.5 x 11 inches for balance |
Folds | Make precise, sharp creases |
Material | Thicker paper or cardstock enhances buoyancy |
Experiment | Try various sizes/shapes for performance |
Frequently Asked Questions
How to Make a Paper Boat Step by Step?
To make a paper boat, start with a rectangular paper, fold it in half, shape the top corners into a triangle, tuck the bottom edges, then open it up, adjusting for balance and stability.
How to Make a Boat Out of Paper Plates?
To make a boat out of paper plates, fold one plate in half for the hull, cut another into a triangle for the sail, and decorate it to enhance its visual appeal and identity.
How to Make Fun Paper Craft?
Think of your favorite childhood crafts—remember that joy? You can create fun paper crafts by folding, cutting, and gluing various paper types. Let your imagination soar, and don't forget to add colorful decorations!
What Paper Is Best for Origami Boats?
For origami boats, you'll want lightweight, flexible paper around 70-100 gsm. Washi paper's durability is great, but recycled magazines or newspapers work too, especially if they have glossy finishes to help repel water.
Conclusion
So, grab your materials and let your imagination set sail! With just a few folds, you can transform a simple sheet of paper into a tiny vessel ready to navigate the vast oceans of your creativity. Whether you race them in puddles or decorate them for a whimsical display, these boats bring joy and spark inspiration. Who knew that with a flick of your wrist, you could create a fleet of dreams afloat on paper waves?
How-to Guides for Making Things
DIY Eclipse Glasses: Be Prepared
Learn how to create your own DIY eclipse glasses for safe viewing, but don’t miss these essential tips to ensure your family’s protection!
Creating your own DIY eclipse glasses is a fun and essential way to prepare for viewing an eclipse safely. Start by gathering materials like poster board, certified ISO 12312-2 solar filters, and some tape. Cut the poster board to form frames, making sure you leave holes for your eyes. Attach the solar filter securely, checking for any scratches or light leaks before use. Be certain to test your glasses in a dark room to confirm they're safe. Remember, safety is key—don't take shortcuts. You'll find more creative viewing ideas and tips to keep your family safe.
Key Takeaways
- Use ISO 12312-2 compliant solar filters to ensure safety when creating DIY eclipse glasses.
- Inspect all materials for scratches and ensure secure fittings to prevent eye damage.
- Follow a step-by-step process to create sturdy frames and properly secure solar filters.
- Conduct light leak tests in a dark room to confirm the glasses are safe for viewing.
- Supervise children closely while using eclipse glasses to ensure they fit correctly and safely.
Importance of Eclipse Glasses
When preparing to watch a solar eclipse, understanding the importance of eclipse glasses is vital for protecting your eyes. You need to make sure that you're using certified glasses that comply with ISO 12312-2 standards.
These eclipse glasses are specifically designed to filter out harmful solar radiation, preventing eye damage that can occur even with brief exposure to the sun.
While traditional eclipse glasses are the safest option, alternatives like No. 14 welding glasses and aluminized mylar sheets can also provide adequate protection. However, you must be cautious; not all glasses are created equal, and using non-compliant filters can lead to serious conditions like solar retinopathy.
If you're considering DIY eclipse glasses, it's essential that you construct them with high-quality solar filters. Always test for light leaks to make sure they provide the necessary protection during the eclipse.
Remember, your eyesight is irreplaceable, so don't take any chances. By using the right eclipse glasses, you can safely enjoy this spectacular celestial event without risking your vision.
Stay safe and enjoy the wonder of the solar eclipse!
Materials Needed for DIY Glasses
Gathering the right materials is essential for crafting effective DIY eclipse glasses. You'll need a few specific items to guarantee your glasses are safe and functional. Here's a handy table to help you organize what you'll require:
Material | Purpose |
---|---|
Poster board | To create the frames of the glasses |
ISO 12312-2 compliant solar filter | For safe solar viewing |
Blue painters tape | To securely attach the solar filter |
Scissors to cut | For cutting the frames and filter |
Pen or marker | To mark eye holes and cutting lines |
Start with poster board or card stock, which will form the sturdy frames for your DIY solar eclipse glasses. Make sure to use an ISO 12312-2 compliant solar filter from a reputable source, like NASA-approved options, to guarantee safety while viewing the eclipse. Use scissors to cut the frames and the solar filter to the correct sizes. Finally, a pen or marker will help you accurately position the eye holes and other features before cutting. With these materials in hand, you're ready to get started!
Step-by-Step Creation Process
With all your materials ready, you can start crafting your DIY eclipse glasses. Follow these steps for a safe and enjoyable eclipse viewing experience:
- Lay out your poster board or card stock.
- Draw the outline of your glasses, including eye holes and ear handles.
- Carefully cut out the shapes to create a sturdy frame.
- Measure and cut your certified solar film to guarantee full coverage of the eye holes.
- Secure the solar film with tape or glue, checking for any scratches.
Make sure the solar filter completely covers the eye holes without any gaps that could allow light leaks. This is essential for safe solar viewing during the eclipse.
Once everything's attached, it's time for a final safety test. Head to a dark room, grab a flashlight, and shine it through the glasses. If you see any light leaks, adjust the solar film accordingly.
Testing Your Eclipse Glasses
Before you head outside to watch the eclipse, you need to test your DIY glasses for safety.
Grab a flashlight and check for any light leaks in a dark room—if you see bright light, your glasses mightn't be safe.
If leaks are present, reinforce or replace the solar filter to guarantee you're fully protected when the time comes.
Safety Test Procedure
To guarantee your DIY eclipse glasses are safe for viewing, it's crucial to conduct a thorough safety test in a dark room. Use a flashlight to check for any light leaks, as bright light can indicate potential problems with the solar filter. Follow these steps to guarantee eye safety:
- Find a dark room: Eliminate all sources of ambient light.
- Wear the glasses: Put on your DIY eclipse glasses before testing.
- Shine the flashlight: Point the flashlight directly at the lenses.
- Observe the lenses: Look for any signs of bright light penetrating through.
- Adjust if necessary: If you spot any leaks, reposition or replace the solar film.
If you detect any light leaks during this safety test, address them immediately.
Repeat the process multiple times if needed, confirming no bright light can penetrate the glasses. A successful test run, where no light leaks are detected, indicates that your eclipse glasses are ready for safe viewing during the solar eclipse.
Identifying Light Leaks
During your safety test, identifying light leaks in your DIY eclipse glasses is vital for eye protection. To check for leaks, head into a dark room and use a flashlight. Shine the light directly onto your glasses, observing any bright light that seeps through the frames.
If you notice light leaks, it means your solar filter isn't adequately secured, or there are gaps in the frames that need fixing. Make certain the solar film completely covers the eye holes, guaranteeing enough overlap to prevent any light leakage.
Remember, bright light entering your glasses indicates they aren't safe for eclipse viewing. If you detect any leaks, you'll need to reapply the solar filter or repeat the assembly process to guarantee complete coverage.
Once you've conducted the test, a successful run with no light leaks observed confirms that your eclipse glasses are ready for safe solar viewing. Taking the time to identify and address any light leaks is vital to protect your eyes during the eclipse.
Don't skip this step; your eye safety depends on it!
Alternative Viewing Methods
If you don't have eclipse glasses, you've got plenty of safe alternatives to enjoy the spectacle.
Pinhole projectors, cereal box viewers, and eclipse masks can all help you witness the event without risking your eyesight.
Let's explore how you can create these simple yet effective viewing methods.
Safe Pinhole Projectors
One of the safest and simplest ways to view a solar eclipse is by using a pinhole projector, which protects your eyes while still allowing you to enjoy the spectacle. Creating your own is easy! Just take a piece of thick paper, cut a small hole in it, and hold it in sunlight. As the light passes through the hole, it projects an image of the eclipse onto a flat surface below.
This method is similar to how air purification systems work by filtering out harmful elements, ensuring a clear view of the event.
To enhance your viewing experience, consider these tips:
- Use multiple pinholes to improve visibility.
- Experiment with different distances from the surface to find the clearest image.
- Look for leafy trees; their gaps create a natural pinhole effect.
- Adjust the angle of your paper for ideal projection.
- Make sure you're in a shaded area to reduce glare.
This method allows for a safe eclipse experience, ensuring you can enjoy this cosmic event without risking eye damage.
With a few simple materials and a little creativity, you'll have a fun and effective way to witness the wonder of a solar eclipse!
Cereal Box Viewers
Cereal box viewers offer a simple yet effective way to safely enjoy a solar eclipse. These DIY eclipse viewers utilize a cereal box to create a pinhole projector, allowing you to view the eclipse without risking eye damage.
To make your own, start by cutting two small openings at the bottom of the box—one for viewing and another covered with foil or paper. Puncture a small pinhole in the foil to let sunlight in.
When you're ready to view the eclipse, hold the cereal box with the pinhole facing the sun. You'll see the projection of the eclipse inside the box, ensuring you're not looking directly at the sun. This method makes it easy to view the eclipse safely, especially for children who can engage in the process of making and using the eclipse viewer.
Materials needed include a cereal or shoe box, scissors, tape, and a pin for creating the pinhole. Not only is this an accessible project, but it also provides an engaging hands-on experience that enhances your understanding of solar phenomena.
Eclipse Viewer Masks
Creating eclipse viewer masks offers another exciting way to experience a solar eclipse safely. You can easily make these masks using paper plates and ISO-approved solar eclipse glasses. This method is especially great for kids, providing a comfortable viewing option while keeping safety in mind.
To craft your eclipse viewer mask, follow these steps:
- Use a paper plate as the base.
- Mark and cut slits for the arms of the eclipse glasses.
- Create a cut-out area for the nose and mouth for a snug fit.
- Slide the solar eclipse glasses into the slits, securing them in place.
- Personalize the mask with colorful markers, crayons, or stickers for added fun.
This engaging activity combines creativity and safety, allowing families to enjoy the solar eclipse together. By using eclipse glasses, you can make eclipse glasses safe and guarantee that everyone sees the spectacular event without risking their eyesight.
Safety Precautions for Viewing
Viewing a solar eclipse safely requires careful preparation and the right equipment. To protect your eyes, always use certified eclipse glasses that comply with ISO 12312-2 safety standards. These filters are specifically designed for direct solar viewing and prevent serious damage, like permanent retinal burns, which can occur if you look at the sun unprotected.
Before using your eclipse glasses, inspect them for scratches or damage. Compromised filters may not provide adequate protection, putting your vision at risk.
If you're considering a DIY Solar Eclipse project, verify any homemade viewers meet safety standards. Avoid using alternative viewers that haven't been tested, as they can expose your eyes to harmful solar rays. Remember, direct viewing is dangerous; stick to approved methods.
Supervise children closely during the event, verifying their eclipse glasses fit securely to prevent accidental exposure to direct sunlight.
If you're engaging in indirect viewing methods, choose safe techniques, like projecting the sun's image through a pinhole. By following these safety precautions, you'll guarantee a memorable and safe eclipse experience.
Frequently Asked Questions
Is It Safe to Make Your Own Eclipse Glasses?
Making your own eclipse glasses can be safe if you use ISO-certified solar filters. Ascertain you obtain high-quality materials, test for light leaks, and never look directly at the sun without proper protection.
How to Make Eclipse Viewing Glasses at Home?
To make eclipse viewing glasses at home, gather heavy stock paper, ISO-certified solar filter lenses, and tape. Cut eye holes, secure lenses, and test for leaks in a dark room before using them safely.
How to Make Eclipse Glasses Out of a Cereal Box?
Imagine a sunny day, and you're enthusiastic to watch an eclipse. To make a cereal box viewer, cut openings, cover one with foil, create a pinhole, and position it to safely view the eclipse's projection.
What Can You Use for Solar Eclipse Glasses?
You can use ISO-certified solar filters, like shade 14 welding lenses, for solar eclipse glasses. Sturdy materials such as heavy stock paper or cardboard make excellent frames, ensuring your glasses are safe and durable during viewing.
Conclusion
Making your own eclipse glasses is a fun and rewarding project that guarantees you're ready for the big event. You might be thinking, "Why bother when I can just buy a pair?" But creating them yourself adds a personal touch and can save you money! Plus, there's a sense of accomplishment in crafting something that protects your eyes. With your DIY glasses in hand, you're not just prepared—you're ready to fully enjoy the wonders of the eclipse!
-
Recipes2 weeks ago
The Ultimate Mashed Potatoes Recipe
-
Recipes2 weeks ago
Get Perfect Hard-Boiled Eggs Every Time
-
When Does2 weeks ago
Spring’s Start Date Revealed!
-
When Does2 weeks ago
Time Change Explained: When It Happens
-
Who Makes2 weeks ago
Who Makes Ozempic? The Details
-
Who Makes2 weeks ago
Most Reliable Car Brands Ranked
-
Understanding Concepts2 weeks ago
What Does 666 Mean? The Facts
-
Understanding Concepts2 weeks ago
Dinner Ideas for Tonight!