How-to Guides for Making Things
Tips for Making Friends Easily
Achieve effortless friendships with key strategies that can transform your social life; discover how to connect with others genuinely and meaningfully.
Making friends easily starts with knowing where to meet new people. Join local groups or take classes that match your interests. Volunteering can also connect you with like-minded individuals. When you meet someone new, use open-ended questions to spark engaging conversations and practice active listening for deeper connections. Be genuine and authentic; people appreciate sincerity. Don't forget to follow up to strengthen those budding friendships. Regular check-ins can maintain your connections over time. If you're looking to enhance your social skills further, there's plenty more to explore in nurturing friendships.
Key Takeaways
- Join local groups, classes, or volunteer opportunities to meet people with similar interests and values in your community.
- Utilize online platforms like Meetup or Bumble BFF to find and connect with potential friends who share your hobbies.
- Start conversations using open-ended questions and practice active listening to foster deeper connections and mutual understanding.
- Schedule regular check-ins and celebrate milestones to maintain and strengthen friendships over time.
- Acknowledge feelings of loneliness and participate in community activities to build connections and enhance your emotional well-being.
Where to Meet New People
Meeting new people can be easier than you think, especially when you know where to look. Start by exploring local groups that align with your interests. Joining a book club or a sports league gives you a structured environment to connect with others who share your passions.
Engaging in these activities can foster a sense of community, as you benefit from the power of online communities that extend beyond physical interactions. Community centers are also fantastic places to meet people; they often offer classes in dance, art, or languages that encourage social interaction.
Volunteering is another great way to forge new friendships. By giving your time to community organizations like shelters or hospitals, you'll find yourself surrounded by individuals who share your commitment to service. This shared purpose can spark meaningful connections.
Don't overlook the power of attending local events, such as fairs, concerts, or art shows. These gatherings create a relaxed atmosphere where casual encounters can lead to lasting friendships.
Additionally, frequent visits to neighborhood coffee shops or community hubs can help you become familiar with local patrons, opening up opportunities for casual conversations.
Online Platforms for Friendships
When you're looking to make friends online, choosing the right platform can make all the difference.
Whether you prefer interest-based sites like Meetup or gaming communities, each option offers unique ways to connect.
Focus on building genuine connections by engaging consistently and sharing your passions with others.
Choosing the Right Platform
In today's digital age, choosing the right platform to make friends can greatly enhance your chances of forming meaningful connections. With so many online platforms available, it's crucial to select one that aligns with your interests and goals. Here's a quick guide to help you:
Platform | Best For |
---|---|
Meetup | Meeting new people in local activities |
Bumble BFF | Finding friends with similar interests |
Facebook Groups | Engaging with communities around hobbies |
Discord/Steam | Connecting through shared gaming experiences |
Skillshare/Coursera | Learning new skills while meeting others |
Using social media effectively can facilitate friendships, especially when you join groups or communities centered around your passions. If you enjoy gaming, platforms like Discord and Steam allow you to meet new people based on shared interests in video games. Alternatively, online forums like Reddit can lead you to individuals who share similar topics of interest. Finally, consider participating in virtual classes, which not only help you learn but also provide opportunities to connect with others. Choose wisely, and you're on your way to meaningful friendships!
Building Genuine Connections
Choosing the right platform sets the stage for building genuine connections. Online spaces like Meetup, Bumble BFF, and Facebook groups allow you to meet people who share similar interests and hobbies.
Engaging in forums on Reddit or joining online gaming communities can also lead to meaningful interactions. These platforms not only help you find friends but also provide conversation starters to break the ice.
Here are some tips to enhance your online friendship experience:
- Explore diverse platforms: Use various sites to find the right fit for your interests.
- Participate actively: Engage in discussions or gaming sessions to bond with others.
- Utilize features: Take advantage of icebreaker questions and interest tags to spark conversations.
- Stay in touch: Once you've made a connection, don't hesitate to reach out through direct messages or group chats.
Initiating Conversations

When you start a conversation, try using open-ended questions to spark engaging dialogue.
For instance, discussing topics like seniors texting humor can lighten the mood and create a connection. Sharing a personal anecdote can make the exchange feel more relatable and build trust.
Don't forget to practice active listening; nodding and maintaining eye contact shows you care about what the other person has to say.
Use Open-Ended Questions
Engaging someone with open-ended questions can spark lively conversations and foster genuine connections. These questions encourage longer responses, allowing others to share more about themselves and helping you connect with people on a deeper level. Instead of simple yes or no answers, you invite elaboration, which can lead to more meaningful discussions that strengthen friendship.
Here are some effective open-ended questions to get started:
- "What do you enjoy most about your job?"
- "How did you get into your favorite hobby?"
- "What's a memorable trip you've taken, and what made it special?"
- "If you could learn any new skill, what would it be and why?"
Using open-ended questions reduces the pressure of conversation by shifting the focus onto the other person, making them feel valued and heard.
Research shows that engaging in these meaningful conversations can considerably increase feelings of closeness and rapport. As you practice this technique, you'll enhance your conversational skills, making it easier to navigate social situations and build lasting friendships over time.
Share Personal Anecdotes
Sharing personal anecdotes can be a fantastic way to initiate conversations and create connections. When you share a light-hearted or relatable story, it often breaks the ice, making others feel comfortable enough to open up and share their own experiences. Aim for moments that evoke laughter or warmth; these tend to create a positive atmosphere.
As you recount your anecdotes, consider using open-ended questions related to your story. This invites deeper discussions, allowing the conversation to flow naturally. For instance, if you share a funny travel mishap, you might ask, "Have you ever had a trip go hilariously wrong?" This not only engages the other person but also fosters a sense of connection.
Authenticity is key in these interactions. Make sure your anecdotes reflect your true self, as genuine stories resonate more with others.
Practice Active Listening
Active listening is a powerful tool that can transform your conversations and help you make friends more easily. By making a conscious effort to engage fully with your conversation partner, you become a good listener, fostering deeper connections.
Here's how to practice active listening effectively:
- Concentrate on the speaker: Put away distractions and focus entirely on what they're saying.
- Use follow-up questions: After someone shares a thought, ask questions that encourage them to elaborate, keeping the conversation going.
- Employ non-verbal cues: Nod and maintain eye contact to show you're engaged and empathetic.
- Reflect back their thoughts: Paraphrasing what they've said can validate their feelings and deepen the exchange.
Building Genuine Connections

Building genuine connections starts with authenticity; people naturally gravitate toward those who are true to themselves. When you're honest about who you are, others feel comfortable being themselves around you. This creates a solid foundation for friendship.
Engaging in shared activities or hobbies can further strengthen these bonds. Whether it's a book club or a sports team, common interests lead to deeper conversations and connections.
Active listening is key in this process. When you listen attentively, you show that you value what the other person is saying. This respect encourages them to open up and share more about their thoughts and feelings.
Additionally, demonstrating empathy helps you understand their experiences better, fostering trust between you. When people feel understood, they're more likely to connect on a deeper level.
Maintaining Friendships Effectively
To maintain friendships effectively, you should schedule regular check-ins and celebrate milestones together.
Sharing heartfelt expressions, such as Romantic Love Shayari 2022, can enhance your emotional connection and show your friends how much you care.
Open and honest communication is key to resolving conflicts and deepening your bond.
Schedule Regular Check-Ins
Regular check-ins act as the lifeline of lasting friendships, ensuring that connections remain vibrant and meaningful. Scheduling these interactions at least once a month can greatly strengthen your friendships and foster deeper emotional connections.
Here are some tips to help you maintain effective communication:
- Set Reminders: Use digital calendars or reminders to prioritize check-ins, preventing friendships from fading.
- Diversify Communication: Mix it up with texts, phone calls, or video chats to keep check-ins personal and engaging.
- Ask and Share: During check-ins, ask your friends about their well-being and share updates about your own life for a reciprocal dialogue.
- Celebrate Milestones: Recognizing important events, like birthdays or achievements, shows appreciation and thoughtfulness.
Celebrate Milestones Together
Celebrating milestones together can greatly enhance your friendships and strengthen your emotional bonds. When you acknowledge important events like birthdays, promotions, or personal achievements, you demonstrate your support for each other's successes. This not only reinforces your emotional connection but also makes your friendship more meaningful.
Milestone | Thoughtful Gesture |
---|---|
Birthday | Personalized gift or card |
Promotion | Group outing or celebration |
Personal Achievement | Special dinner or surprise event |
Whether it's a small gift or a heartfelt note, these gestures can enhance feelings of appreciation and strengthen the bond between you and your friends. Organizing group celebrations fosters a sense of community, allowing everyone to feel included and valued.
Research shows that celebrating achievements together leads to increased happiness and satisfaction in friendships, helping both of you feel more connected and supported. Regularly commemorating milestones not only creates lasting memories but also encourages open communication about each other's lives, ensuring your friendship remains vibrant and fulfilling. So, take the time to celebrate together—you'll be glad you did!
Communicate Openly and Honestly
Effective friendships thrive on open and honest communication. By sharing your thoughts and feelings, you create a deeper understanding that strengthens your bond.
Here are some essential tips to maintain effective friendships through open dialogue:
- Express appreciation regularly: Let your friends know what you value about them. Gratitude enhances relationship satisfaction.
- Engage in honest conversations: Discuss your boundaries and needs openly. This helps prevent misunderstandings and keeps your friendship healthy.
- Be vulnerable: Sharing personal experiences can deepen emotional connections. When you open up, you encourage reciprocity, allowing your friendships to flourish.
- Follow up after conflicts: Address issues with open communication to resolve them effectively. This builds trust and commitment within your friendship.
Overcoming Social Anxiety
Social anxiety affects millions of adults, making it essential to recognize that you're not alone in feeling uncomfortable in social situations. About 15 million people in the U.S. experience similar feelings.
To overcome social anxiety, start by gradually exposing yourself to social settings. Small gatherings can provide excellent opportunities to talk without overwhelming pressure.
Practice mindfulness techniques like deep breathing or grounding exercises to manage those anxious feelings in the moment.
Remember, it's vital to set realistic expectations for your social interactions. Not every attempt at making friends will lead to an instant connection, and that's perfectly okay. It takes time to build relationships.
To ease your nerves, prepare conversation topics or icebreakers in advance. This preparation can help you feel more confident and ready to engage with others.
Focus on the experience rather than the outcome, allowing yourself to enjoy the process of meeting new people. With patience and practice, you'll find that overcoming social anxiety can lead to meaningful connections and friendships.
Embrace each opportunity to talk, and trust that you're moving in the right direction.
The Power of Active Listening
Active listening is an essential skill that can transform your interactions and strengthen your connections with others. By practicing active listening, you enhance communication and show that you genuinely care about what others have to say.
This approach not only makes you more trustworthy but also fosters empathy, paving the way for deeper conversations.
To become a better active listener, consider these strategies:
- Maintain eye contact and smile: This simple action creates a welcoming environment and encourages openness.
- Ask follow-up questions: Demonstrating genuine interest in someone's thoughts can lead to more meaningful exchanges.
- Reflect on what they say: Summarizing or paraphrasing their words shows that you value their feelings and opinions.
- Use non-verbal cues: Nodding or leaning slightly forward can signal that you're engaged and present in the conversation.
Establishing Healthy Boundaries
Establishing healthy boundaries is vital for nurturing strong friendships and guaranteeing that both you and your friends feel respected and valued. By clearly communicating your needs and limits, you foster mutual respect, which is the foundation of any meaningful relationship.
Recognize your emotional limits and physical boundaries to avoid burnout. Setting boundaries can include defining how often you want to communicate, what personal information you're comfortable sharing, and how much time you can dedicate to the friendship.
When you're honest about your limits, your friends will appreciate your clarity and will be more likely to respect those boundaries. Regularly reassessing and adjusting boundaries as your friendship evolves is also significant.
This ongoing communication helps confirm both parties feel valued and understood. If something feels off, don't hesitate to bring it up; it can lead to a stronger connection.
Establishing healthy boundaries isn't just about keeping others at a distance; it's about creating a safe space for genuine interaction. So, take the time to communicate your needs, and encourage your friends to do the same. In doing so, you'll cultivate deeper, more fulfilling friendships.
Dealing With Loneliness

Loneliness can feel like a heavy blanket, suffocating and isolating. Acknowledging these feelings is your first step toward overcoming them.
Self-awareness can lead to better coping strategies and emotional resilience. Here are some effective ways to combat loneliness and start making friends:
- Engage in community activities: Join local events or clubs to immerse yourself in social settings.
- Volunteer: Helping others not only distracts you but also strengthens your sense of belonging. Research shows that regular volunteers often feel more connected to their communities.
- Join support groups: Find groups focused on shared interests or experiences. Connecting with others who understand your feelings can greatly alleviate loneliness.
- Practice self-compassion: Nurturing your emotional well-being fosters a sense of belonging within yourself, making it easier to reach out to others.
Understanding the Importance of Connection

Everyone knows that human connection is essential for our well-being. Building strong relationships isn't just about having good friends; it's about enhancing your mental health.
Studies show that individuals with close friendships experience lower rates of anxiety and depression. When you nurture these connections, you're not only improving your emotional well-being but also boosting your longevity. In fact, people with strong relationships are 50% more likely to live longer.
Having friends provides important emotional support during tough times, helping you build resilience against stress and adversity. This support is critical for maneuvering life's challenges, as it allows you to cope more effectively.
Frequently Asked Questions
What Is the Easiest Way to Make Friends?
The easiest way to make friends is to engage in activities you enjoy. Whether it's joining a club, volunteering, or attending events, being open and approachable helps you connect with others naturally and meaningfully.
How Do People Make New Friends so Easily?
Isn't it funny how effortlessly people make friends? You engage in social activities, engage openly, and listen closely. You'll find that genuine interest and shared experiences turn strangers into friends faster than you think.
How Come I Struggle to Make Friends?
You might struggle to make friends because social opportunities decrease as adults, anxiety holds you back, and you may not actively seek connections. Also, starting conversations can be intimidating, and friendships require time and effort to develop.
How Do You Make Friends in 10 Easy Steps?
To make friends, start by engaging in activities you enjoy, volunteering, and reaching out to others. Be open, ask questions, and listen actively. Remember, building connections takes time, so be patient and persistent.
Conclusion
Making friends doesn't have to be intimidating; it's about taking those small steps that lead to meaningful connections. Remember, every great friendship starts with a simple "hello." By being open, approachable, and genuinely interested in others, you can transform fleeting encounters into lasting bonds. So, why wait? Immerse yourself in the world around you, and watch as friendships blossom. After all, in a world that sometimes feels lonely, isn't it worth it to forge those connections?
How-to Guides for Making Things
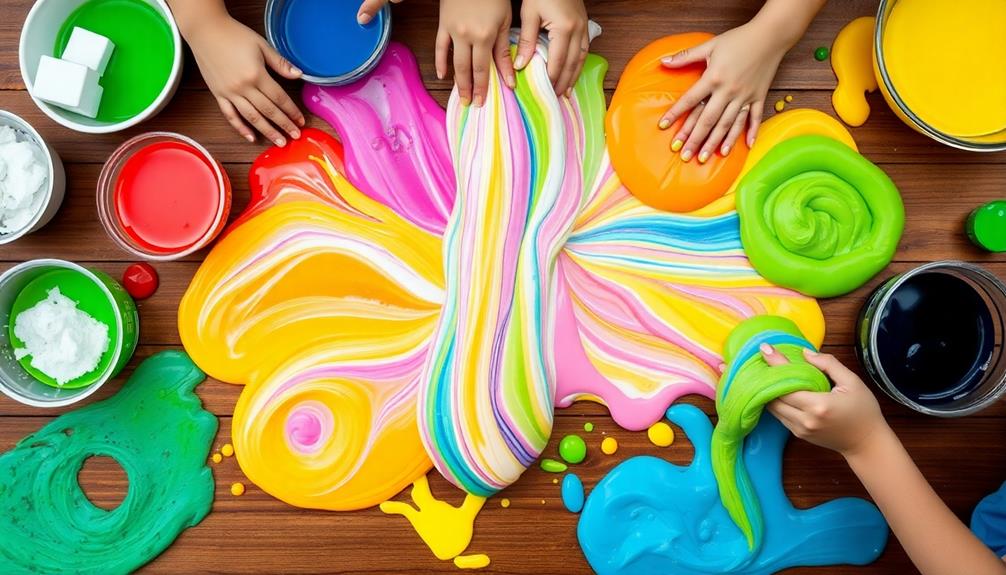
Make Slime Without Glue: Here’s How
How to create fun and stretchy slime without glue? Discover simple recipes that will surprise you and ignite your creativity!
You can easily make slime without glue using items from your home. Mix equal parts hand soap and hand sanitizer, then refrigerate the mixture for about three hours for the best texture. For clear slime, use a peel-off face mask with PVA and add an activator like Tide. If you want something thicker, microwave crushed glue sticks before mixing with an activator. Feel free to experiment with food coloring and other ingredients like lotion or toothpaste for unique results. Curious about more combinations and tips? There's plenty more to explore that can enhance your slime-making experience!
Key Takeaways
- Combine hand soap and hand sanitizer in equal parts, then refrigerate for about 3 hours for optimal slime texture.
- Use a peel-off face mask containing polyvinyl alcohol (PVA) as the base for clear slime, adding an activator like borax or Tide.
- Microwave crushed glue sticks until melted, then mix with an activator for a thick and fluffy slime consistency.
- Experiment with various household items like toothpaste, lotion, and clay to discover unique slime textures and outcomes.
- Engage with the slime-making community for tips, inspiration, and shared experiences to enhance your slime-making skills.
Understanding No-Glue Slime
No-glue slime offers a fun and creative alternative to traditional slime recipes, allowing you to use everyday household items instead. You might be excited to try making no-glue slime because it eliminates the need for glue, which can sometimes be messy and hard to find. Instead, you can use ingredients like hand soap, hand sanitizer, and even peel-off face masks.
To get started, make sure you have your ingredients ready. A popular method involves mixing hand soap with hand sanitizer, then refrigerating the mixture for several hours to achieve that perfect slime consistency.
For clear slime, a peel-off face mask containing polyvinyl alcohol (PVA) can be combined with an activator like borax or Tide. This method gives you a stretchy result that's visually appealing.
Don't be afraid to experiment! You can try various ingredients like toothpaste, lotion, or shaving cream, but keep in mind that not every combination will yield the desired outcome.
Embrace the trial-and-error nature of no-glue slime making, and you'll discover the joy of crafting your own unique slime creations at home.
Hand Sanitizer Slime Recipe
If you're ready to make some fun and gooey slime, the Hand Sanitizer Slime Recipe is a fantastic choice. This recipe requires just a few simple ingredients: hand soap and hand sanitizer. There's nothing complicated about it, so you can eyeball the measurements as you mix. Start by combining the two until you achieve a liquidy consistency. If you want to add a pop of color, feel free to mix in food coloring before refrigerating.
To get the best results, let's go ahead and refrigerate the mixture for about 3 hours. Once it's set, you'll have a fun, gooey slime that's perfect for playing around with.
Ingredient | Amount Needed | Notes |
---|---|---|
Hand Soap | Eyeball it | Choose your favorite |
Hand Sanitizer | Eyeball it | Check for gel texture |
Food Coloring | Optional | Adds visual appeal |
Refrigeration Time | 3 hours | guarantees proper texture |
This easy alternative to traditional slime making is sure to delight slime enthusiasts looking for no-glue options. You might need to adjust the ratios slightly for your desired texture, but that's part of the fun!
Clear Slime Recipe
Creating clear slime is a simple and satisfying process that requires just a few key ingredients. Start with a peel-off face mask that contains polyvinyl alcohol (PVA), as this will serve as your base ingredient. You'll want to pour the desired amount of the face mask into a mixing bowl.
Next, add an activator to your mixture. You can use borax or Tide—both work well to achieve that perfect slime consistency. Stir the mixture thoroughly until everything is well combined.
If you want to personalize your clear slime, this is the perfect time to add a few drops of food coloring. Combine it well to guarantee even coloring throughout.
Once your mixture is ready, let it set for a few minutes. This resting period helps develop the texture you're looking for. The final product should be stretchy, clear, and visually appealing, reminiscent of the ocean.
You'll love how fun it's to play with your homemade clear slime. Enjoy experimenting with different colors and textures, and remember, the more you mix and stretch, the more satisfying it becomes!
Thick Slime Recipe
Thick slime offers a unique, tactile experience that's both fun and satisfying to make. To start, you'll need to microwave crushed glue sticks until they melt into a fluffy consistency. This step is essential for achieving that thick texture you're after.
Once melted, mix in an activator like Tide. You'll want to stir thoroughly to guarantee even distribution.
If you'd like a splash of color, consider adding food coloring to your melted glue stick mixture. Just a few drops can transform your slime into a vibrant creation. Keep stirring until the color is well combined. The result will be a chunky texture, which mightn't be as smooth as traditional glue-based slimes, but it provides an enjoyable tactile sensation.
Remember to experiment with the proportions of glue sticks and Tide. This trial-and-error approach helps you find the perfect balance for thickness and stretchiness.
Be aware that preparing glue sticks can be challenging, and the effectiveness of your final product may vary compared to other slime recipes. Enjoy the process and the squishy fun of your homemade thick slime!
Experimenting With Ingredients
The beauty of experimenting with ingredients for no-glue slime lies in the endless possibilities it offers. You can use common household items like hand soap, hand sanitizer, toothpaste, lotion, and various creams or clays to create unique slimes.
For instance, when mixing hand soap and hand sanitizer, you don't need precise measurements—just combine them and refrigerate the mixture for the best texture.
If you're interested in making clear slime, check the ingredients of a peel-off face mask for polyvinyl alcohol (PVA) content, as this will guarantee it works effectively as a slime base.
Alternatively, you might try microwaving crushed glue sticks to achieve a fluffy consistency, but be aware that this method can challenge your mixing skills.
Comparing Recipe Outcomes
When you immerse yourself in the world of no-glue slime, comparing the outcomes of different recipes can be eye-opening.
For instance, the hand sanitizer slime offers a liquid consistency that requires refrigeration for about three hours. If mixed with food coloring, it transforms into a vibrant, fun creation.
On the other hand, the clear slime recipe, which uses a peel-off face mask and Tide, results in a stretchy, ocean-like slime, highlighting the importance of polyvinyl alcohol in the face mask.
You might find the thick slime recipe, made from crushed glue sticks, a bit challenging. It often leads to a chunkier product than you might expect.
Your first attempt with toothpaste, lotion, and salt? That one's a "big fat fail" since it won't yield any slime, no matter how much you mix.
Conversely, the second attempt with clay, shaving cream, and warm water shines through, producing one of the fluffiest slimes, even if the preparation is a bit messy.
Tips for Successful Slime
Successful slime-making starts with the right ingredients and techniques. When using hand sanitizer, combine it with hand soap, then refrigerate the mixture for at least three hours to achieve the best consistency.
If you're going for clear slime, make sure your peel-off face mask contains polyvinyl alcohol (PVA) for effective slime formation. Mixing in food coloring during this step adds a fun visual effect.
For a fluffy texture, microwave crushed glue sticks before mixing them with an activator like Tide. Be aware that achieving a smooth mixture can be tricky, so don't get discouraged if it doesn't turn out perfectly the first time.
Don't hesitate to experiment with different combinations, too—adding clay, shaving cream, or warm water can yield unique slime textures.
Share Your Slime Experiences
Sharing your slime adventures can be a fun way to connect with others and learn new techniques. You might've noticed that many slime enthusiasts share their experiences with no-glue slime recipes, showcasing the excitement of experimenting with household ingredients. Some of these recipes include hand sanitizer, face masks, or shaving cream, leading to a mix of successful and unexpected results.
As you engage in this creative process, remember the importance of patience and careful mixing. The right consistency takes time, and sharing your journey can help others understand the nuances involved. It's fascinating to hear how different techniques yield varying outcomes, and your tips could be the spark someone else needs to succeed.
Engaging with the slime-making community not only inspires you to keep experimenting but also helps refine your methods. You'll find that sharing your successes and failures encourages others to do the same, creating a supportive environment for all.
Frequently Asked Questions
How to Make Slime Without Glue That Actually Works?
To make slime without glue, mix hand sanitizer with hand soap, then refrigerate for three hours. Alternatively, try a peel-off face mask with Tide or borax for a stretchy, clear slime variation. Experiment and enjoy!
How to Make Fluffy Slime With 2 Ingredients No Glue?
Want fluffy slime without glue? Start with warm water and clay, mixing until smooth. Then, fold in shaving cream for that airy texture. Add food coloring for flair, and enjoy your fun, creative activity!
How Do You Make Slime With Just Glue and Water Nothing Else?
To make slime with just glue and water, mix equal parts of white school glue and warm water in a bowl. Stir well, let it sit briefly, then knead for a stretchy, pliable texture.
How to Make Slime With Soap and Water Only?
Want to create slime magic? Mix equal parts hand soap and water in a bowl. Stir well, add food coloring if you like, then let it thicken. Refrigerate for extra stretchiness, and enjoy your tactile experience!
Conclusion
Now that you know how to make slime without glue, it's time to release your inner mad scientist! Immerse yourself in these fun recipes, experiment with different ingredients, and watch your creations come to life. Just like whipping up a potion in a wizard's lab, the possibilities are endless. Remember, the best slime is the one you enjoy making, so grab your supplies and start crafting your masterpiece. Share your adventures, and let's make some magical memories together!
How-to Guides for Making Things
Craft a Paper Boat for Fun
Navigate the art of crafting a paper boat for fun and discover creative twists that will take your boating experience to the next level!
Crafting a paper boat is a fun and creative activity you can easily do with just a rectangular piece of paper. Start by folding it in half lengthwise, then bring the top corners down to form a triangle. Fold the bottom flap up, and tuck the triangle down over it for stability. You can decorate your boat with colors or even add a small sail for extra flair! Want to spice things up? Try different sizes, experiment with materials, or even organize a boat race with friends for some friendly competition. There's so much more to explore!
Key Takeaways
- Start with a rectangular paper (8.5 x 11 inches) and fold it in half lengthwise to create a center crease.
- Fold the top corners down to meet the center crease, forming a triangle shape.
- Secure the base by folding the bottom flap up to the triangle's base and then fold the triangle down.
- Enhance your boat's design by adding sails or using thicker paper for better buoyancy.
- Organize a paper boat race to engage in fun and teamwork while exploring physics and buoyancy.
Materials Needed for Crafting
When you're ready to craft your paper boat, what materials do you need? First, grab a rectangular piece of paper; ideally, it should be around 8.5 x 11 inches, but any size works for different scales of boats. Regular printer paper or origami paper is perfect, especially if it's around 20 lb (75 gsm) in weight. This guarantees your paper is easy to fold while still being durable enough to hold its shape.
If you're starting with a larger sheet, you may need scissors to cut it down to the right dimensions. A flat surface is essential for folding, as it helps you create precise creases that enhance your boat's stability and appearance.
Don't forget about optional materials! You can use markers or colored pencils to decorate your boat, adding a personal touch and making it visually appealing. This is a great way to express your creativity while enjoying the process.
Step-by-Step Folding Instructions
To craft your paper boat, start with a rectangular piece of paper, ideally 8.5 x 11 inches.
Begin by folding the paper in half lengthwise, then unfold it to create a center crease. This crease will guide your next folds.
Next, fold the top corners down to meet the center crease, forming a triangle at the top of the paper. Make sure the corners align neatly for a crisp point.
Now, take the bottom flap of the paper and fold it up to the base of the triangle. This will create a secure base for your boat.
Once you've folded the bottom flap, fold the triangle down over it to hold everything in place.
You should now see a shape with a triangle on top and a rectangle below.
Creative Variations and Designs
After mastering the basic folding technique for your paper boat, you can explore a range of creative variations and designs to make your project even more exciting. You can start with the classic origami style, which is simple yet effective. To enhance your creation, consider adding sails made from paper or toothpicks. This not only looks great but also improves functionality.
For those who want their boats to float longer, try incorporating waterproofing techniques using wax or plastic coatings. This way, you can enjoy your paper boats in water without worrying about them falling apart. If you're ready for a challenge, advanced designs like the "Sailing Paper Boat" require more complex folds, mimicking real sailboats.
Here's a quick overview of some creative ideas:
Design Type | Materials Needed | Skill Level |
---|---|---|
Classic Origami | Square paper | Beginner |
Paper Sailboat | Paper, toothpicks | Intermediate |
Waterproof Boat | Wax or plastic coating | Intermediate |
Sailing Paper Boat | Extra sheet, folding skills | Advanced |
Engaging in these variations can improve your fine motor skills and hand-eye coordination, making it fun for everyone!
Fun Activities With Paper Boats
Paper boats aren't just fun to make; they open up a world of enjoyable activities that can spark creativity and learning. As you craft these little vessels, you're not only engaging in a hands-on project but also enhancing fine motor skills. Folding and manipulating the paper helps develop dexterity, which is especially beneficial for children.
Once you've made your boats, why not organize a paper boat race? This friendly competition fosters teamwork and social interaction, bringing friends or family together for a fun-filled event. You can even use recycled materials, promoting an eco-friendly crafting experience while teaching the importance of sustainability.
Floating your boats in water can lead to exciting explorations of buoyancy and physics. You'll discover how different designs affect their ability to float, turning playtime into a lesson in science.
Plus, engaging in these hands-on activities can improve cognitive development and problem-solving skills, making it a well-rounded experience for young learners.
Tips for Successful Boat Making
Creating paper boats can be a delightful experience, but ensuring they float well and look great requires some helpful tips. Start with a rectangular piece of paper, ideally 8.5 x 11 inches, for a balanced boat structure. Make precise folds; sharp creases enhance stability and aesthetics. Thicker paper or cardstock can add buoyancy, allowing your boat to support more weight in water.
Experiment with different sizes and shapes. Smaller boats may capsize easily, while larger ones can hold more cargo. To boost your boat's sailing capabilities, consider adding a small sail made from another piece of paper. Adjust its angle to catch the wind effectively.
Here's a quick reference table to guide you:
Tip | Description |
---|---|
Paper Size | Use 8.5 x 11 inches for balance |
Folds | Make precise, sharp creases |
Material | Thicker paper or cardstock enhances buoyancy |
Experiment | Try various sizes/shapes for performance |
Frequently Asked Questions
How to Make a Paper Boat Step by Step?
To make a paper boat, start with a rectangular paper, fold it in half, shape the top corners into a triangle, tuck the bottom edges, then open it up, adjusting for balance and stability.
How to Make a Boat Out of Paper Plates?
To make a boat out of paper plates, fold one plate in half for the hull, cut another into a triangle for the sail, and decorate it to enhance its visual appeal and identity.
How to Make Fun Paper Craft?
Think of your favorite childhood crafts—remember that joy? You can create fun paper crafts by folding, cutting, and gluing various paper types. Let your imagination soar, and don't forget to add colorful decorations!
What Paper Is Best for Origami Boats?
For origami boats, you'll want lightweight, flexible paper around 70-100 gsm. Washi paper's durability is great, but recycled magazines or newspapers work too, especially if they have glossy finishes to help repel water.
Conclusion
So, grab your materials and let your imagination set sail! With just a few folds, you can transform a simple sheet of paper into a tiny vessel ready to navigate the vast oceans of your creativity. Whether you race them in puddles or decorate them for a whimsical display, these boats bring joy and spark inspiration. Who knew that with a flick of your wrist, you could create a fleet of dreams afloat on paper waves?
How-to Guides for Making Things
DIY Eclipse Glasses: Be Prepared
Learn how to create your own DIY eclipse glasses for safe viewing, but don’t miss these essential tips to ensure your family’s protection!
Creating your own DIY eclipse glasses is a fun and essential way to prepare for viewing an eclipse safely. Start by gathering materials like poster board, certified ISO 12312-2 solar filters, and some tape. Cut the poster board to form frames, making sure you leave holes for your eyes. Attach the solar filter securely, checking for any scratches or light leaks before use. Be certain to test your glasses in a dark room to confirm they're safe. Remember, safety is key—don't take shortcuts. You'll find more creative viewing ideas and tips to keep your family safe.
Key Takeaways
- Use ISO 12312-2 compliant solar filters to ensure safety when creating DIY eclipse glasses.
- Inspect all materials for scratches and ensure secure fittings to prevent eye damage.
- Follow a step-by-step process to create sturdy frames and properly secure solar filters.
- Conduct light leak tests in a dark room to confirm the glasses are safe for viewing.
- Supervise children closely while using eclipse glasses to ensure they fit correctly and safely.
Importance of Eclipse Glasses
When preparing to watch a solar eclipse, understanding the importance of eclipse glasses is vital for protecting your eyes. You need to make sure that you're using certified glasses that comply with ISO 12312-2 standards.
These eclipse glasses are specifically designed to filter out harmful solar radiation, preventing eye damage that can occur even with brief exposure to the sun.
While traditional eclipse glasses are the safest option, alternatives like No. 14 welding glasses and aluminized mylar sheets can also provide adequate protection. However, you must be cautious; not all glasses are created equal, and using non-compliant filters can lead to serious conditions like solar retinopathy.
If you're considering DIY eclipse glasses, it's essential that you construct them with high-quality solar filters. Always test for light leaks to make sure they provide the necessary protection during the eclipse.
Remember, your eyesight is irreplaceable, so don't take any chances. By using the right eclipse glasses, you can safely enjoy this spectacular celestial event without risking your vision.
Stay safe and enjoy the wonder of the solar eclipse!
Materials Needed for DIY Glasses
Gathering the right materials is essential for crafting effective DIY eclipse glasses. You'll need a few specific items to guarantee your glasses are safe and functional. Here's a handy table to help you organize what you'll require:
Material | Purpose |
---|---|
Poster board | To create the frames of the glasses |
ISO 12312-2 compliant solar filter | For safe solar viewing |
Blue painters tape | To securely attach the solar filter |
Scissors to cut | For cutting the frames and filter |
Pen or marker | To mark eye holes and cutting lines |
Start with poster board or card stock, which will form the sturdy frames for your DIY solar eclipse glasses. Make sure to use an ISO 12312-2 compliant solar filter from a reputable source, like NASA-approved options, to guarantee safety while viewing the eclipse. Use scissors to cut the frames and the solar filter to the correct sizes. Finally, a pen or marker will help you accurately position the eye holes and other features before cutting. With these materials in hand, you're ready to get started!
Step-by-Step Creation Process
With all your materials ready, you can start crafting your DIY eclipse glasses. Follow these steps for a safe and enjoyable eclipse viewing experience:
- Lay out your poster board or card stock.
- Draw the outline of your glasses, including eye holes and ear handles.
- Carefully cut out the shapes to create a sturdy frame.
- Measure and cut your certified solar film to guarantee full coverage of the eye holes.
- Secure the solar film with tape or glue, checking for any scratches.
Make sure the solar filter completely covers the eye holes without any gaps that could allow light leaks. This is essential for safe solar viewing during the eclipse.
Once everything's attached, it's time for a final safety test. Head to a dark room, grab a flashlight, and shine it through the glasses. If you see any light leaks, adjust the solar film accordingly.
Testing Your Eclipse Glasses
Before you head outside to watch the eclipse, you need to test your DIY glasses for safety.
Grab a flashlight and check for any light leaks in a dark room—if you see bright light, your glasses mightn't be safe.
If leaks are present, reinforce or replace the solar filter to guarantee you're fully protected when the time comes.
Safety Test Procedure
To guarantee your DIY eclipse glasses are safe for viewing, it's crucial to conduct a thorough safety test in a dark room. Use a flashlight to check for any light leaks, as bright light can indicate potential problems with the solar filter. Follow these steps to guarantee eye safety:
- Find a dark room: Eliminate all sources of ambient light.
- Wear the glasses: Put on your DIY eclipse glasses before testing.
- Shine the flashlight: Point the flashlight directly at the lenses.
- Observe the lenses: Look for any signs of bright light penetrating through.
- Adjust if necessary: If you spot any leaks, reposition or replace the solar film.
If you detect any light leaks during this safety test, address them immediately.
Repeat the process multiple times if needed, confirming no bright light can penetrate the glasses. A successful test run, where no light leaks are detected, indicates that your eclipse glasses are ready for safe viewing during the solar eclipse.
Identifying Light Leaks
During your safety test, identifying light leaks in your DIY eclipse glasses is vital for eye protection. To check for leaks, head into a dark room and use a flashlight. Shine the light directly onto your glasses, observing any bright light that seeps through the frames.
If you notice light leaks, it means your solar filter isn't adequately secured, or there are gaps in the frames that need fixing. Make certain the solar film completely covers the eye holes, guaranteeing enough overlap to prevent any light leakage.
Remember, bright light entering your glasses indicates they aren't safe for eclipse viewing. If you detect any leaks, you'll need to reapply the solar filter or repeat the assembly process to guarantee complete coverage.
Once you've conducted the test, a successful run with no light leaks observed confirms that your eclipse glasses are ready for safe solar viewing. Taking the time to identify and address any light leaks is vital to protect your eyes during the eclipse.
Don't skip this step; your eye safety depends on it!
Alternative Viewing Methods
If you don't have eclipse glasses, you've got plenty of safe alternatives to enjoy the spectacle.
Pinhole projectors, cereal box viewers, and eclipse masks can all help you witness the event without risking your eyesight.
Let's explore how you can create these simple yet effective viewing methods.
Safe Pinhole Projectors
One of the safest and simplest ways to view a solar eclipse is by using a pinhole projector, which protects your eyes while still allowing you to enjoy the spectacle. Creating your own is easy! Just take a piece of thick paper, cut a small hole in it, and hold it in sunlight. As the light passes through the hole, it projects an image of the eclipse onto a flat surface below.
This method is similar to how air purification systems work by filtering out harmful elements, ensuring a clear view of the event.
To enhance your viewing experience, consider these tips:
- Use multiple pinholes to improve visibility.
- Experiment with different distances from the surface to find the clearest image.
- Look for leafy trees; their gaps create a natural pinhole effect.
- Adjust the angle of your paper for ideal projection.
- Make sure you're in a shaded area to reduce glare.
This method allows for a safe eclipse experience, ensuring you can enjoy this cosmic event without risking eye damage.
With a few simple materials and a little creativity, you'll have a fun and effective way to witness the wonder of a solar eclipse!
Cereal Box Viewers
Cereal box viewers offer a simple yet effective way to safely enjoy a solar eclipse. These DIY eclipse viewers utilize a cereal box to create a pinhole projector, allowing you to view the eclipse without risking eye damage.
To make your own, start by cutting two small openings at the bottom of the box—one for viewing and another covered with foil or paper. Puncture a small pinhole in the foil to let sunlight in.
When you're ready to view the eclipse, hold the cereal box with the pinhole facing the sun. You'll see the projection of the eclipse inside the box, ensuring you're not looking directly at the sun. This method makes it easy to view the eclipse safely, especially for children who can engage in the process of making and using the eclipse viewer.
Materials needed include a cereal or shoe box, scissors, tape, and a pin for creating the pinhole. Not only is this an accessible project, but it also provides an engaging hands-on experience that enhances your understanding of solar phenomena.
Eclipse Viewer Masks
Creating eclipse viewer masks offers another exciting way to experience a solar eclipse safely. You can easily make these masks using paper plates and ISO-approved solar eclipse glasses. This method is especially great for kids, providing a comfortable viewing option while keeping safety in mind.
To craft your eclipse viewer mask, follow these steps:
- Use a paper plate as the base.
- Mark and cut slits for the arms of the eclipse glasses.
- Create a cut-out area for the nose and mouth for a snug fit.
- Slide the solar eclipse glasses into the slits, securing them in place.
- Personalize the mask with colorful markers, crayons, or stickers for added fun.
This engaging activity combines creativity and safety, allowing families to enjoy the solar eclipse together. By using eclipse glasses, you can make eclipse glasses safe and guarantee that everyone sees the spectacular event without risking their eyesight.
Safety Precautions for Viewing
Viewing a solar eclipse safely requires careful preparation and the right equipment. To protect your eyes, always use certified eclipse glasses that comply with ISO 12312-2 safety standards. These filters are specifically designed for direct solar viewing and prevent serious damage, like permanent retinal burns, which can occur if you look at the sun unprotected.
Before using your eclipse glasses, inspect them for scratches or damage. Compromised filters may not provide adequate protection, putting your vision at risk.
If you're considering a DIY Solar Eclipse project, verify any homemade viewers meet safety standards. Avoid using alternative viewers that haven't been tested, as they can expose your eyes to harmful solar rays. Remember, direct viewing is dangerous; stick to approved methods.
Supervise children closely during the event, verifying their eclipse glasses fit securely to prevent accidental exposure to direct sunlight.
If you're engaging in indirect viewing methods, choose safe techniques, like projecting the sun's image through a pinhole. By following these safety precautions, you'll guarantee a memorable and safe eclipse experience.
Frequently Asked Questions
Is It Safe to Make Your Own Eclipse Glasses?
Making your own eclipse glasses can be safe if you use ISO-certified solar filters. Ascertain you obtain high-quality materials, test for light leaks, and never look directly at the sun without proper protection.
How to Make Eclipse Viewing Glasses at Home?
To make eclipse viewing glasses at home, gather heavy stock paper, ISO-certified solar filter lenses, and tape. Cut eye holes, secure lenses, and test for leaks in a dark room before using them safely.
How to Make Eclipse Glasses Out of a Cereal Box?
Imagine a sunny day, and you're enthusiastic to watch an eclipse. To make a cereal box viewer, cut openings, cover one with foil, create a pinhole, and position it to safely view the eclipse's projection.
What Can You Use for Solar Eclipse Glasses?
You can use ISO-certified solar filters, like shade 14 welding lenses, for solar eclipse glasses. Sturdy materials such as heavy stock paper or cardboard make excellent frames, ensuring your glasses are safe and durable during viewing.
Conclusion
Making your own eclipse glasses is a fun and rewarding project that guarantees you're ready for the big event. You might be thinking, "Why bother when I can just buy a pair?" But creating them yourself adds a personal touch and can save you money! Plus, there's a sense of accomplishment in crafting something that protects your eyes. With your DIY glasses in hand, you're not just prepared—you're ready to fully enjoy the wonders of the eclipse!
-
Recipes2 weeks ago
The Ultimate Mashed Potatoes Recipe
-
Recipes2 weeks ago
Get Perfect Hard-Boiled Eggs Every Time
-
When Does2 weeks ago
Time Change Explained: When It Happens
-
When Does2 weeks ago
Spring’s Start Date Revealed!
-
Who Makes2 weeks ago
Who Makes Ozempic? The Details
-
Who Makes2 weeks ago
Most Reliable Car Brands Ranked
-
Understanding Concepts2 weeks ago
What Does 666 Mean? The Facts
-
Recipes2 weeks ago
How to Make Quinoa for Any Meal