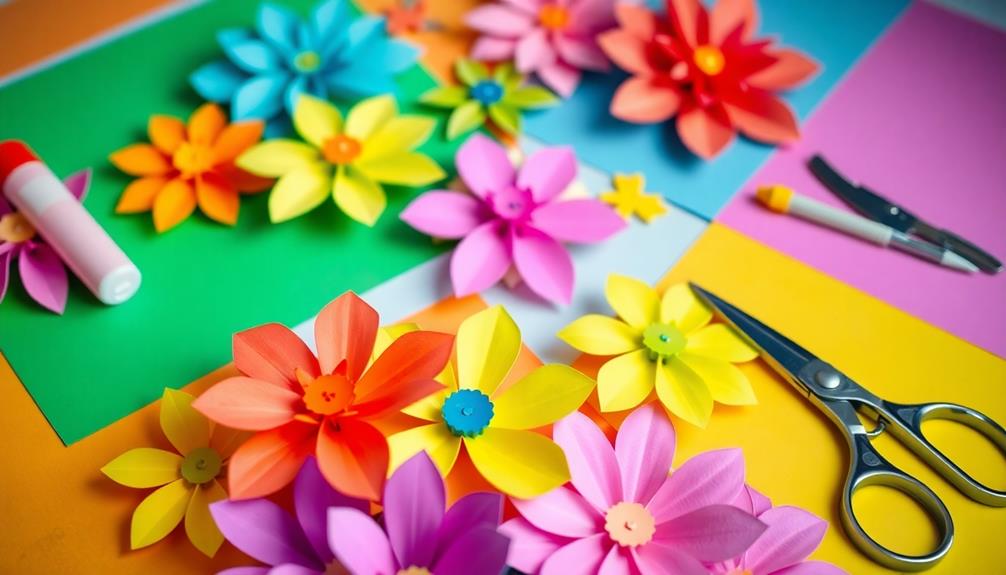
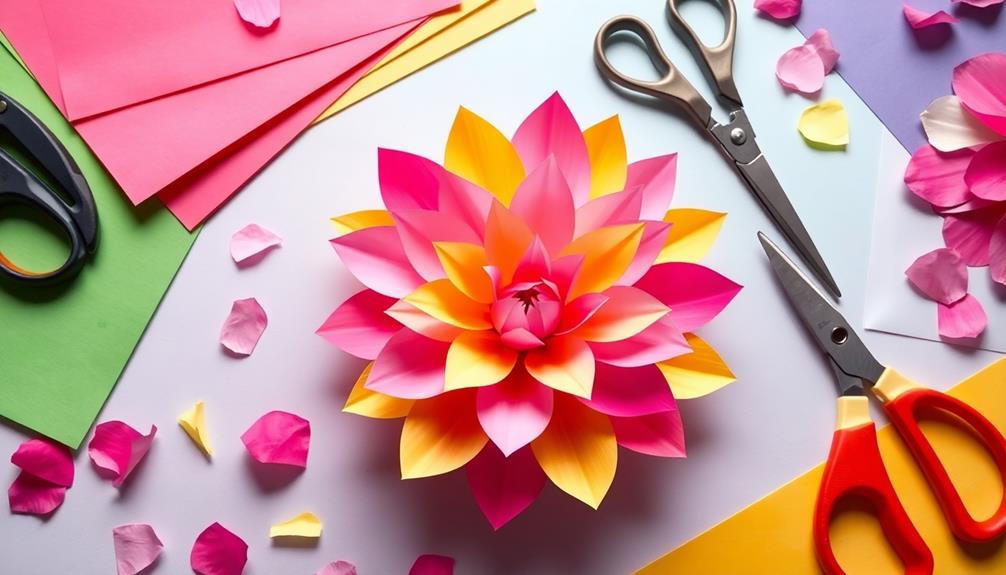
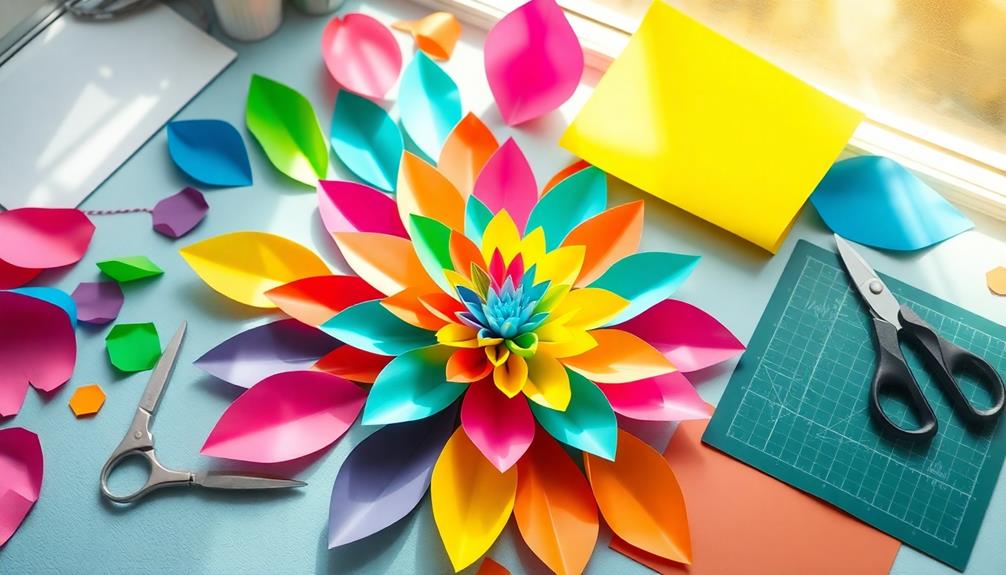
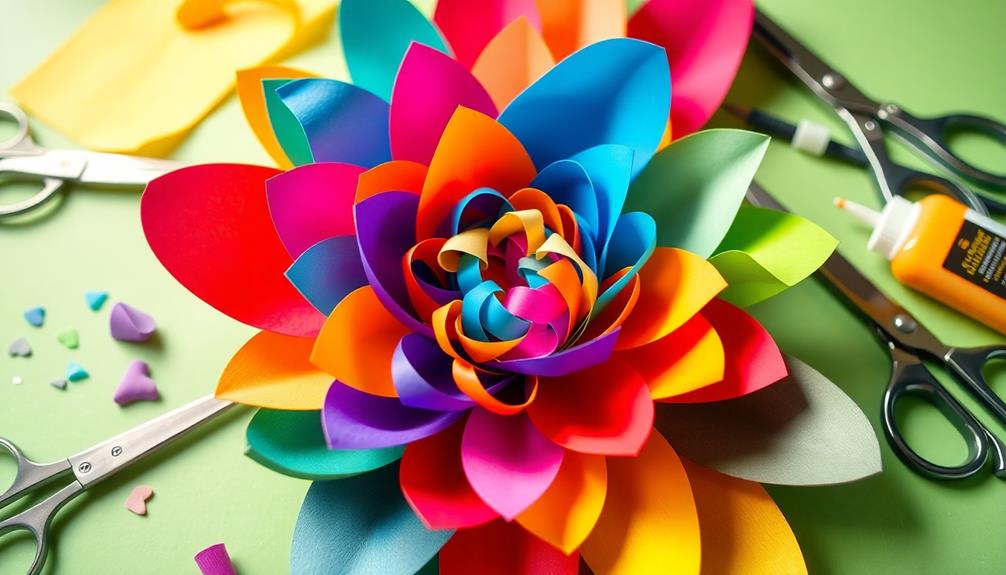
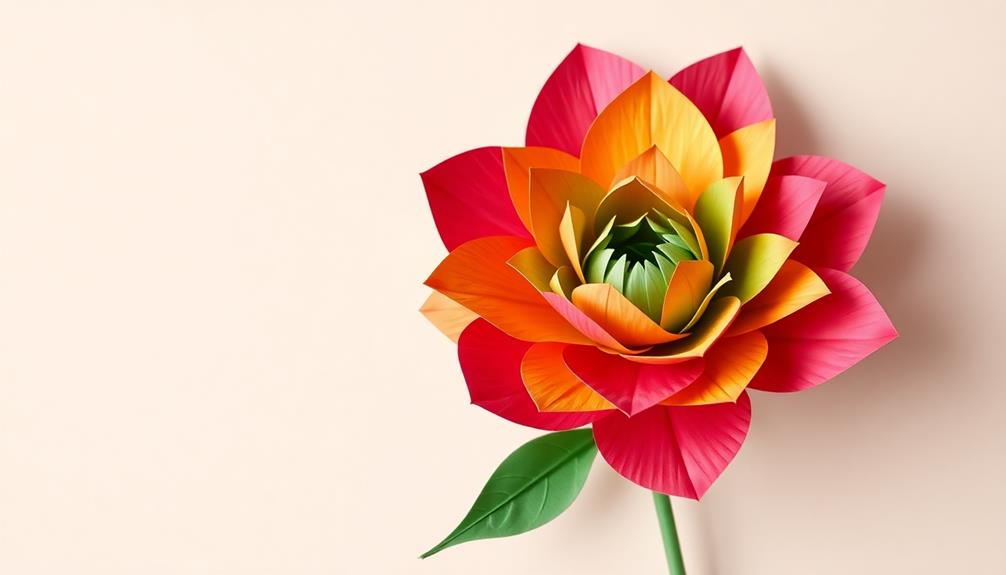
You can craft a beautiful paper flower in just five minutes with materials you likely have at home. Start by choosing vibrant colored or patterned paper. Cut petal shapes by folding the paper for symmetry, then layer them for a fuller look. To create the flower center, use pom-poms or buttons, attaching them to a smaller circle of paper. For the stem, roll up a green strip of paper and attach it with glue. Display your flower in a nice vase, and you'll have a lovely decoration in no time. There's even more to explore for enhancing your creations!
Key Takeaways
- Gather lightweight, vibrant colored paper, scissors, and glue to quickly create your flower.
- Fold and cut petal shapes from the colored paper, ensuring symmetry for a neat look.
- Layer the petals by staggering them and secure them together using glue for added dimension.
- Create a simple flower center using a small circle of paper and embellish with beads or pom-poms.
- Attach a rolled green paper strip as the stem, securing it to the flower head for a complete look.
Artilume U1 Laser Engraver 12000mW, Laser Engraver and Cutter Machine, WiFi, 0.01mm Precision, Large Working Area 150 * 200mm for Wood Leather Acrylic and More, Best for Beginners Small Business
- High Precision Laser: 0.01mm engraving accuracy with long lifespan
- Pre-Assembled Design: Easy setup with large 150x200mm workspace
- Versatile Material Compatibility: Engraves wood, leather, acrylic, ceramics, stone
As an affiliate, we earn on qualifying purchases.
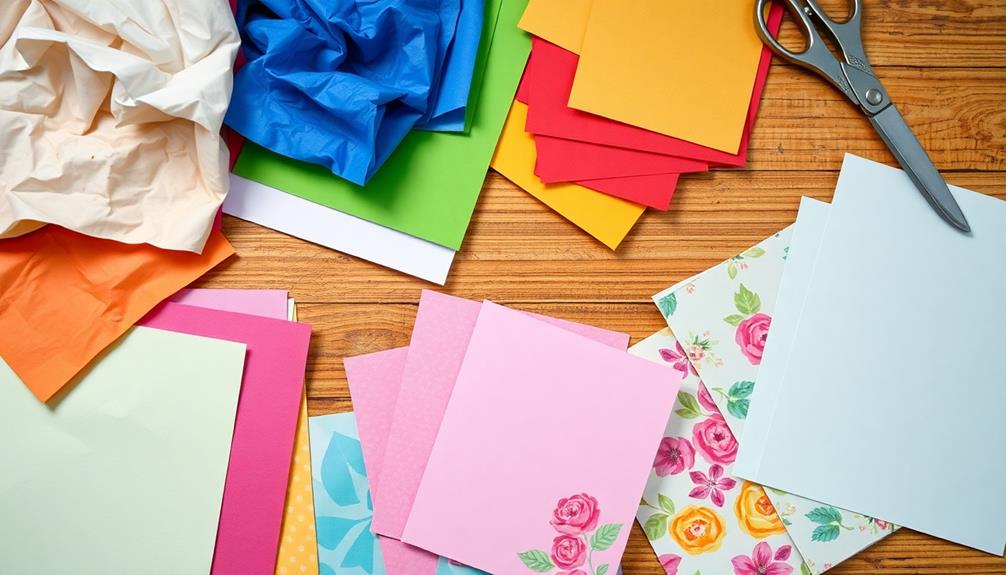
Materials Needed

To create your DIY paper flower, you'll need a few essential materials. Start with colored paper or cardstock in vibrant hues for the petals. For the stem and leaves, grab some green paper or tape. This combination will give your flower a lively and fresh look.
Next, you'll require a pair of sharp scissors, perfect for cutting your paper into petal shapes. Make sure they're suitable for precise cutting to achieve the best results. A glue stick or craft glue is also necessary to securely attach the petals together, ensuring your flower holds its shape.
If you want to trace petal shapes first, keep a pencil handy. For a sturdy base, consider using floral wire or straws as the flower stem. They'll provide the support your flower needs to stand tall.
Choosing Your Paper
When you're choosing your paper for your DIY paper flower, think about how the colors and textures will impact the overall look. Vibrant colors can make your flower visually appealing, helping it stand out in any arrangement. Lightweight papers like tissue or crepe paper are ideal since they're easier to manipulate and shape into delicate petals. You might also consider using patterned paper for added texture and depth, creating unique designs that enhance the flower's aesthetic.
Here's a quick reference table to help you choose the right paper:
| Paper Type | Benefits |
|---|---|
| Lightweight Paper | Easier to manipulate for delicate petals |
| Vibrant Colored | Creates a visually striking flower |
| Patterned Paper | Adds texture and unique designs |
Additionally, look for eco-friendly options to make your craft sustainable. Papers with a slight gloss or sheen can add an elegant touch to your flower creation, making it even more special. Choosing the right paper not only enhances your flower but also aligns with your artistic vision, so take your time with this essential step!
Cutting Petal Shapes
Cutting petal shapes is a crucial step in crafting your DIY paper flower. Start by folding a piece of paper in half; this creates a symmetrical design, making it easier to achieve identical petals. Use a pencil to lightly outline your desired petal shape, like an oval or teardrop, before cutting. This step guarantees precision and helps you visualize the final look.
For a more layered appearance, consider cutting multiple petal shapes from different colored papers. Vary the sizes to add visual interest and depth to your flower. Remember, sharp scissors are essential for clean edges. Dull scissors can lead to jagged cuts that detract from your flower's overall beauty.
Once you've cut out your petals, take a moment to gently curve the edges using your fingers. This small detail creates a more natural flower shape and enhances the final look of your paper flower.
Assembling the Flower
Now that you've cut your petal shapes, it's time to assemble your flower.
Gather your materials and follow these simple steps to create a beautiful bloom.
You'll layer the petals, add a center, and attach a stem, bringing your paper flower to life.
Required Materials Overview
To assemble your paper flower, you'll need a few essential materials that will bring your creation to life. First, grab some colored paper—construction or crepe paper works great. A variety of colors will help you create vibrant petals and leaves, enhancing the overall look of your flower.
Next, you'll need scissors for cutting the paper into specific petal shapes, which are vital for defining your flower's structure. Don't forget a glue stick or liquid glue; this will secure the petals together and attach them to the base or stem.
For the stem, consider using floral wire or wooden skewers. These options provide sturdy support, making it easy to display your finished flower.
If you want to add a personal touch, optional materials can elevate your design. A pencil can be handy for tracing petal shapes, ensuring consistency in size.
Additionally, decorative items like beads or ribbons can serve as lovely finishing touches, giving your flower a unique flair. Gather these materials, and you'll be ready to jump into the assembly process!
Step-by-Step Assembly Guide
As you commence on the assembly of your paper flower, begin by transforming a square piece of colored paper into a circular base. Aim for a diameter of about 6 inches to guarantee your petals are the perfect size.
Once you've got your circle, fold it in half, then in half again. Unfold it to reveal crease lines that will guide your petal shapes.
Next, cut rounded edges along the outer circle, creating petal shapes. Vary the depth of your cuts to give the petals a more natural appearance.
Once you've shaped several petals, layer them together, making sure they're staggered for a fuller look. Secure them at the base with glue or tape.
To complete your flower, cut a small green paper circle to serve as the base. Attach a green paper strip to create the stem, securing it to the green circle.
Your beautiful paper flower is now assembled and ready to brighten up any space! Enjoy the satisfaction of your quick and creative project, and don't hesitate to make more in different colors and sizes!
Creating the Flower Center
When creating the flower center, you'll want to choose the right materials to achieve the look you desire.
Think about the shape and design that fits your flower, as it can really enhance your overall project.
Material Selection Tips
Choosing the right materials for the center of your paper flower can greatly enhance its overall look. One popular option is to use a small pom-pom made from yarn or tissue paper. This adds texture and dimension, making your flower visually appealing.
Alternatively, beads or buttons can provide a pop of color and a tactile element that enhances the overall design.
If you're aiming for a more natural appearance, consider incorporating a small piece of crumpled green paper. This simulates the look of a flower's reproductive structures and adds authenticity.
For a touch of sparkle, think about using glitter or metallic paper. These materials catch the light beautifully, drawing attention to your flower's center.
Shape and Design
To create a stunning flower center, start by cutting a small circle from colored paper, ideally 1-2 inches in diameter. This circle will serve as the base for your flower's stigma and petals. For added dimension, layer multiple smaller circles in varying colors, gluing them together to form a visually appealing and textured center.
Next, use a pencil or a small tool to gently curl the edges of the paper circle. This technique gives the flower center a more natural and voluminous appearance. To mimic pollen, consider adding tiny dots of yellow or orange paper, or even using beads and gluing them in the center of your flower design.
Finally, secure the flower center to the petals by applying glue generously, ensuring it adheres well to maintain the flower's structure.
- Layering colors creates depth and interest.
- Curling edges adds a natural touch.
- Mimicking pollen enhances realism and detail.
With these tips, you'll elevate your paper flower craft, making it more vibrant and eye-catching. Enjoy the process of creating your beautiful flower!
Adhesive Options Explained
Selecting the right adhesive is essential for securely attaching your flower center to the petals. Hot glue is often your best bet; it dries quickly and forms a strong bond, ensuring your flower center stays put. Just be careful when using it, as it can be hot!
For a revitalizing twist, consider incorporating essential oils into your crafting space, as they can enhance your mood while you create, such as using essential oils for respiratory health to promote easier breathing.
If you prefer a more flexible option, craft glue might be your choice. It's great for detailed work, but keep in mind it takes longer to dry, so you'll need a bit of patience.
For a mess-free approach, try double-sided tape. It allows you to position your flower center easily without any drying time. This is especially handy when you're in a hurry.
If your design includes fabric elements, fabric glue works well, adhering to both paper and fabric while keeping a soft finish.
Lastly, consider using adhesive dots or glue dots for quick applications. They provide a strong hold without the mess of liquid adhesives, making them perfect for attaching smaller details in your flower center.
Choose the adhesive that best fits your project, and you'll have a beautiful flower in no time!
Adding the Stem
As you prepare to add the stem to your paper flower, cutting a strip of green paper about 1 inch wide and 12 inches long is essential for a standard-sized bloom.
Once you have your strip, roll it tightly from one end to the other, creating a cylindrical shape. Use glue or tape to secure it, ensuring it holds its form. For extra stability, consider inserting a thin, flexible stick like a skewer or craft stick into the rolled paper before securing it.
To give your stem a realistic touch, wrap it in green floral tape. This not only adds texture but also helps it blend seamlessly with the flower.
Finally, attach the flower head to the top of the stem using glue, making sure it's centered and secure for a polished finish.
- Crafting brings joy and creativity into your life.
- Simple materials can transform into beautiful art.
- Personal touches make your creation uniquely yours.
Displaying Your Creation
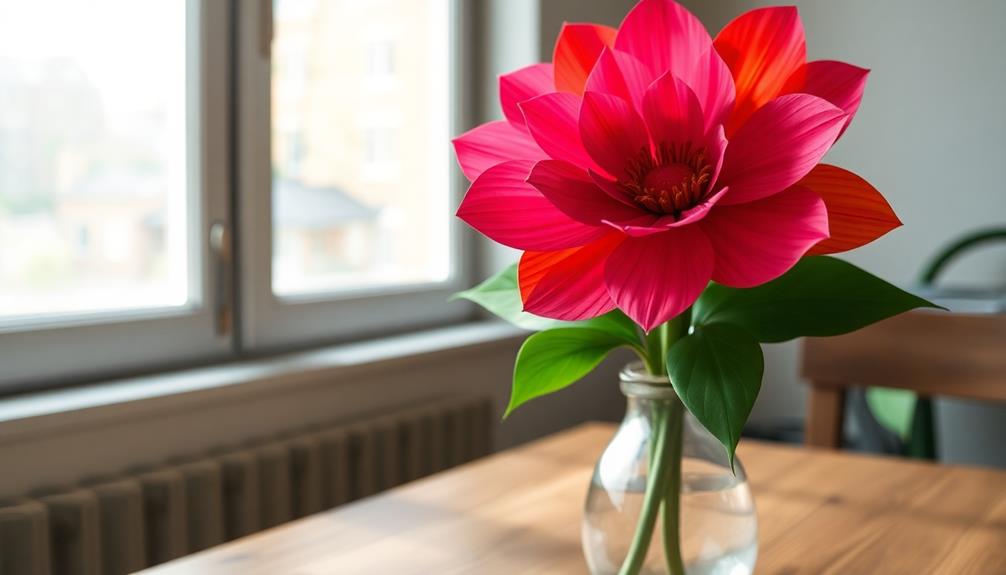
When it comes to displaying your paper flower, choosing the right vase or container can make all the difference. A visually appealing vase enhances your flower's presentation and draws attention to your creation.
Consider using a bright or textured container that complements your flower's colors, perhaps even a rustic design that aligns with modern farmhouse decor trends like natural materials. You might also arrange multiple paper flowers together in a bouquet, creating a dynamic and colorful display that serves as a stunning focal point in any room.
Don't forget to personalize your arrangement; adding decorative elements like ribbons or beads around the base of the flowers can add charm and character.
Position your paper flower in a well-lit area to highlight its intricate details and vibrant colors. Proper lighting can greatly elevate its visual impact, making it a true centerpiece in your decor.
To keep things fresh and engaging, regularly rotate or change the display location of your paper flower. This allows it to complement different settings in your home and guarantees it remains a delightful part of your decor.
With these tips, you can show off your creation beautifully and enjoy it every day.
Frequently Asked Questions
How Do You Make a Simple Paper Flower Easy?
To make a simple paper flower, cut a square piece of paper, fold and cut petal shapes, then unfold. Add a stem and center, and curl the petal edges for a realistic touch. Enjoy your creation!
How to Make a Flower Out of Paper for Your Mom?
Creating a paper flower for your mom's special day's a delightful adventure! You'll cut, roll, and embellish like a true artist, crafting a stunning masterpiece that'll surely bring a smile to her face. Don't forget the leaves!
How to Make a Mobile Flower Out of Paper?
To make a mobile flower out of paper, cut petal shapes, curl their edges, and create a central ball. Attach the flowers to a lightweight branch with string, then hang it for a charming display.
How Do You Make Rolled Flowers Out of Paper?
Creating rolled flowers is like wrapping happiness in a bloom. You cut a spiral, roll it tightly, and secure it with glue. Fluff the petals, and watch your paper blossom come to life beautifully.
Conclusion
You've just transformed simple paper into a blooming work of art! Like a gardener nurturing a seed, you've cultivated your creativity in just five minutes. Each petal you shaped and every detail you added reflects your unique touch. Now, as you display your creation, remember that just like this flower, your imagination can blossom in unexpected ways. So, keep exploring and crafting—who knows what beautiful ideas you'll cultivate next?